| 前言: |
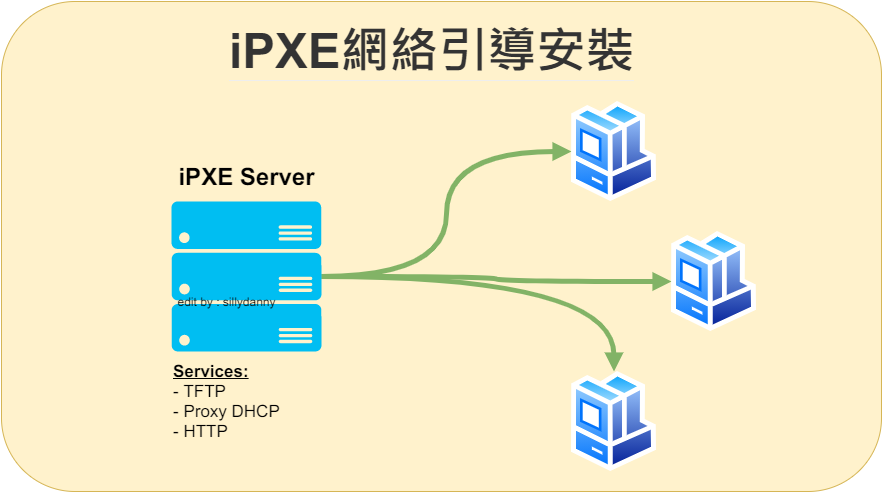
iPXE是PXE的擴展版,支持工作站通過網絡從遠端服務器下載映像,並由此可支持網絡啟動操作系統,支持HTTP、FTP、TFTP、ISCSI SAN等協議方式啟動。所有的文件內容也是取自網上大神的分享,最終可以實現自動判斷電腦底板是傳統(Legacy)啟動還是UEFI啟動。
| 目錄內容: |
| 實現條件: |
- iPXE 啟動文件
- DHCP伺服器
- TFTP伺服器
- HTTP網頁伺服器
實驗環境是在LXC(容器內)安裝Ngnix + dnsmasq實現iPXE網絡引導及安裝系統。
| 部署iPXE網絡引導 |
轉換root管理用戶
sudo -i設置本地時區
timedatectl set-timezone Asia/Hong_Kong| iPXE 的啟動文件及資料內容 |
建立目錄
mkdir -p /opt/tftpboot/ && cd /opt/tftpboot下載iPXE 網絡引導資料內容
git clone https://github.com/slkde/ipxe.gitiPXE 的啟動文件來自slkde/ipxe
或者
apt update && apt install unzip -y && wget https://github.com/slkde/ipxe/archive/refs/heads/master.zip && unzip master.zip && mv ipxe-master ipxe && rm master.zip更新官方最新啟動文件
cd /opt/tftpboot/ipxe/rm -f ipxe.efi undionly.kpxe && wget http://boot.ipxe.org/undionly.kpxe && wget http://boot.ipxe.org/ipxe.efi這個動作是:下載最新Legacy啟動文件 並將其保存到 TFTP 伺服器目錄(
/opt/tftpboot/ipxe)。下載最新UEFI啟動文件 並將其保存到 TFTP 伺服器目錄(
/opt/tftpboot/ipxe)。
或者手動「下載iPXE啟動文件」[[ipxe.zip]]
修改啟動資料內的boot.ipxe的next-server 地址
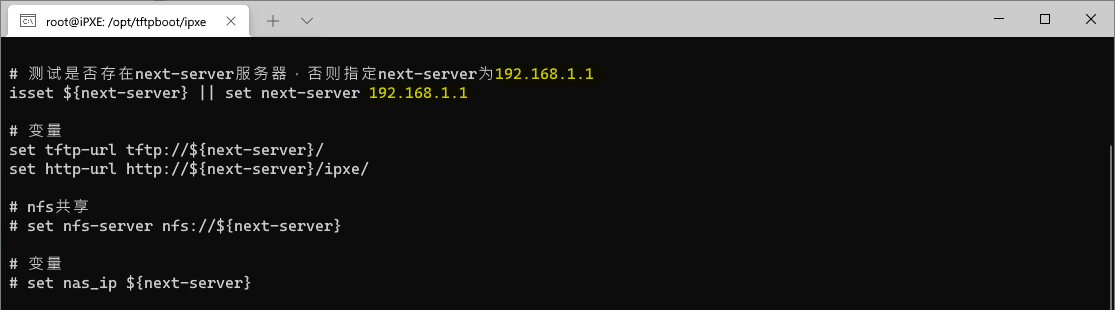
sed -i -e 's/192.168.1.1/19.86.11.7/g' -e '/isset ${next-server}/aset next-server 19.86.11.7' -e 's/http:\/\/${next-server}\/ipxe\//http:\/\/${next-server}\//' /opt/tftpboot/ipxe/boot.ipxe
更新next-server(tftp服务器的地址)為本機IP地址,其中19.86.11.7為本機IP。(#不知道為何
next-server變量設定失效,所以才要新增多一行netxt-server)
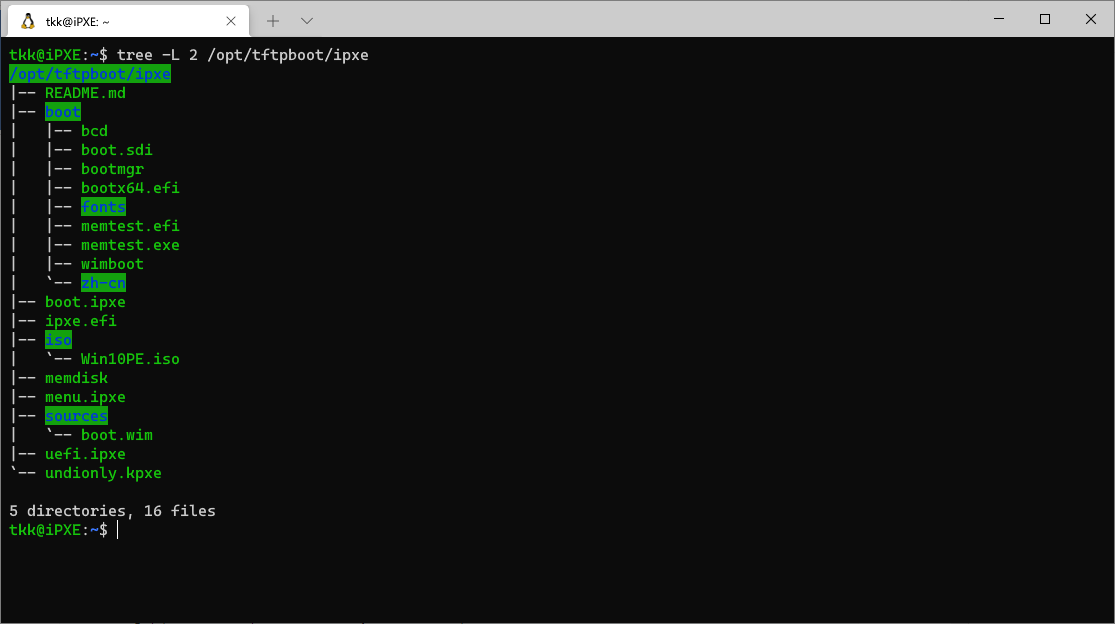
Win10PE.iso 及 boot.wim 是後加進去的WINPE系動文件。
| 安裝 Ngnix 網頁伺服器 |
sudo apt install nginx -y移除default文件
sudo rm -f /etc/nginx/sites-enabled/default新增iPXE的網頁文件內容
cat >> /etc/nginx/conf.d/ipxe.conf <<EOF
server {
        listen 80 default_server;
        root /opt/tftpboot/ipxe/;

        index index.html index.htm index.nginx-debian.html;
        server_name _;
        location / {
        }

}
EOF
其中/opt/tftpboot為iPXE文件存放路徑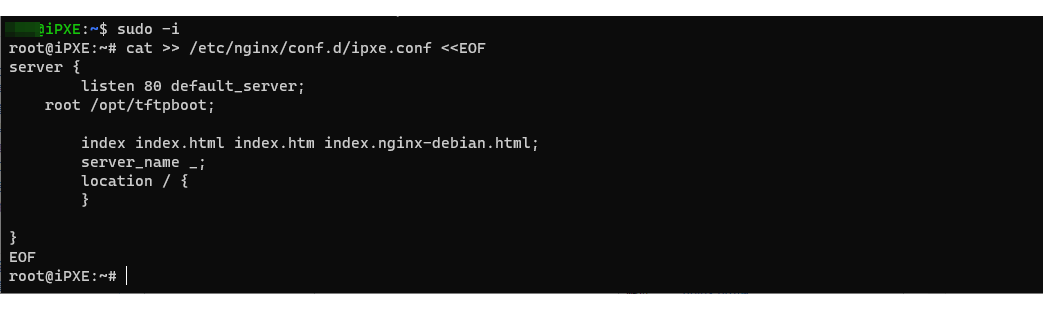
檢查配置的語法是否正確
nginx -tnginx: the configuration file /etc/nginx/nginx.conf syntax is ok
nginx: configuration file /etc/nginx/nginx.conf test is successful
重新啟動Ngnix 網頁伺服器及查看啟動狀況
systemctl restart nginx.service && systemctl status nginx.service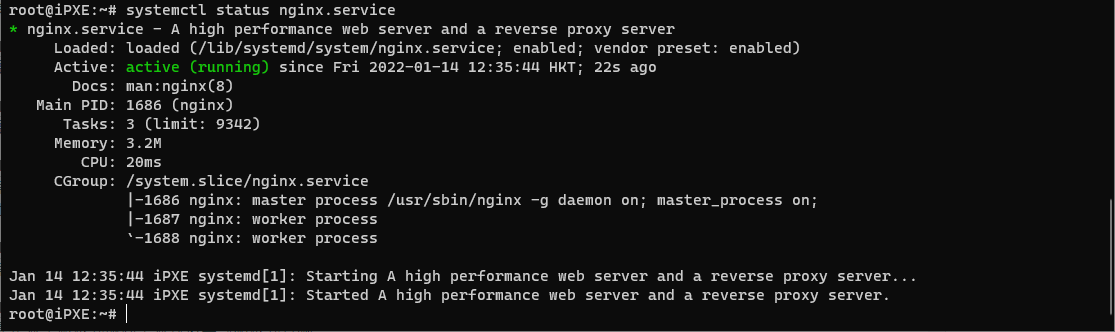
開機自動啟動
systemctl enable nginx.service| 安裝 Dnsmasq |
Dnsmasq是輕量級的的DNS、DHCP及TFTP伺服器,其中可以實現Proxy DHCP的一種形式,在不影響現有網路上的DHCP服務。
apt install dnsmasq -y開啟模塊化功能
sed -i 's/#conf-dir=\/etc\/dnsmasq.d/conf-dir=\/etc\/dnsmasq.d/' /etc/dnsmasq.conf檢查配置的語法是否正確
dnsmasq --testdnsmasq: syntax check OK.
新增dnsmasq模塊ipxe.conf的配置內容
cat >> /etc/dnsmasq.d/ipxe.conf << EOF
port=0
dhcp-option=vendor:PXEClient,6,2b
dhcp-range=19.86.11.0,proxy
interface=eth0
dhcp-no-override
dhcp-match=set:ipxe-http,175,19
dhcp-match=set:ipxe-https,175,20
dhcp-match=set:ipxe-menu,175,39
dhcp-match=set:ipxe-pxe,175,33
dhcp-match=set:ipxe-bzimage,175,24
dhcp-match=set:ipxe-iscsi,175,17
dhcp-match=set:ipxe-efi,175,36
tag-if=set:ipxe-ok,tag:ipxe-http,tag:ipxe-menu,tag:ipxe-iscsi,tag:ipxe-pxe,tag:ipxe-bzimage
tag-if=set:ipxe-ok,tag:ipxe-http,tag:ipxe-menu,tag:ipxe-iscsi,tag:ipxe-efi
pxe-service=tag:!ipxe-ok,X86PC,PXE,undionly.kpxe,192.168.11.7
pxe-service=tag:!ipxe-ok,IA32_EFI,PXE,snponlyx32.efi,192.168.11.7
pxe-service=tag:!ipxe-ok,BC_EFI,PXE,ipxe.efi,192.168.11.7
pxe-service=tag:!ipxe-ok,X86-64_EFI,PXE,ipxe.efi,192.168.11.7
#dhcp-boot=tag:ipxe-ok,http://boot.ipxe.org/demo/boot.php,,0.0.0.1
dhcp-boot=tag:ipxe-ok,http://19.86.11.7/boot.ipxe,,0.0.0.1
enable-tftp
tftp-root=/opt/tftpboot/ipxe
EOFport=0# 關閉 DNS 伺服器
dhcp-option=vendor:PXEClient,6,2b# 發送 禁用多播和廣播發現,並立即下載引導檔
dhcp-range=19.86.11.0,proxy# 作為代理 DHCP 伺服器提供引導資訊,但沒有IP租約 (其中19.86.11.0 為自己的網段)。
interface=eth0# 綁定本機網口
dhcp-no-override# 禁止重複使用 DHCP 伺服器名稱和檔案名字段作為額外欄位
enable-tftp#啟用TFTP伺服器
tftp-root=/opt/tftpboot/ipxe#TFTP根目錄路徑為/opt/tftpboot/ipxe其他不懂, 是判斷電腦底板使用傳統(Legacy)啟動,還是UEFI啟動。
19.86.11.7為本機IP (TFTP伺服器IP)
再次檢查配置的語法是否正確
dnsmasq --testdnsmasq: syntax check OK.
重新啟動dnsmasq服務及查看啟動狀況
systemctl restart dnsmasq.service && systemctl status dnsmasq.service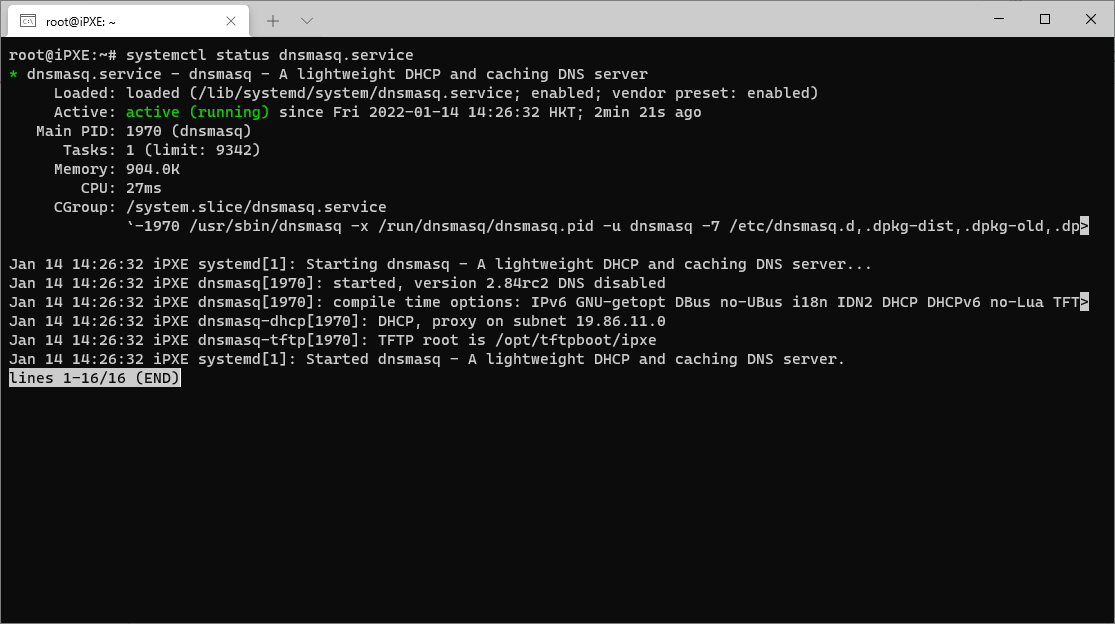
開機自動啟動
systemctl enable dnsmasq.service| 網絡啟動測試 |
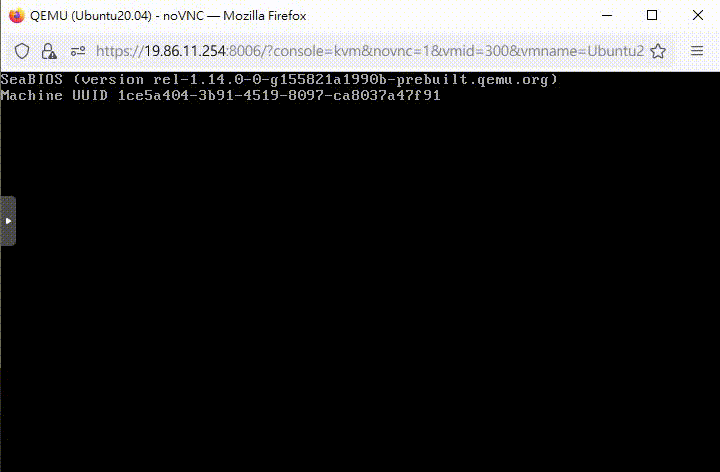
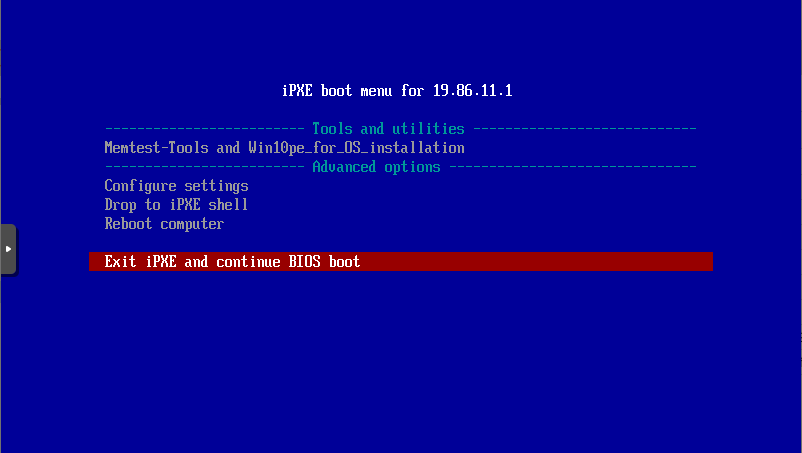
傳統啟動(Legacy)
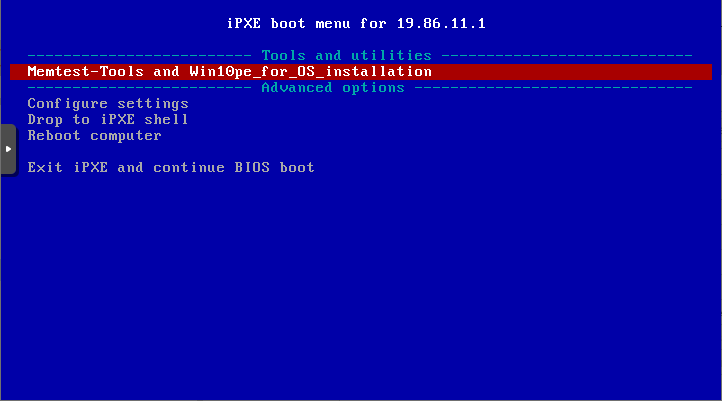
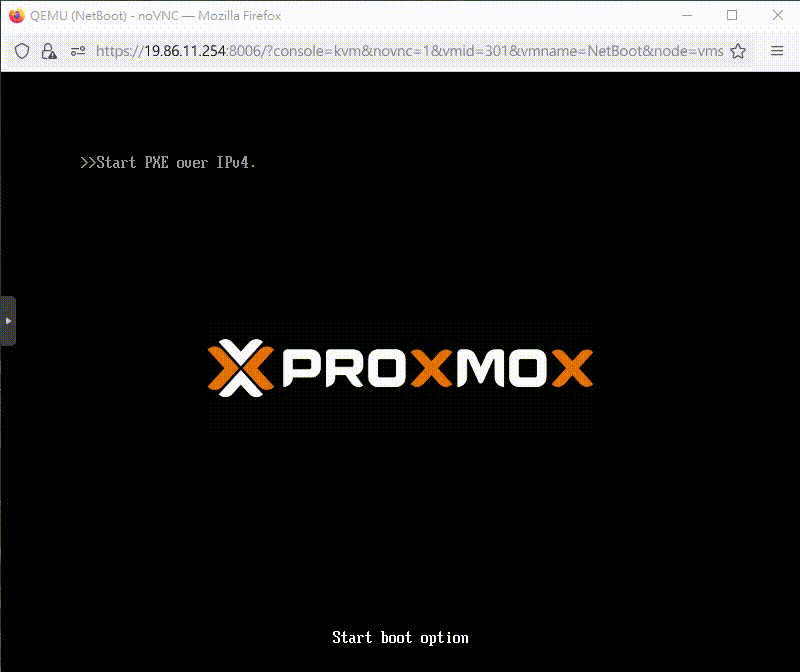
UEFI啟動

| 結語: |
之前嘗試多次設定只能使用Legacy啟動,最後發現是iPXE的啟動文件需要更新(建議自行編譯),所以才需要分別下載官方最新的啟動文件替換原有的才能成功。透過iPXE的網絡啟動功能,用戶端電腦網絡啟動操作系統(Windows、Linux等)變得更簡單方便。
| 參考資料: |