Configuring VLANs on a Host for Proxmox VE

In today's increasingly complex networking environments, Virtual Local Area Networks (VLANs) have become a crucial tool for managing network traffic and ensuring optimal performance.This blog post provides a step-by-step guide on configuring VLANs on a host for Proxmox Virtual Environment (VE), a popular open-source virtualization platform.
| Why use VLANs with Proxmox VE? |
VLANs allow you to segregate network traffic into isolated broadcast domains, improving security and reducing network congestion. By configuring VLANs on a Proxmox VE host, you can:
- Improve network performance by reducing broadcast traffic.
- Enhance security by isolating sensitive virtual machines (VMs) and containers.
- Simplify network management and troubleshooting.
| Prerequisites |
Before proceeding, ensure you have the following:
- A Proxmox VE host installed and configured.
- A managed network switch that supports VLAN tagging (IEEE 802.1Q).
| Procedures: |
This guide provides procedures for configuring VLANs on a host for Proxmox Virtual Environment (VE).
This guide provides instructions for configuring VLANs, with separate sections for both the command line interface (CLI) and the graphical user interface (GUI).
| The Command Line Interface (CLI) Configuration |
| Step 1: A Proxmox VE host configurration |
Edit configuration file for the VLAN interface in /etc/network/interfaces.
vi /etc/network/interfacesThe eno1 is a physical network interface and vmbr0 is a Linux Bridge.
the following configuration, adjusting the address and gateway parameters as needed
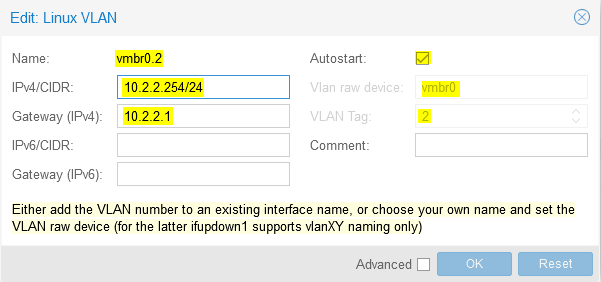
Use VLAN 2 for the Proxmox VE management IP with VLAN aware Linux bridgeauto lo
iface lo inet loopback
iface eno1 inet manual
auto vmbr0.2
iface vmbr0.2 inet static
address 10.2.2.254/24
gateway 10.2.2.1
auto vmbr0
iface vmbr0 inet static
bridge-ports eno1
bridge-stp off
bridge-fd 0
bridge-vlan-aware yes
bridge-vids 1-4094Save the file and exit the editor use :wq
Apply the new configuration by restarting the networking service:
systemctl restart networking| Step2: Configure a managed Network Switch |
In this scenario, use Cisco SG300-10P 10-Port Gigabit Managed Switch.
The command "enable" is used to enter privileged EXEC mode on a Cisco SG300-10 switch, which allows access to configuration and management commands.
enableThe subsequent command "configuration terminal" is used to enter global configuration mode, which allows the user to configure various aspects of the switch's behavior.
configuration terminalThe command "interface gigabitethernet2" is used to select the Gigabit Ethernet interface 2 on the switch for configuration.
The command "description VMS01" is used to assign a description to the selected interface, in this case labeling it as "VMS01", which standard for Virtual Machine Server.
The command "switchport trunk allowed vlan add 2-4,11" is used to configure the selected interface as a trunk port and allow traffic from VLANs 2, 3, 4, and 11 to pass through the port. The "add" keyword specifies that these VLANs should be added to the existing list of allowed VLANs, if any.
interface gigabitethernet2
description VMS01
switchport trunk allowed vlan add 2-4,11| Step 3: Assign VLAN to VMs or Containers |
Finally, assign the newly created bridge to your VMs or containers:
This sample use container.
- Select the desired container in the Proxmox VE web interface.
- Go to the Network tab.
- Click Edit.
- Select the bridge (e.g.,
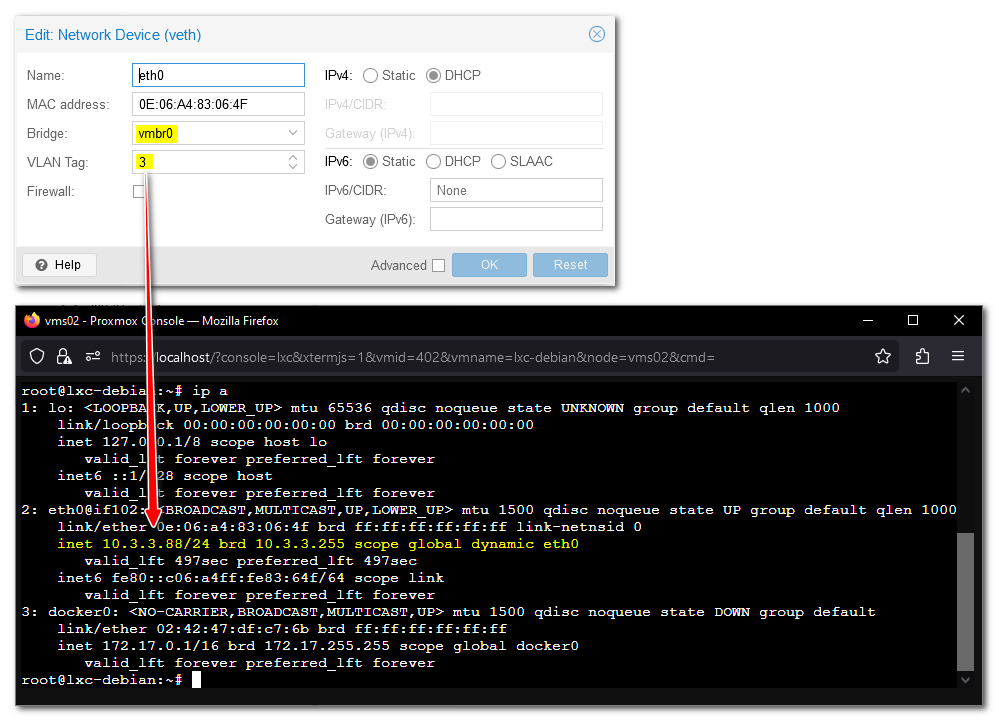
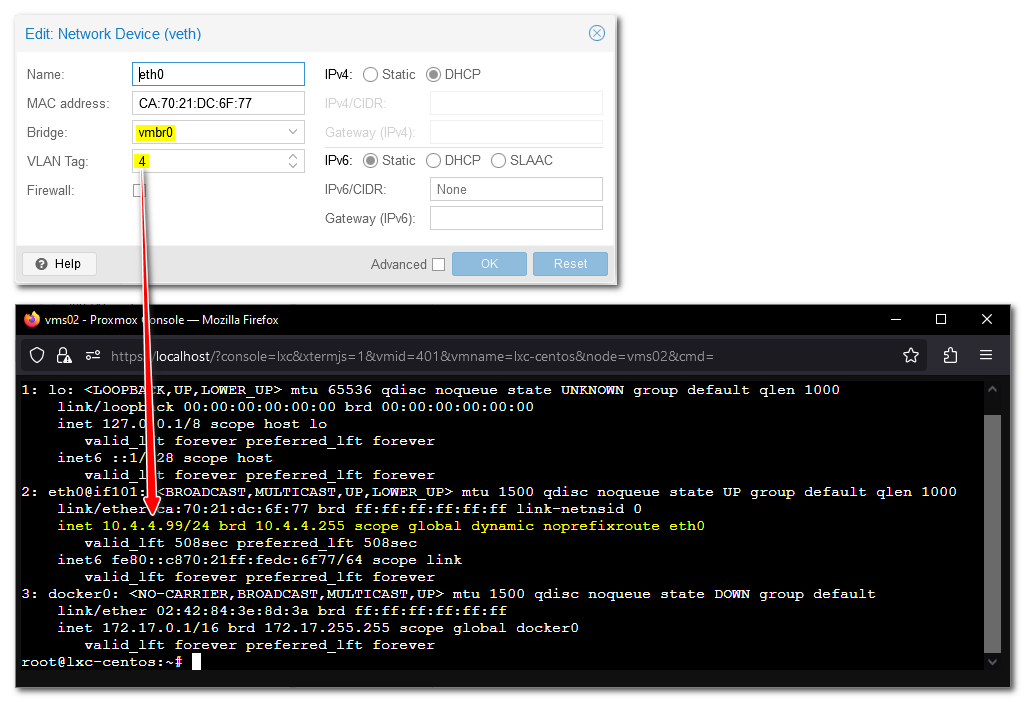
vmbr0) from the Bridge dropdown menu. - Assign a vlan number in VLAN Tag
- Click OK to apply the changes.
Repeat these steps for each container you want to assign to the VLAN.
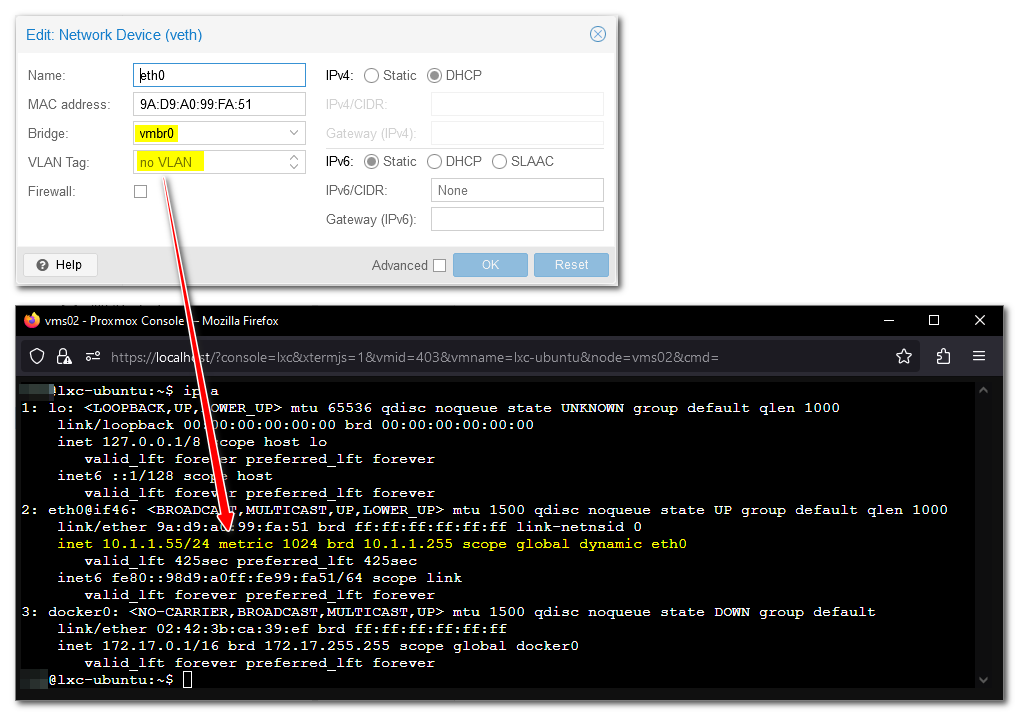
no VLAN as PVID vlan1
| Graphical User Interface (GUI) Configuration |
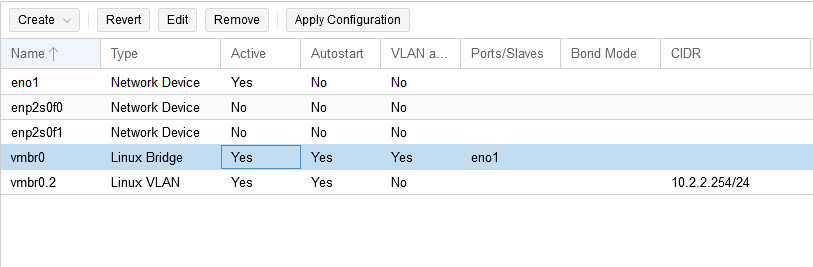
| Step 1: Configure Proxmox VE Network |
Now, create a new Linux Bridge or Open vSwitch in the Proxmox VE web interface:
- Log in to the Proxmox VE web interface.
- Go to Datacenter > vms02 (your-node) > System > Network.
- Click "Create > Linux Bridge" or " Edit the Existing vmbr0 of Linux Bridge" (depending on your preference).
- Add the VLAN interface to the Bridge ports field.

| Step2: Configure a managed Network Switch |

PVID (Default Vlan ID) as 1
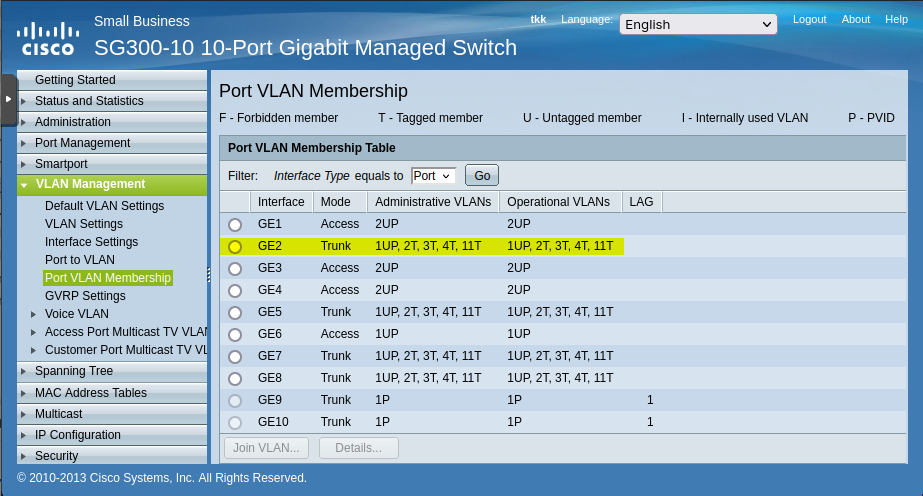
Configure the GE2 interface as a Trunk port and allow traffic from VLANs 2, 3, 4, and 11 to pass through the port, with VLAN1 as the Default Vlan without Vlan Tag.
| Conclusion |
By following this guide, you've successfully configured VLANs on a Proxmox VE host and assigned them to your VMs and containers. This will help you optimize network performance, enhance security, and simplify network management in your virtual environment.
| Reference: |
| Related: |