[shadow]
前言:
在恩山總有好多優秀的大佬在無私地分享,自上次@dybjxx適配的迅雷賺錢寶OPENWRT固件後,今次又一位大佬@icebee250分享armbian固件,二話不說立即刷來折騰。這次的分享更多是在
armbian系統上安裝軟件,而軟件上的使用需要自行發掘,請教Google老師。
目錄內容:
- 刷機及首次登入
- 更新系統時間
- ttyd - 網頁終端機
- SMB目錄分享
- FileBrowser
- qBittorrent - BT下載利器
- aria2 - 強大又輕巧的下載工具
- LNMP (
Linux系統下Nginx+PHP+MySQL) - Directory Lister-簡潔目錄列表程序
- h5ai-目錄分享伺服器
- Lychee - 相冊
- Typecho - 個人博客
- FileRun - 個人網盤
- frp - 高性能的內網穿透程式
- 導航頁
- RCLONE - 網盤掛載器
- Rsync - 定時備份資料到NAS上
| 刷機及首次登入 |
關於固件下載、刷機及首次登入後建立新帳號,直接參考大佬@icebee250 的即食教程
【賺錢寶2代 Armbian 直刷包】軟件隨便裝,可以apt-get,可以掛甜糖~
或者刷機圖文教程:
2021年了, 大家還記得迅雷賺錢寶嗎? 記一次OpenWrt軟件安裝
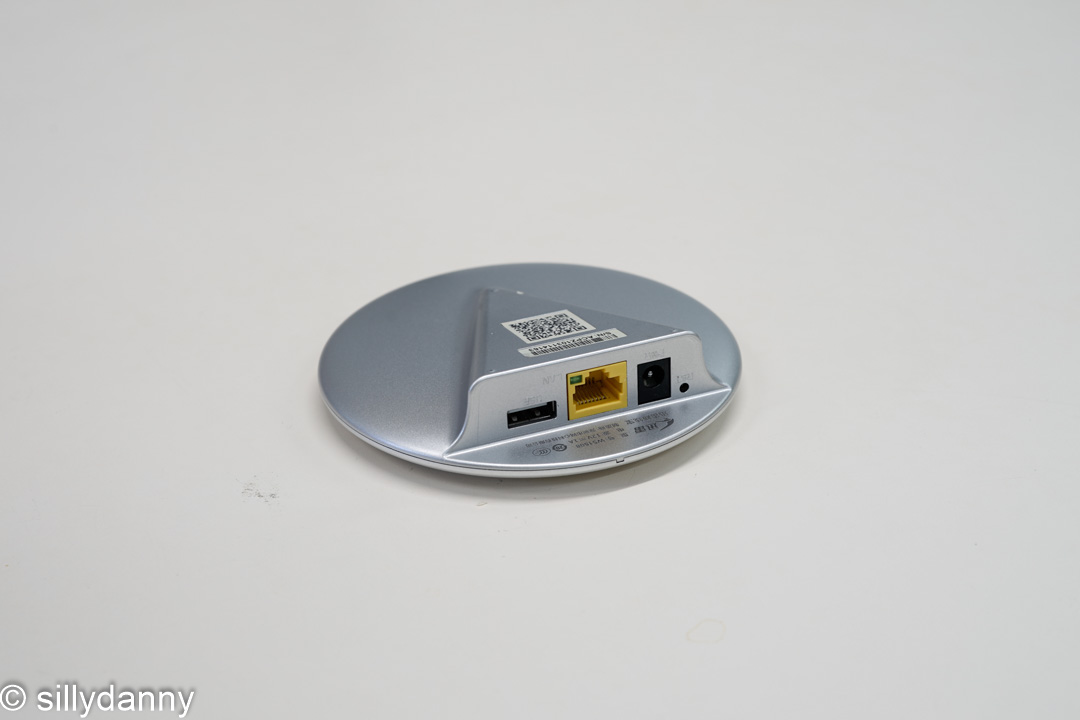
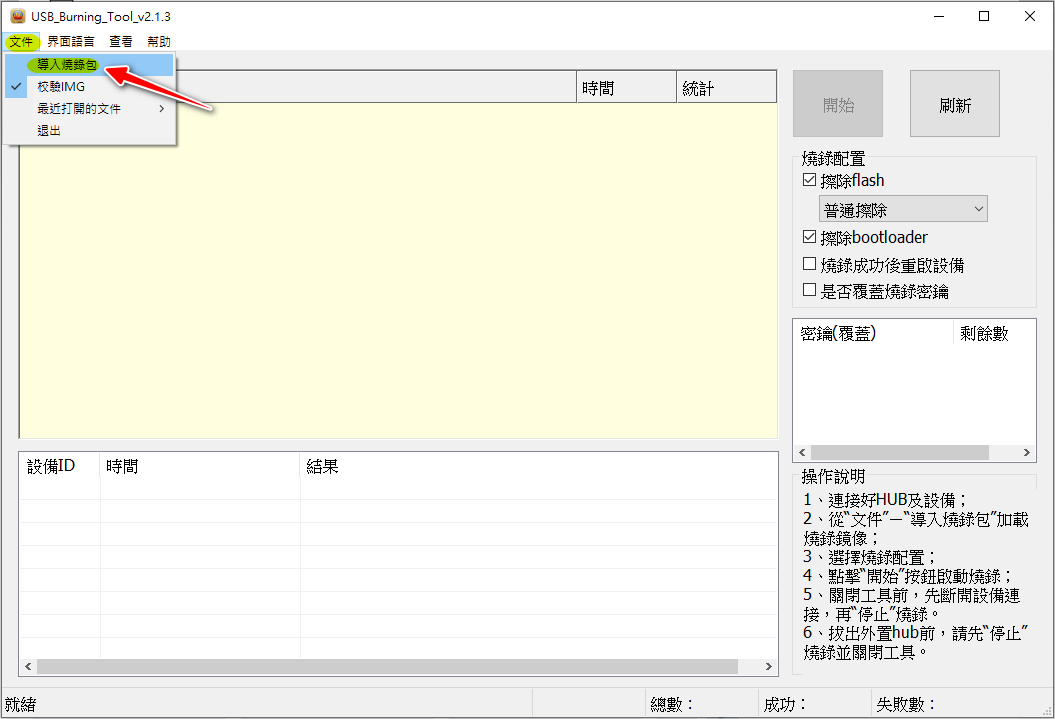
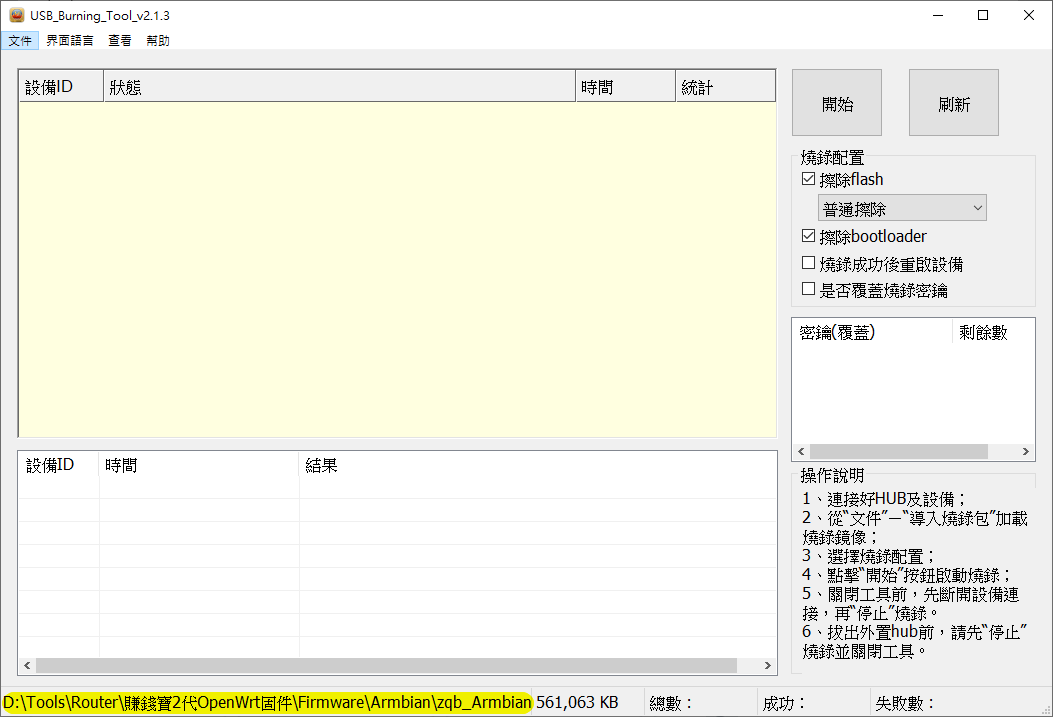
電腦開啟USB_Burning_Tools并導入armbian固件
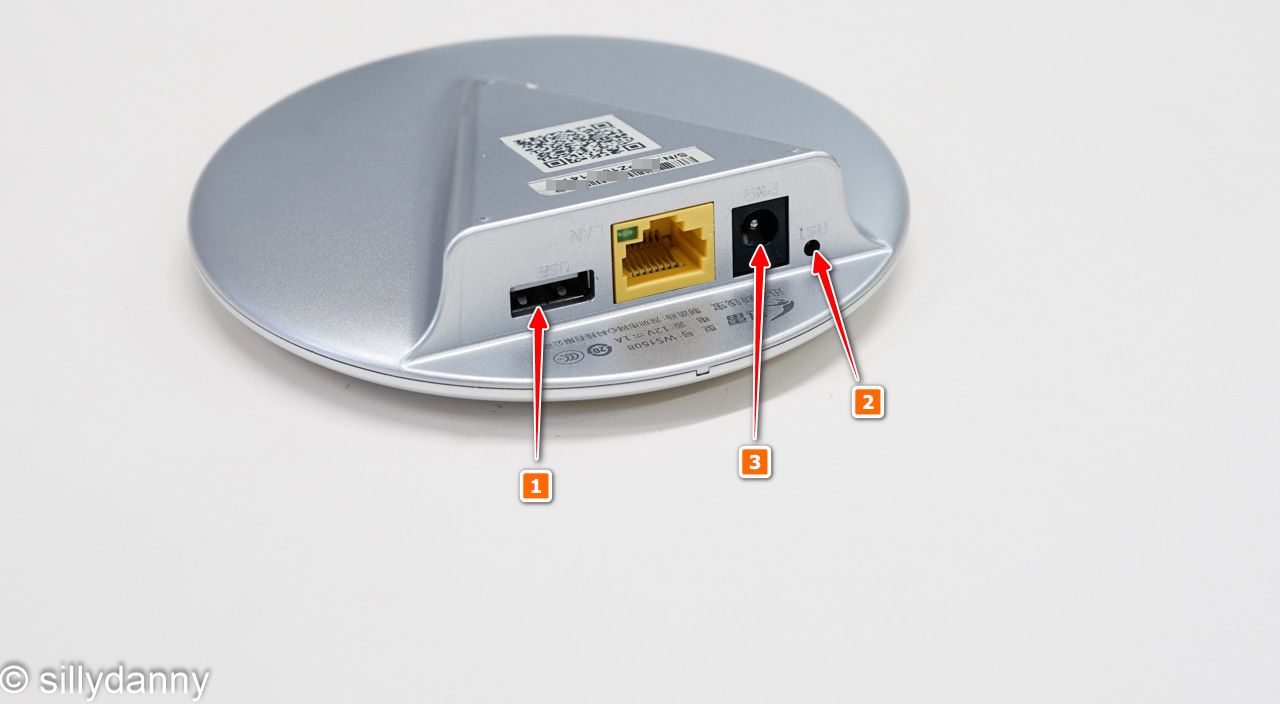
- 雙公頭USB線,一端連入電腦,一端連接賺錢寶PRO的
USB口。- 斷電情況下,按住
RST重置鍵不放。- 通電後,查看
USB_Burning_Tools刷機軟件顯示「連接成功」後可鬆開RST重置按鈕。
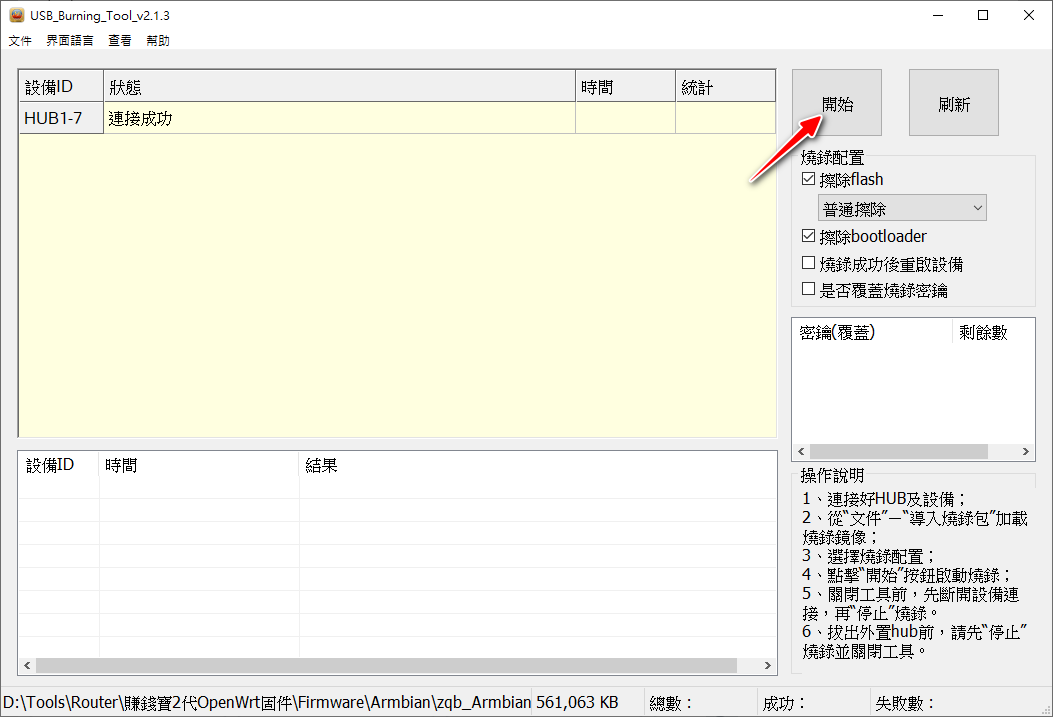
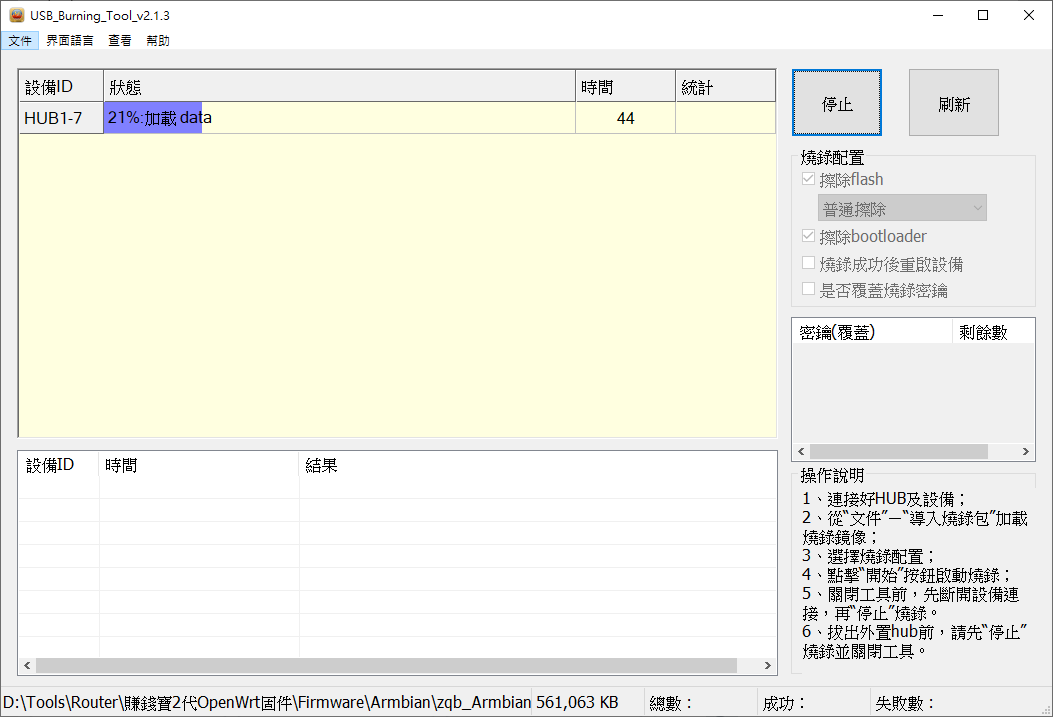
按開始刷機
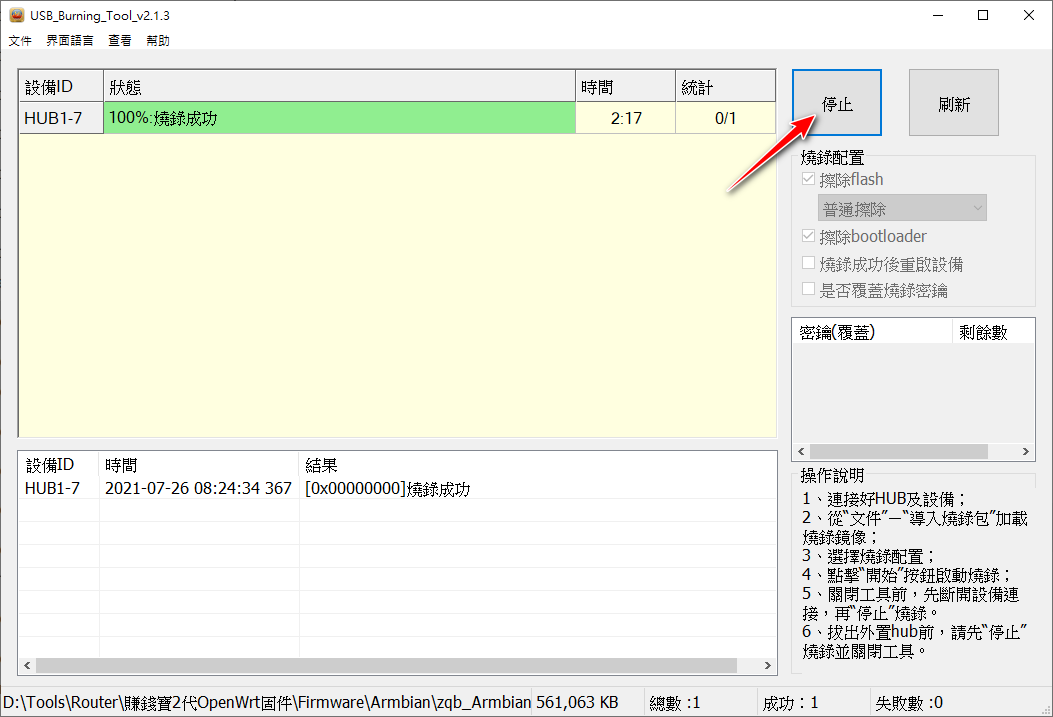
燒錄完成後按下停止按鈕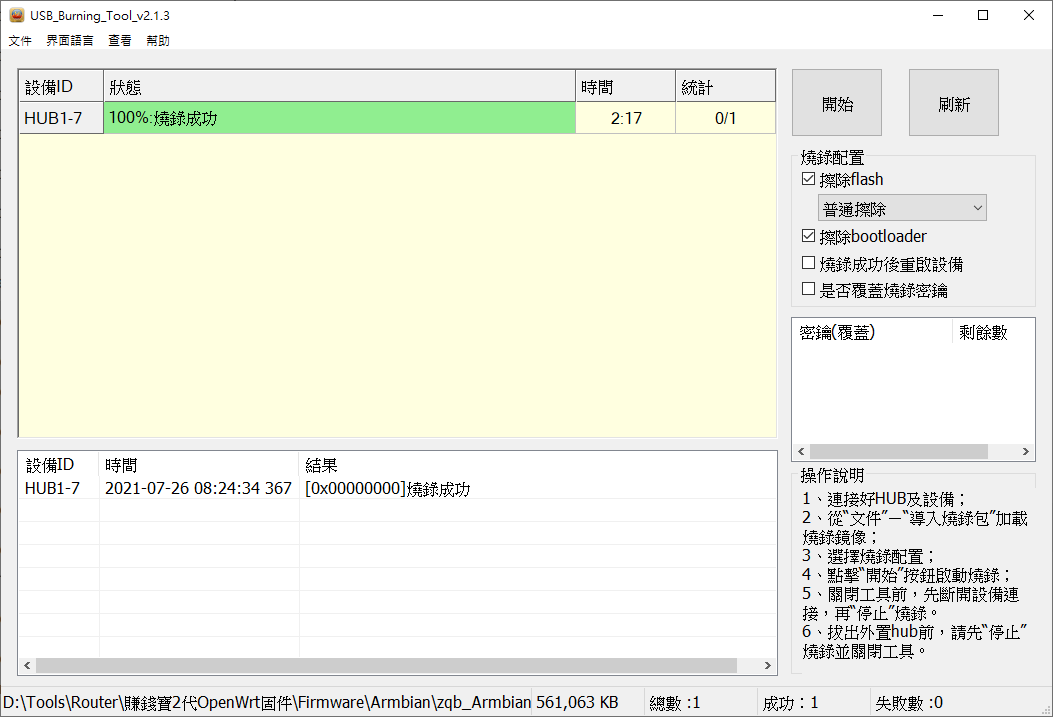
斷電-通電-接上網線到網絡

在路由器的DHCP列表查找賺錢寶Pro 的IP 地址
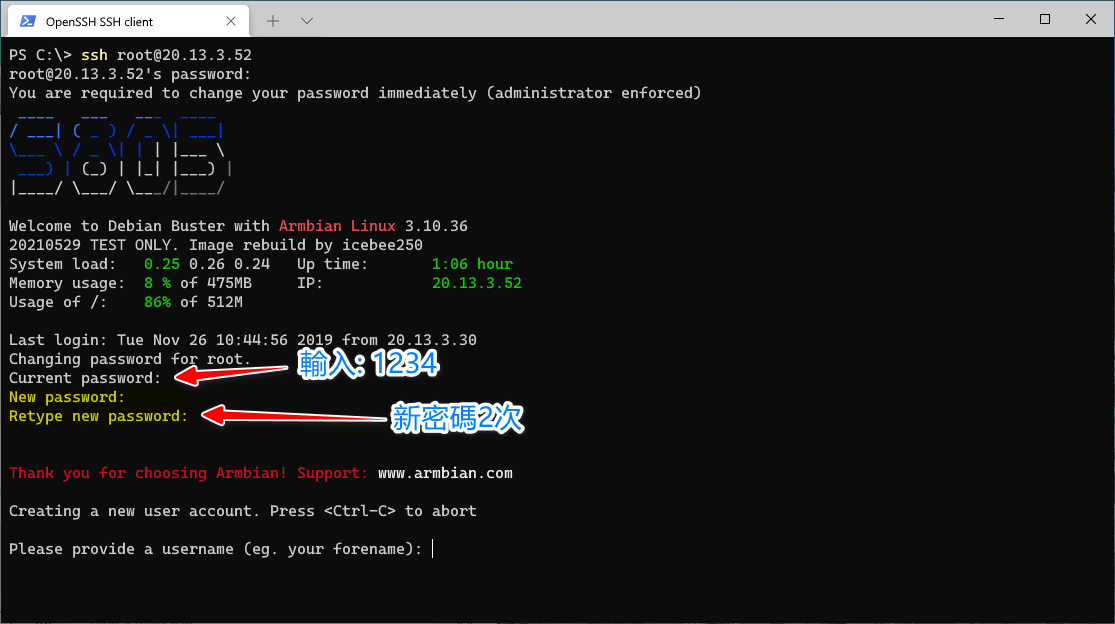
SSH 首次登入需要設定新的 root 密碼
帳號: root初始密碼: 1234
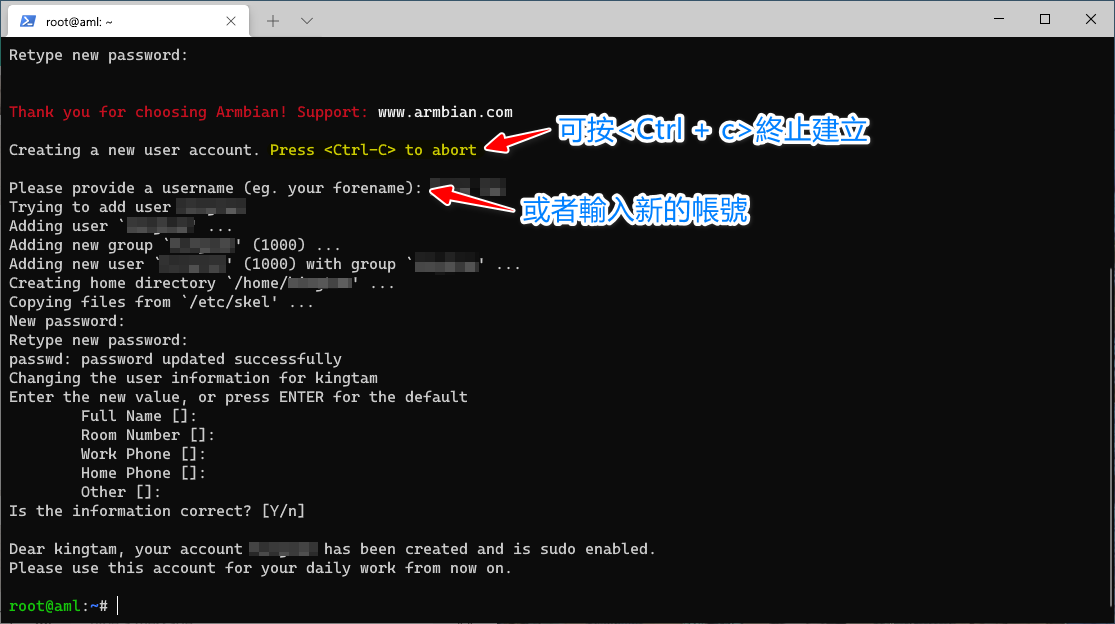
同時新建自定義使用者帳號

調整根目錄空間
resize2fs /dev/data[[返回目錄內容]]
| 更新系統時間 |
迅雷賺錢寶PRO的armbian固件預設時間是2019年,需要校準時間才可以更新軟件源。設定+0800時區
timedatectl set-timezone "Asia/Hong_Kong"手動設定現在日期與時間
timedatectl set-time "2021-07-14 14:38:40"安裝ntp服務,自動校時
apt install -y ntp查看ntp服務狀態
systemctl status ntp顯示active (running)代表已啟用及執行中[[返回目錄內容]]
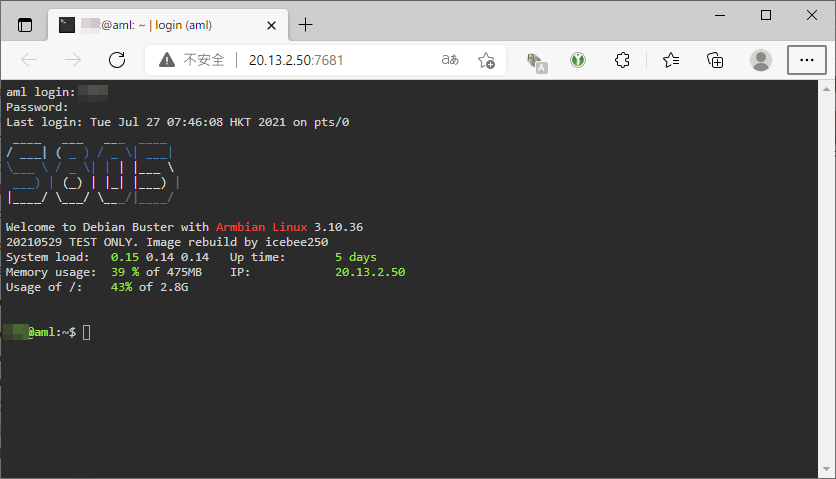
| ttyd - 網頁終端機 |
ttyd 可以讓使用者透過網頁(即瀏覽器)使用 Linux 系統的終端機。
下載TTYD:
wget https://github.com/tsl0922/ttyd/releases/download/1.6.3/ttyd.armhf -O /usr/local/bin/ttyd && chmod +x /usr/local/bin/ttyd新增 ttyd 服務,讓它開機時自動啟動:
cat >> /etc/systemd/system/ttyd.service << EOF
[Unit]
Description=ttyd server

[Service]
Type=simple
ExecStart=/usr/local/bin/ttyd -p 7681 login
Restart=always

[Install]
WantedBy=multi-user.target
EOF
將權限設定為 644:
sudo chmod 644 /etc/systemd/system/ttyd.service重新載入 Systemd 設定檔:
sudo systemctl daemon-reload啟動自訂的 ttyd 服務:
sudo systemctl start ttyd
sudo systemctl enable ttyd在瀏覽器中打開http://IP:7681
[[返回目錄內容]]
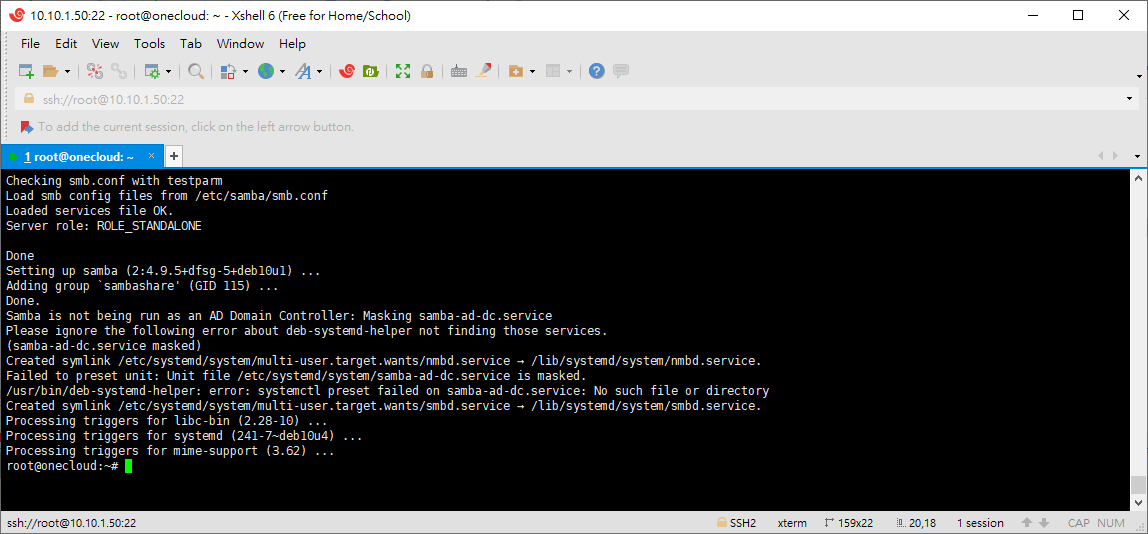
| SMB目錄分享 |
在設定分享目錄前,外置的硬碟已接駁到OneCloud及格式化為EXT4,如需瞭解外置硬碟的操作可考掛載外置 USB 硬碟。
安裝:
apt update && apt -y install samba
選取Yes
添加分享目錄:
cat >> /etc/samba/smb.conf << EOF
[Public]
   path = /mnt/sda
   browsable = yes
   writable = yes
   read only = no
   security = share
   guest ok = yes
EOF[Public]#分享的目錄名稱
/mnt/sda#分享的目錄路徑security = share#不需帳號密碼的設定
測試Samba的設置是否正確
testparm重新啟動SMB服務
systemctl restart smbd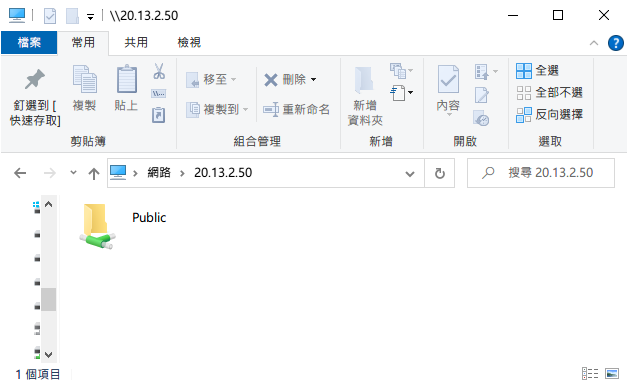
[[返回目錄內容]]
| File Browser |
FileBrowser可提供在瀏覽器管理檔案,可用於上傳、刪除、預覽、重命名和編輯您的工作。
下載及安裝:
wget https://github.com/filebrowser/filebrowser/releases/download/v2.15.0/linux-armv7-filebrowser.tar.gz && tar -xzv -f linux-armv7-filebrowser.tar.gz filebrowser && mv filebrowser /usr/local/bin/ && chmod +x /usr/local/bin/filebrowser && rm linux-armv7-filebrowser.tar.gz配置:
建立配置文件存放目錄
mkdir -p /etc/filebrowser添加配置參數:
cat >> "/etc/filebrowser/config.json" << EOF
{
    "address":"0.0.0.0",
    "database":"/etc/filebrowser/filebrowser.db",
    "port":8080,
    "root":"/mnt",
    "username":"admin"
}
EOF
address:監聽地址 (0.0.0.0) 即任意地址
database:數據庫地址
port:需要監聽的端口
root:需要讀取哪個目錄下的文件
username:用戶名
編寫服務(service)文件
cat >> "/etc/systemd/system/filebrowser.service" << EOF
[Unit]
Description=File Browser
After=network.target

[Service]
ExecStart=filebrowser -c /etc/filebrowser/config.json

[Install]
WantedBy=multi-user.target
EOF
chmod 644 /etc/systemd/system/filebrowser.service啟動服務
systemctl daemon-reload
systemctl start filebrowser
systemctl enable filebrowser在瀏覽器中打開http://IP:8080
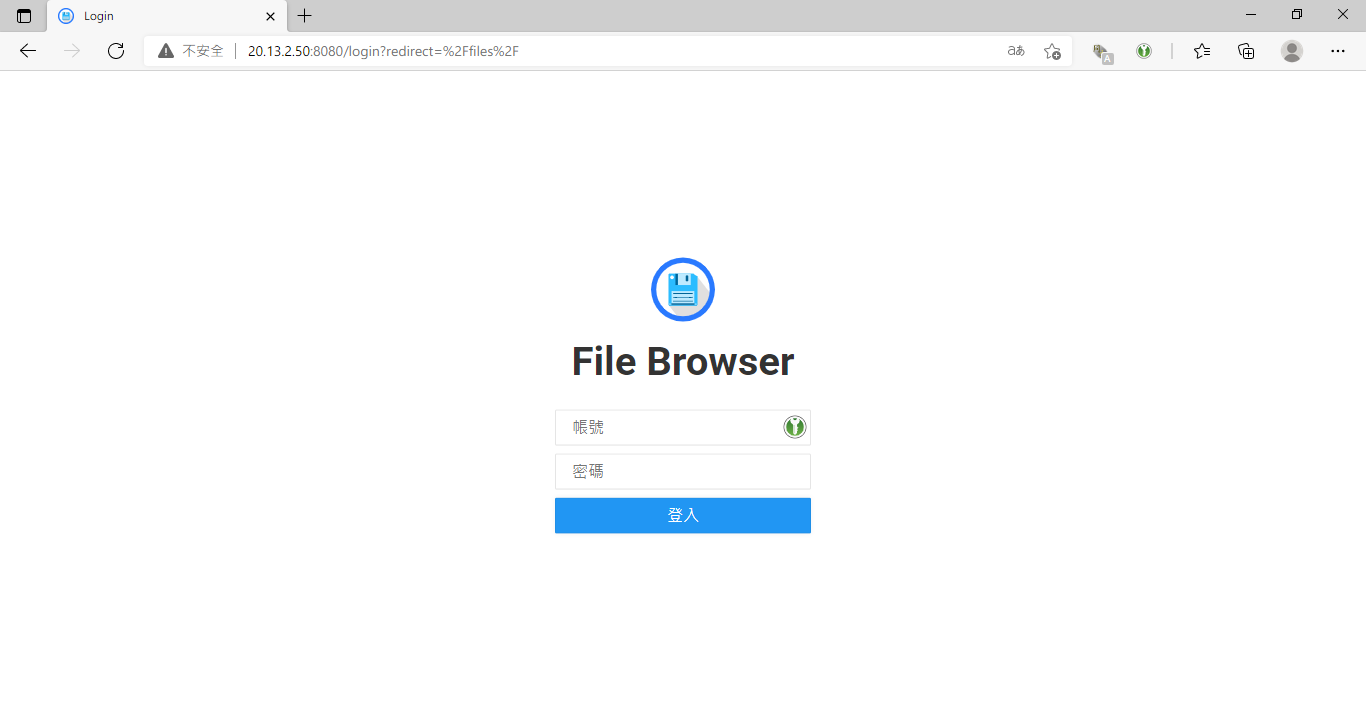
預設帳號:admin密碼:
admin
[[返回目錄內容]]
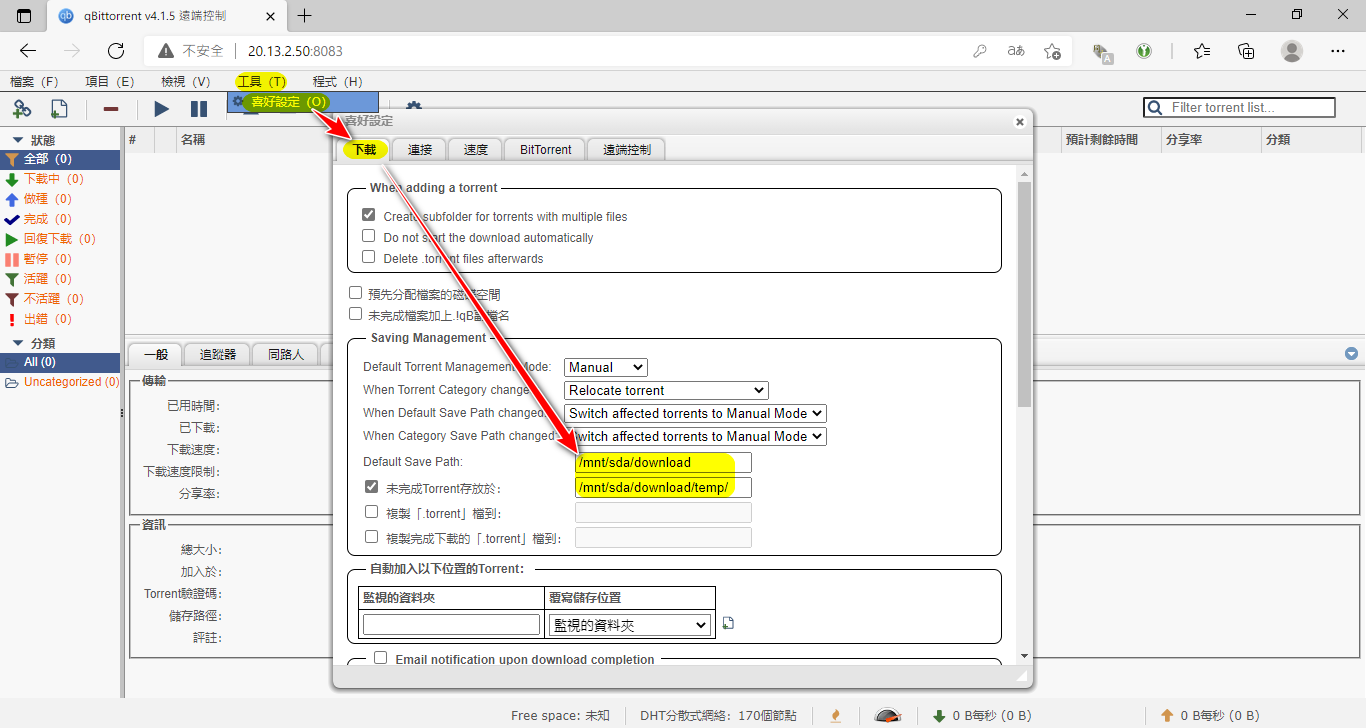
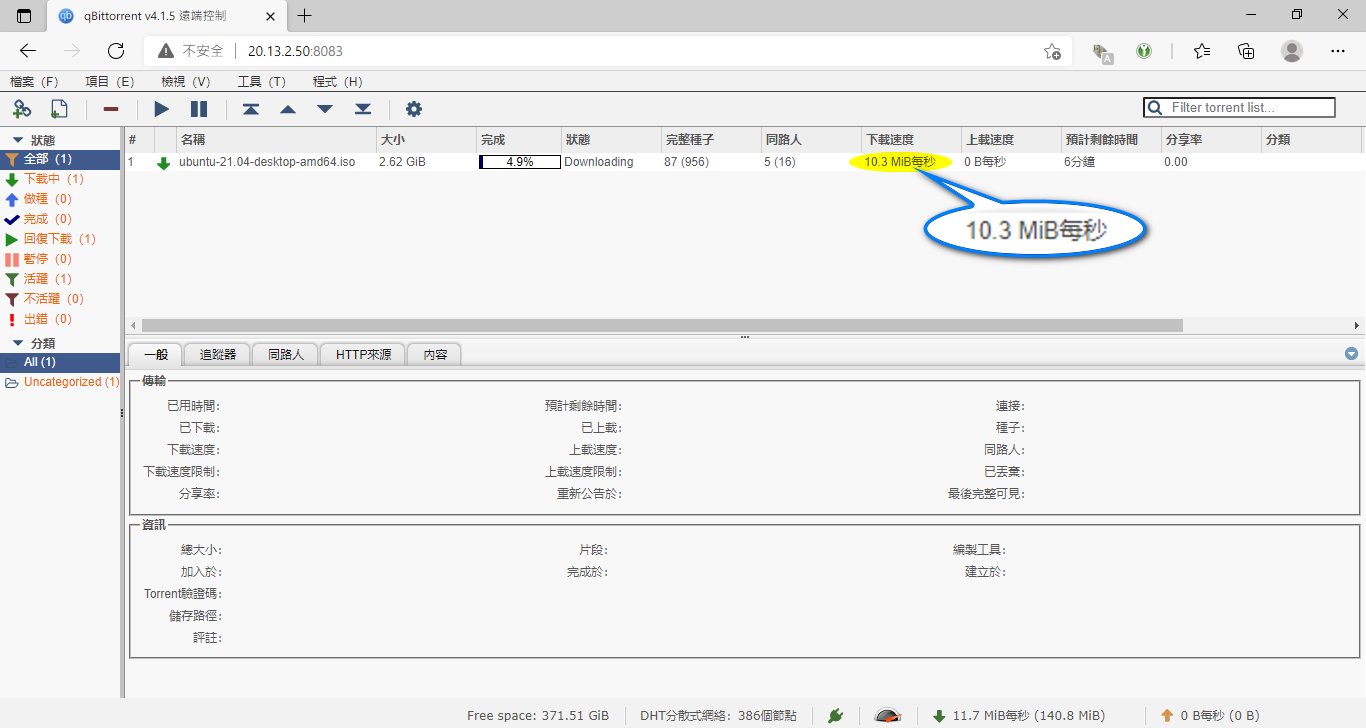
| qBittorrent - BT下載利器 |
qBittorrent專案旨在提供一個開源軟體替代Bittorent。
qbittorrent安裝:
apt install -y qbittorrent-nox建立開機自啟動服務:
cat >> /lib/systemd/system/qb.service << EOF
[Unit]
Description=qBittorrent Daemon Service
After=network.target
[Service]
User=root
ExecStart=/usr/bin/qbittorrent-nox --webui-port=8083
ExecStop=/usr/bin/killall -w qbittorrent-nox
[Install]
WantedBy=multi-user.target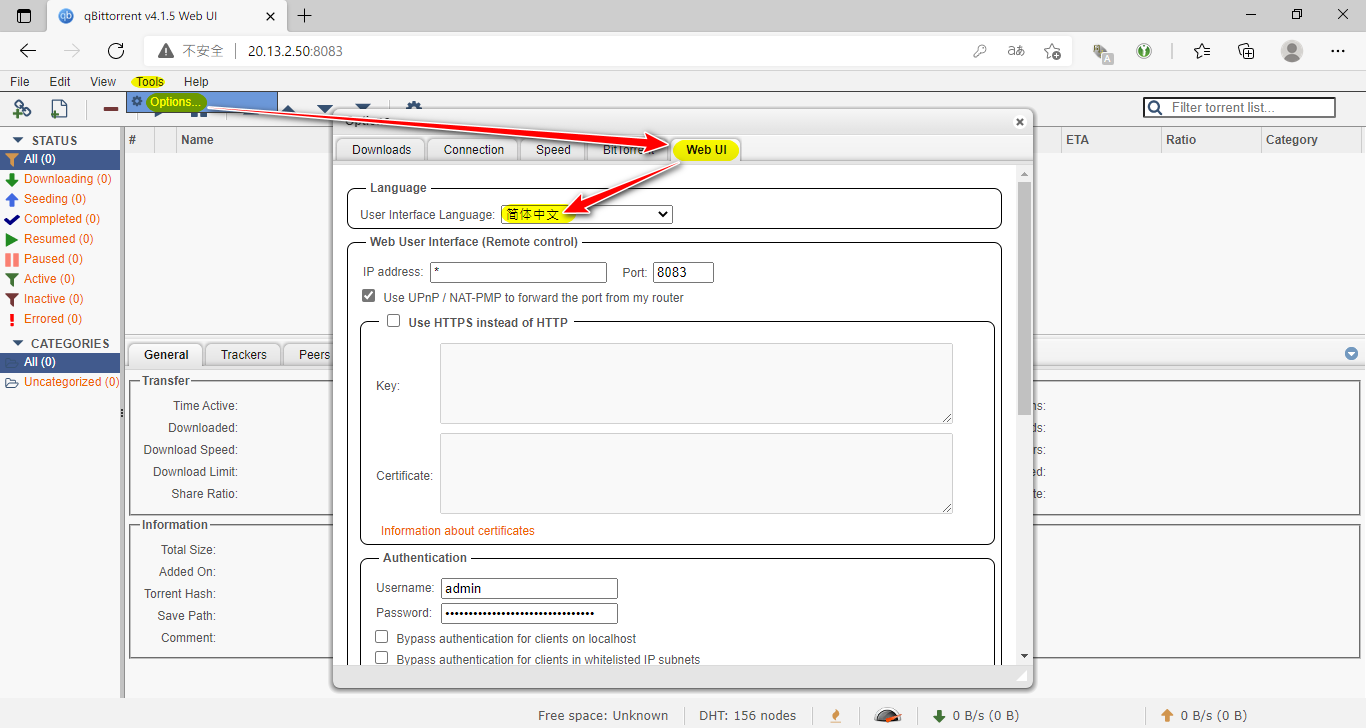
EOF--webui-port=8083#表示qbittorrent啟動在8083端口
systemctl start qb
systemctl enable qb
systemctl status qbstart#表示啟動服務
enabled#表示開機自啟動
active (running)#表示執行中
建立下載目錄並給與所有權限
mkdir -p /mnt/sda/download/temp && chmod 777 -R /mnt/sda/download/在瀏覽器中打開http://IP:8083
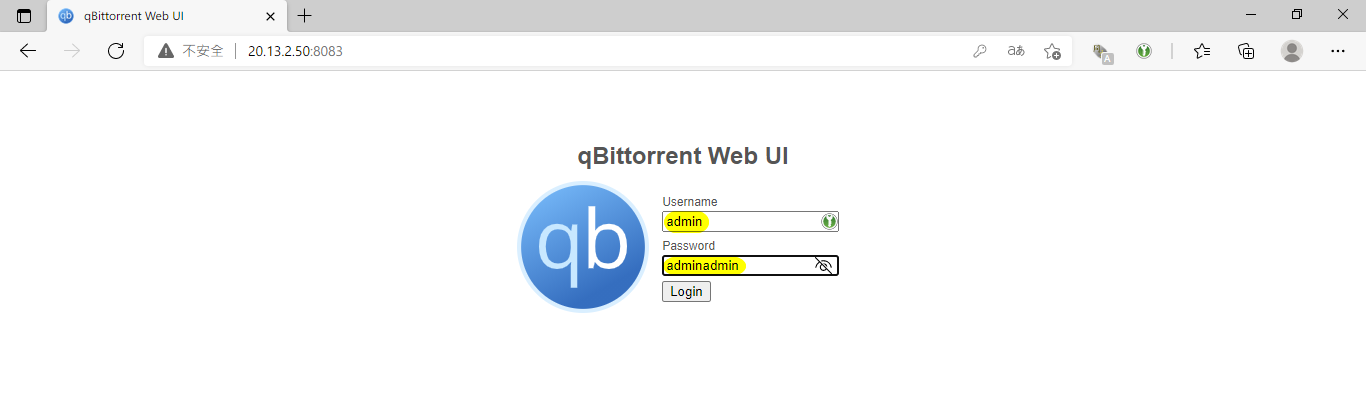
登入名稱:admin密碼:
adminadmin
[[返回目錄內容]]
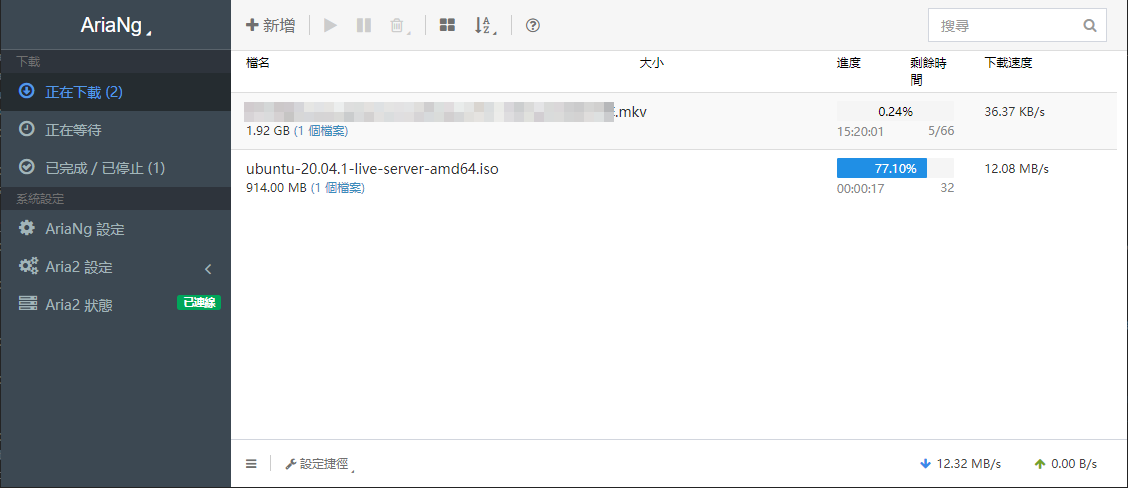
| aria2 - 強大又輕巧的下載工具 |
支援了 HTTP、HTTPS、FTP、SFTP、BitTorrent (BT 種子) 和 Metalink 等通訊協定。
建立下載目錄
mkdir -p /mnt/sda/download && chmod 777 /mnt/sda/download下載安裝腳本
選取 P3TERX 大佬的一鍵腳本, 因為一直進行維護, 做了大量的功能與細節優化。
wget -N git.io/aria2.sh && chmod +x aria2.sh運行腳本
./aria2.sh選擇數字 1 執行安裝
 Aria2 一鍵安裝管理腳本 增強版 [v2.7.4] by P3TERX.COM

  0. 升級腳本
 ———————————————————————
  1. 安裝 Aria2
  2. 更新 Aria2
  3. 卸載 Aria2
 ———————————————————————
  4. 啟動 Aria2
  5. 停止 Aria2
  6. 重啟 Aria2
 ———————————————————————
  7. 修改 配置
  8. 查看 配置
  9. 查看 日誌
 10. 清空 日誌
 ———————————————————————
 11. 手動更新 BT-Tracker
 12. 自動更新 BT-Tracker
 ———————————————————————

 Aria2 狀態: 已安裝 | 已啟動

 自動更新 BT-Tracker: 已開啟

 請輸入數字 [0-12]:
再次運行腳本
./aria2.sh選擇數字 7--> 3更改下載目錄為 /mnt/sda/download
 Aria2 狀態: 已安裝 | 已啟動

 自動更新 BT-Tracker: 未開啟

 請輸入數字 [0-12]:7

 1. 修改 Aria2 RPC 密鑰
 2. 修改 Aria2 RPC 端口
 3. 修改 Aria2 下載目錄
 4. 修改 Aria2 密鑰 + 端口 + 下載目錄
 5. 手動 打開配置文件修改
 ————————————
 0. 重置/更新 Aria2 完美配置

 請輸入數字 [0-5]:
下載Aria2的Web前端 (需預先安裝Nginx)
wget https://github.com/mayswind/AriaNg/releases/download/1.2.2/AriaNg-1.2.2-AllInOne.zip && unzip AriaNg-1.2.2-AllInOne.zip -d /var/www/html/ && rm AriaNg-1.2.2-AllInOne.zip在瀏覽器中打開http://IP:80
[[返回目錄內容]]
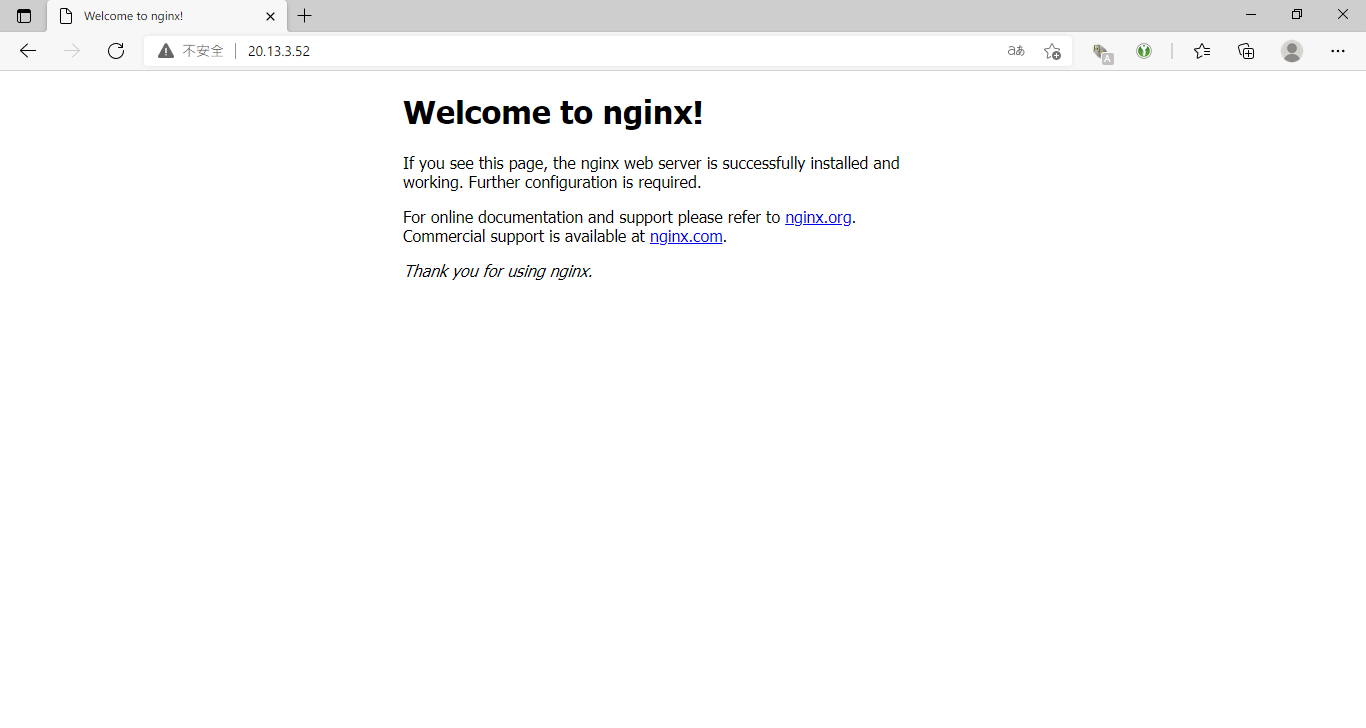
| LNMP |
LNMP是指網站服務器架構:Linux系統下Nginx+PHP+MySQL。
Linux: 是一類計算機操作系統的統稱,這裡使用的是armbian。Nginx: 是網頁伺服器也是高性能的HTTP和反向代理伺務器。PHP: 是一種嵌入HTML文檔的腳本語言。Mysql: 是一個數據庫管理系統。
apt install -y nginx在瀏覽器中打開http://IP:80
apt install -y php php-fpm php-mysql php-gd php-curl php-mbstring php-xml php-xmlrpc php-json php-zip php-intl php-mcrypt php-xsl php-dom php-exifvi /etc/nginx/sites-enabled/default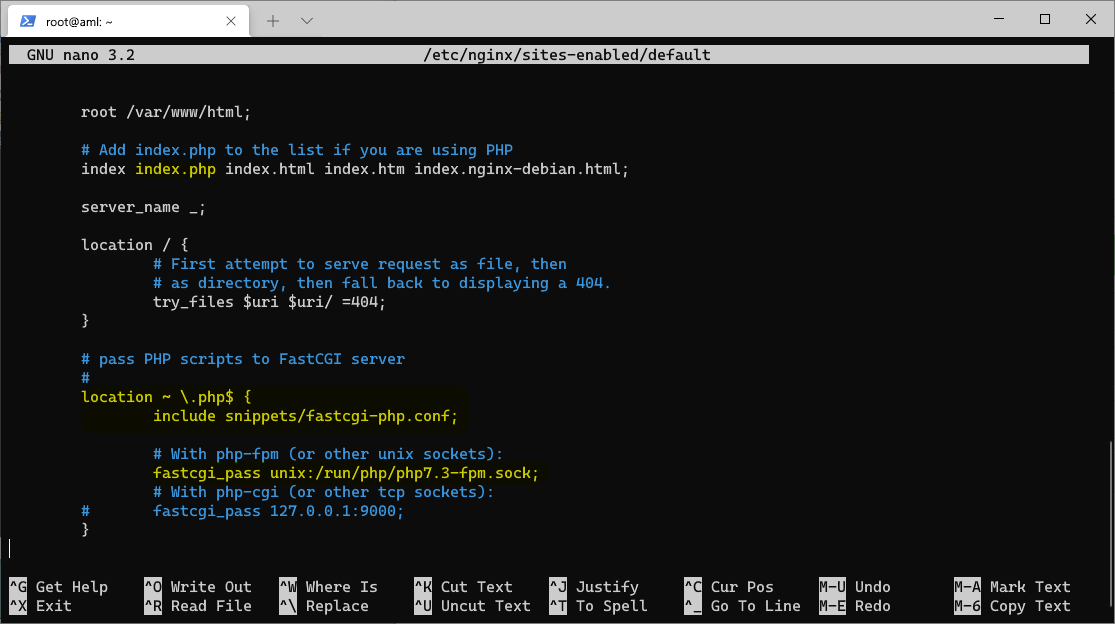
黃色加亮區是已修改的地方
測試Nginx設置是否正確:
nginx -tnginx: the configuration file /etc/nginx/nginx.conf syntax is ok
nginx: configuration file /etc/nginx/nginx.conf test is successful
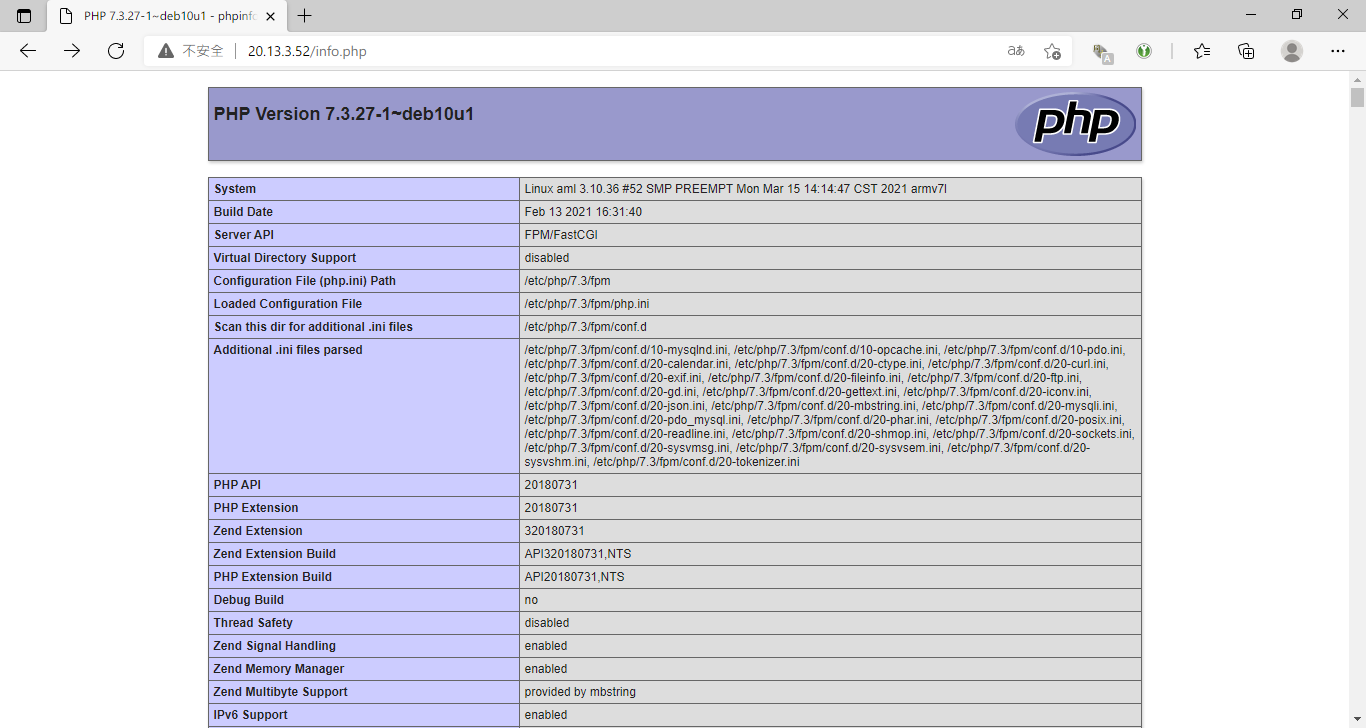
添加PHP測試頁面:
echo "<?php phpinfo(); ?>" > /var/www/html/info.php在瀏覽器中打開http://IP/info.php
出於硬件限制,在armbian的系統內,優先使用MariaDB數據庫管理系統。
MariaDB是MySQL關聯式資料庫管理系統的一個復刻。
安裝數據庫:
apt install -y mariadb-server執行數據庫配置向導:
mysql_secure_installation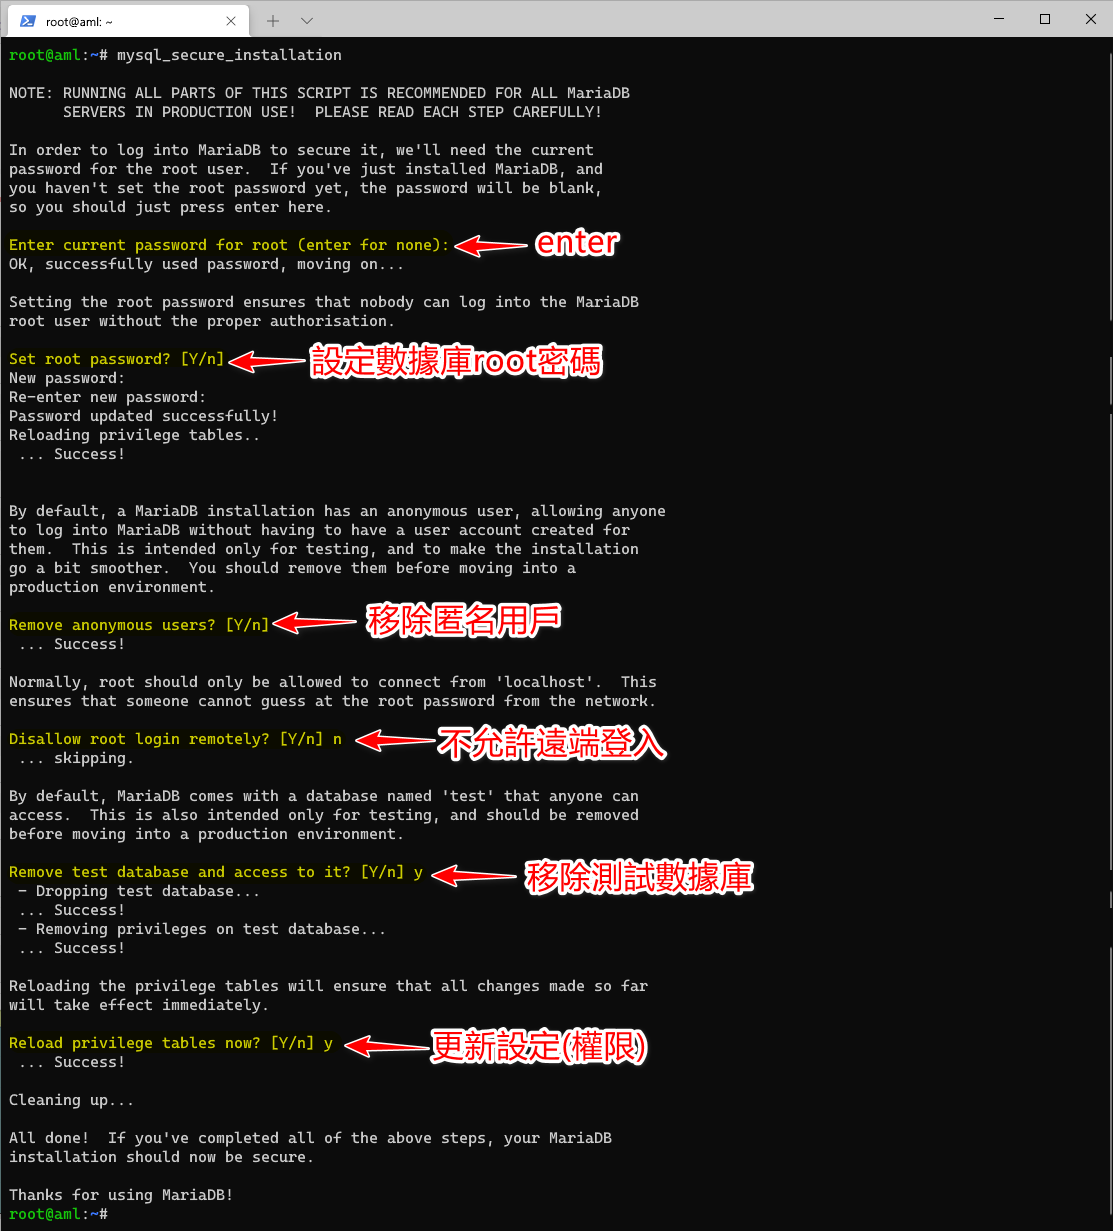
[[返回目錄內容]]
| Directory Lister-簡潔目錄列表程序 |

Directory Lister是最精簡的Web型式瀏覽和共用文件。配置簡單。需要
php-zip和php-dom擴展。
實現條件:
Nginx(或者其他網頁伺服器)PHP
建立目錄:
mkdir -p /mnt/sda/www/dl && cd /mnt/sda/www/dl下載及安裝:
wget https://github.com/DirectoryLister/DirectoryLister/releases/download/3.8.3/DirectoryLister-3.8.3.tar.gz && tar xzv -f DirectoryLister-3.8.3.tar.gz && cp .env.example .env && rm DirectoryLister-3.8.3.tar.gzNginx 的Directory Lister配置:
Cat >> "/etc/nginx/conf.d/dl.conf" << EOF
server {
        listen 8084 default_server;
#       listen [::]:8084 default_server;

        root /mnt/sda/www/dl;


        # Add index.php to the list if you are using PHP
        index index.php index.html index.htm index.nginx-debian.html;

        server_name _;

        location / {
                # First attempt to serve request as file, then
                # as directory, then fall back to displaying a 404.
        #       try_files $uri $uri/ =404;
        try_files $uri $uri/ /index.php$is_args$query_string;
        rewrite /(.*)/$ /index.php?dir=$1 last;
        }


        # pass PHP scripts to FastCGI server
        #
        location ~ \.php$ {
                include snippets/fastcgi-php.conf;

                # With php-fpm (or other unix sockets):
                fastcgi_pass unix:/run/php/php7.3-fpm.sock;
                # With php-cgi (or other tcp sockets):
        #       fastcgi_pass 127.0.0.1:9000;
        }

        # deny access to .htaccess files, if Apache's document root
        # concurs with nginx's one
        #
        #location ~ /\.ht {
        #       deny all;
        #}
}
EOF啟動Nginx服務
systemctl restart nginx在瀏覽器中打開http://IP:8084

[[返回目錄內容]]
| h5ai-目錄分享伺服器 |
在LNMP環境的基礎上,就可以安裝多種軟件。
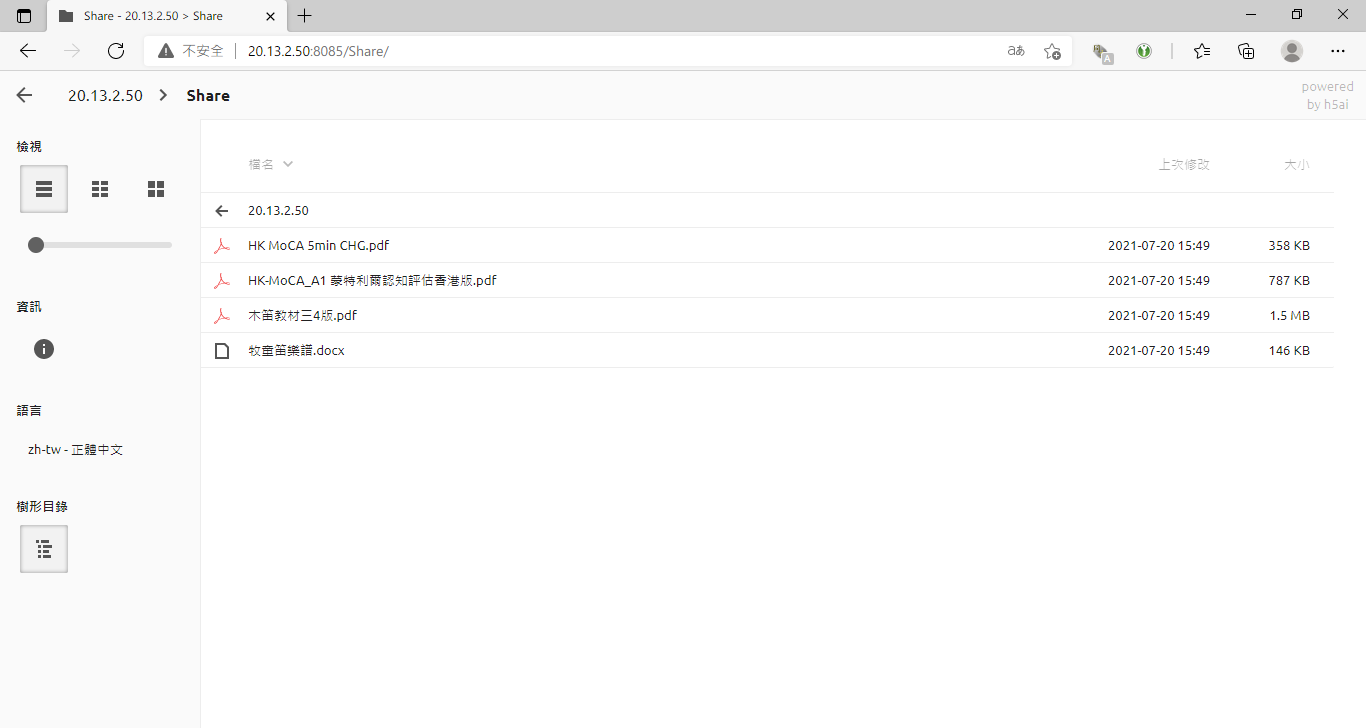
H5ai是一款外觀時尚且實用的目錄列表分享程序,適合用來做個人網盤,還支持在線播放。
實現條件:
Nginx(或者其他網頁伺服器)PHP
建立目錄:
mkdir -p /mnt/sda/h5ai && chown www-data.www-data -R /mnt/sda/h5ai/下載及解壓:
wget https://release.larsjung.de/h5ai/h5ai-0.30.0.zip && unzip h5ai-0.30.0.zip && chown www-data.www-data -R _h5ai/ && rm h5ai-0.30.0.zipNginx 的h5ai配置:
cat >> "/etc/nginx/conf.d/h5ai.conf" << EOF
server {
    listen 8085;
    index index.php /_h5ai/public/index.php;
    server_name  localhost; # change to your own domain

    root /mnt/sda/www/h5ai;

    # individual nginx logs for this vhost
    access_log  /var/log/nginx/h5ai_access.log; # change to your own domain
    error_log   /var/log/nginx/h5ai_error.log;  # change to your own domain

    location /_h5ai/private {
        return 403;
    }

    location ~ [^/]\.php(/|$) {
    fastcgi_split_path_info ^(.+?\.php)(/.*)$;
    if (!-f $document_root$fastcgi_script_name) {
        return 404;
    }

    fastcgi_param HTTP_PROXY "";

    fastcgi_pass unix:/run/php/php7.3-fpm.sock;
    fastcgi_index index.php;

    include fastcgi_params;

    fastcgi_param  SCRIPT_FILENAME   $document_root$fastcgi_script_name;
    fastcgi_param  PATH_INFO         $fastcgi_path_info;
    }
}
EOF啟動Nginx服務
systemctl restart nginx在瀏覽器中打開http://IP:8085
[[返回目錄內容]]
| Lychee - 相冊 |
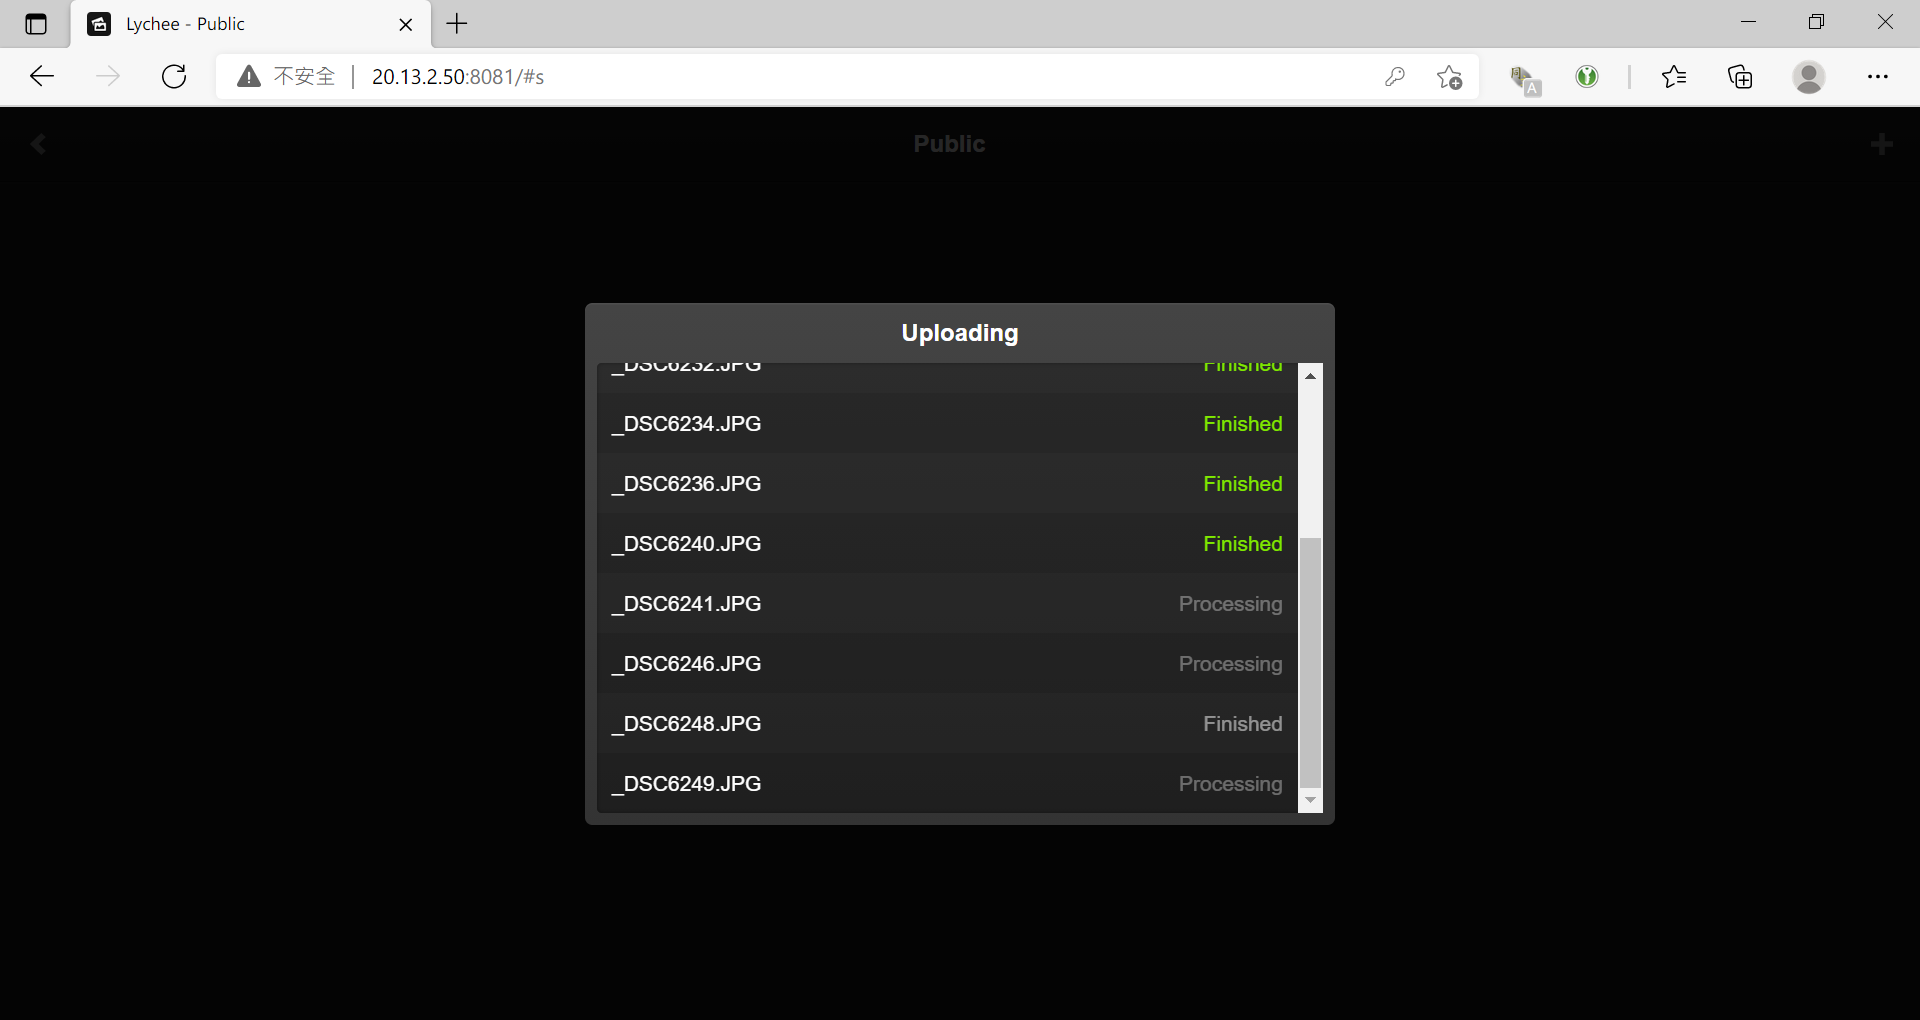
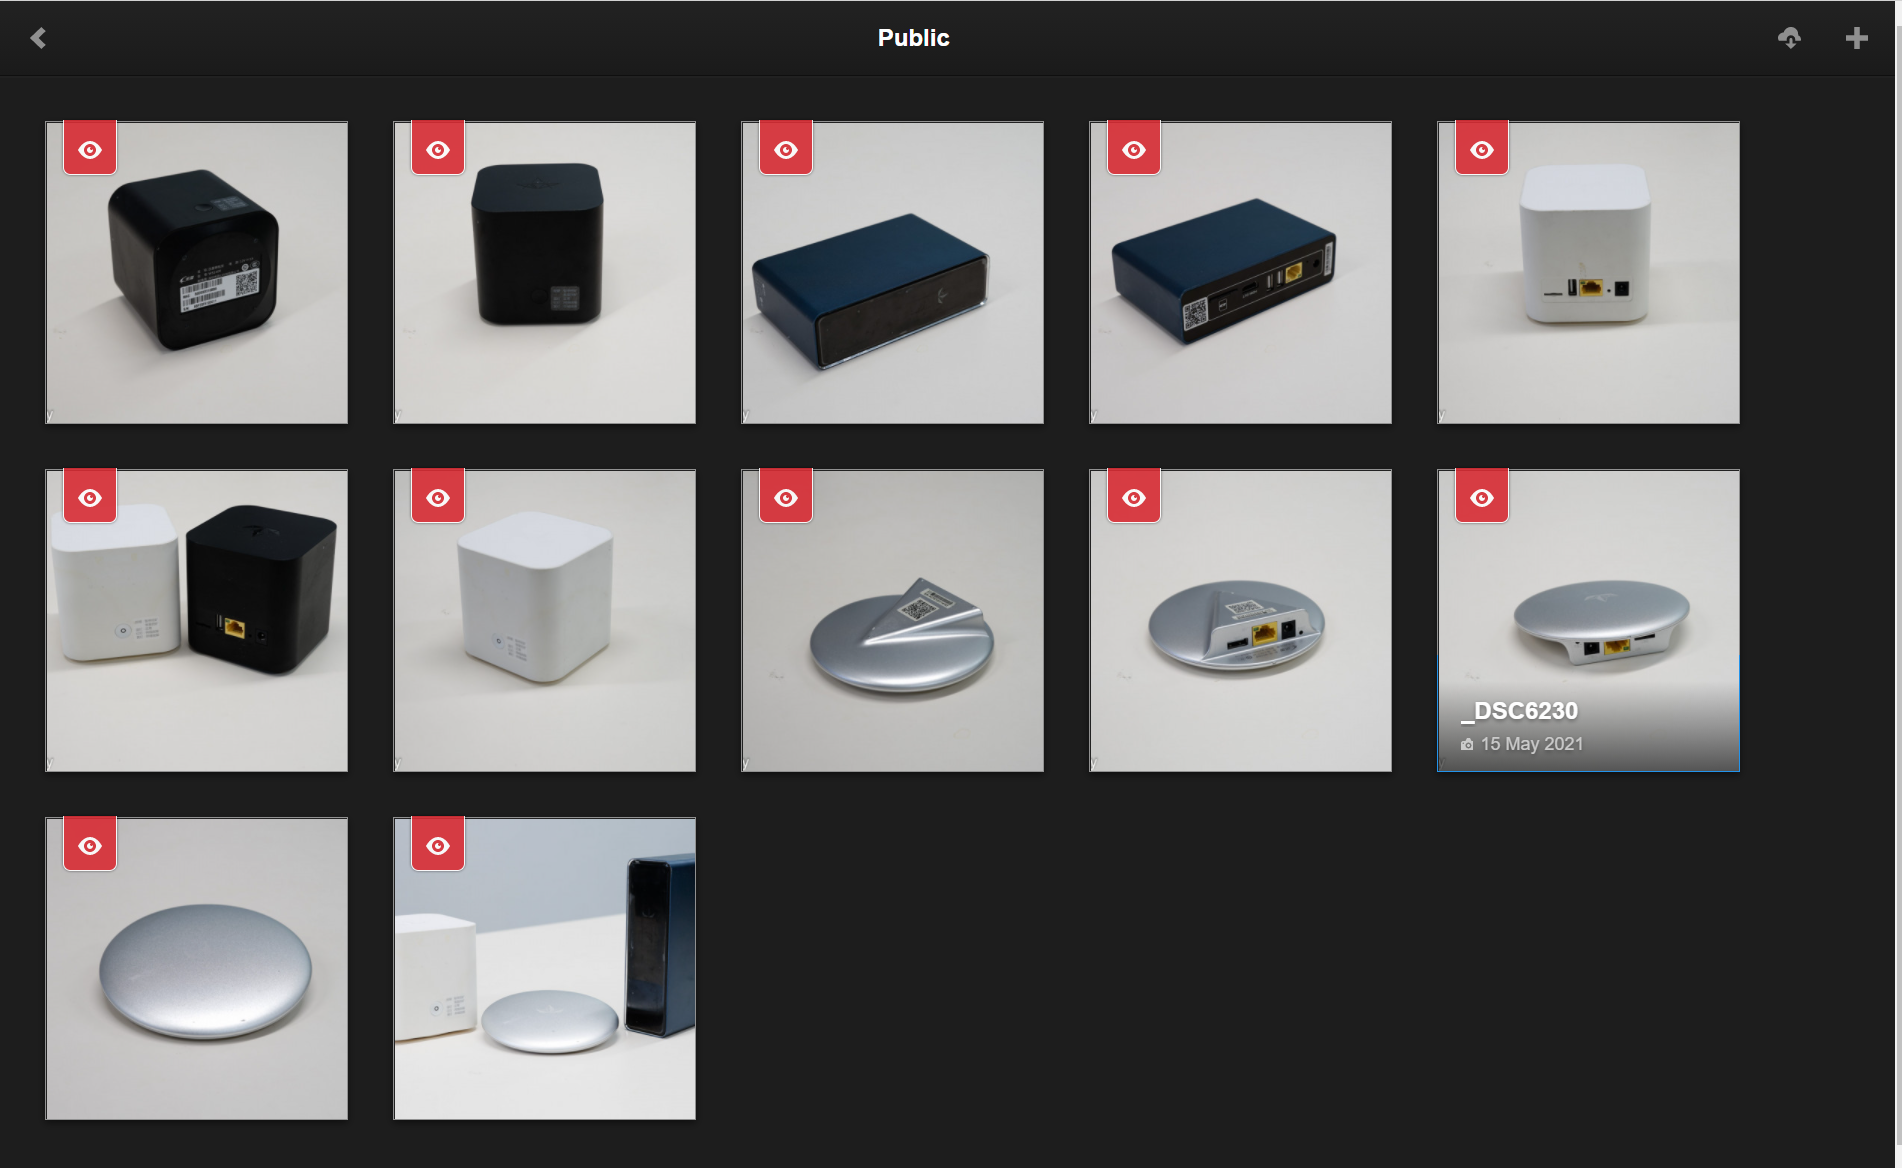
一個外觀漂亮、易於使用的照片管理系統。上傳、管理和共用來自本地應用程式的照片。
實現條件:
Nginx(或者其他網頁伺服器)PHPMySql(這裡是MariaDB)
下載lychee相冊文件:
wget https://github.com/electerious/Lychee/archive/refs/tags/v3.1.6.tar.gz && tar xzv -f v3.1.6.tar.gz && mv Lychee-3.1.6/ lychee && chown www-data:www-data -R ./lychee/Nginx 的lychee配置:
cat >> "/etc/nginx/conf.d/lychee.conf" << EOF
server {
    server_name localhost;
    listen 8081;
    root /mnt/sda/www/lychee;

   # access_log /var/www/my.lychee.site/logs/access.log;
   # error_log /var/www/my.lychee.site/logs/error.log;

    index index.php index.html;

    location / {
    try_files $uri $uri/ /index.html;
    }

    location ~* \.(?:ico|css|js|gif|jpe?g|png|ttf|woff)\$ {
        access_log off;
        expires 30d;
        add_header Pragma public;
        add_header Cache-Control "public, mustrevalidate, proxy-revalidate";
    }

    location ~ \.php$ {
        fastcgi_split_path_info ^(.*\.php)(/.*)?$;
        fastcgi_pass unix:/run/php/php7.3-fpm.sock;
        fastcgi_index index.php;
        include fastcgi_params;
        fastcgi_param SCRIPT_FILENAME $document_root$fastcgi_script_name;
        fastcgi_intercept_errors off;
        # fastcgi_buffer_size 16k;
    }

    location ~ /\.ht {
        deny all;
    }
}
EOF啟動Nginx服務
systemctl restart nginxMariaDB(Mysql)配置:
登入到數據庫
mysql -u root -p創建lychee 數據庫
CREATE DATABASE lychee DEFAULT CHARACTER SET utf8mb4 COLLATE utf8mb4_unicode_ci;設定lychee數據庫用戶名和密碼
GRANT ALL ON lychee.* TO 'lychee'@'localhost' IDENTIFIED BY 'P@ssword';引號裡的lychee是用戶名
P@ssword是要設置的密碼
刷新系統權限
FLUSH PRIVILEGES;退出
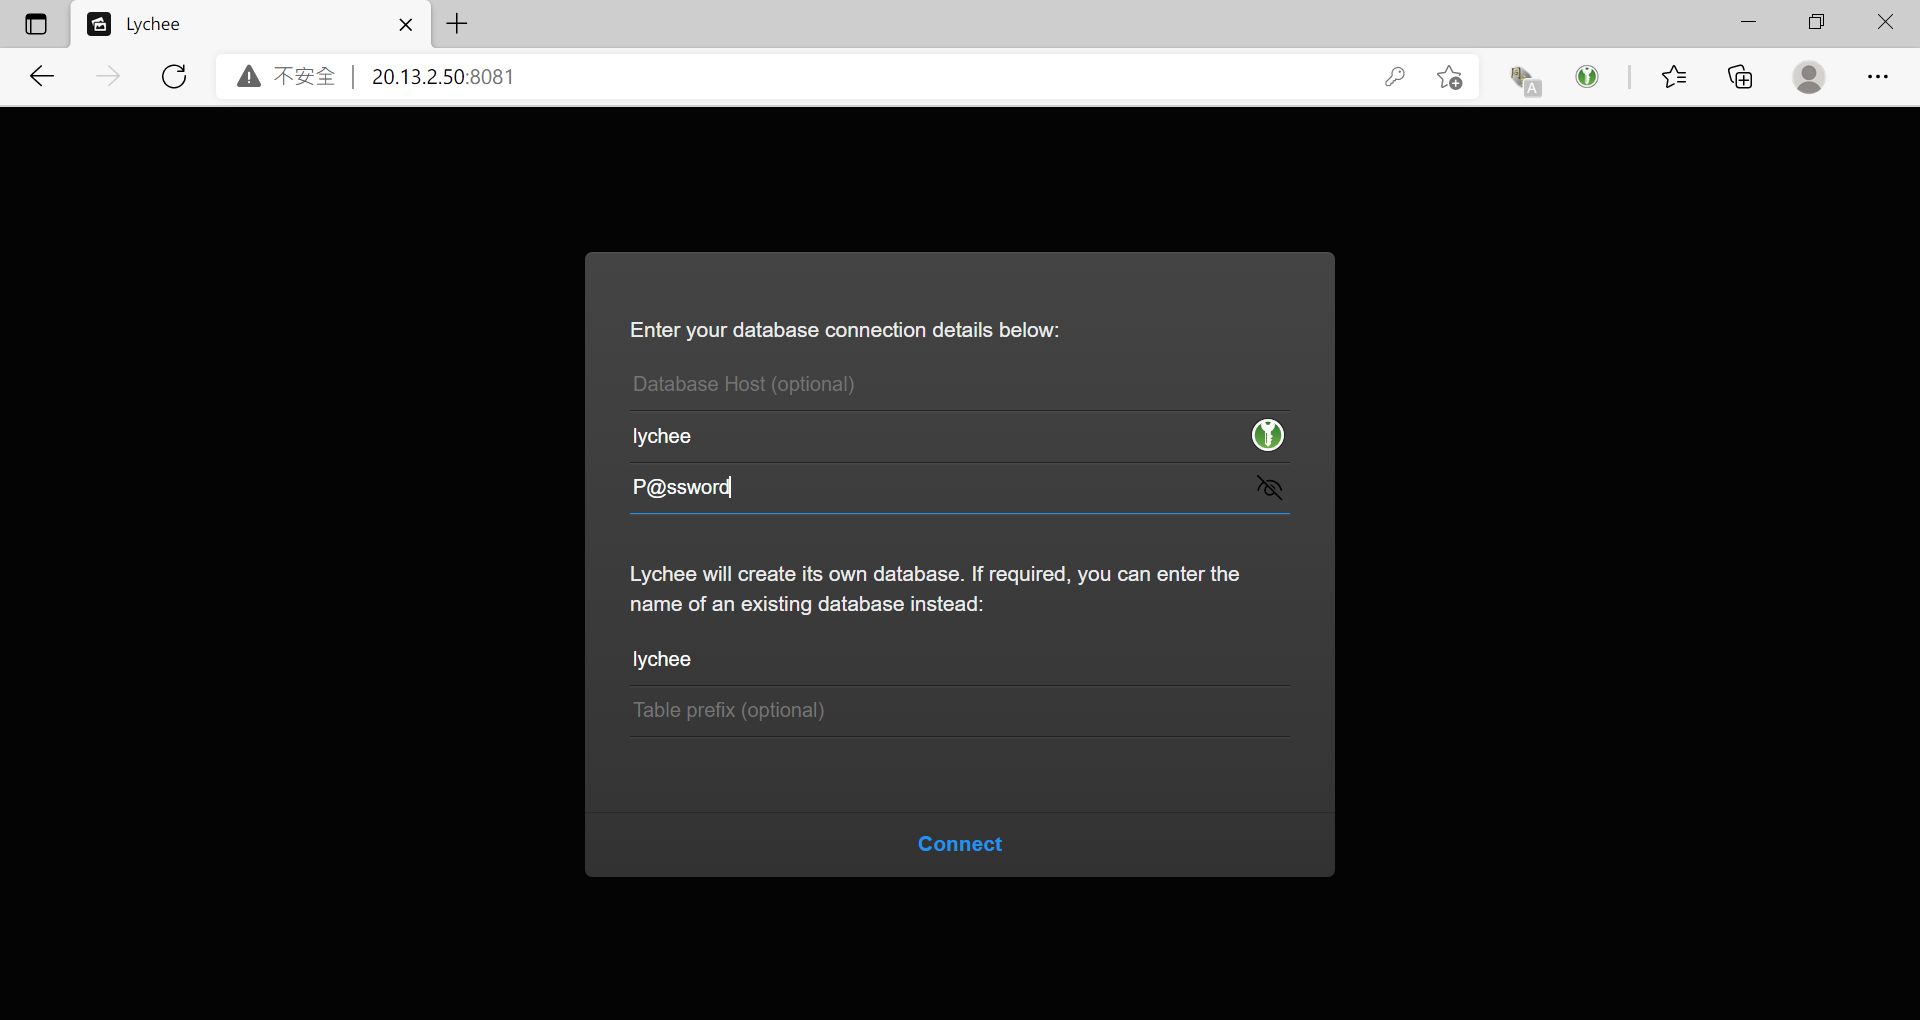
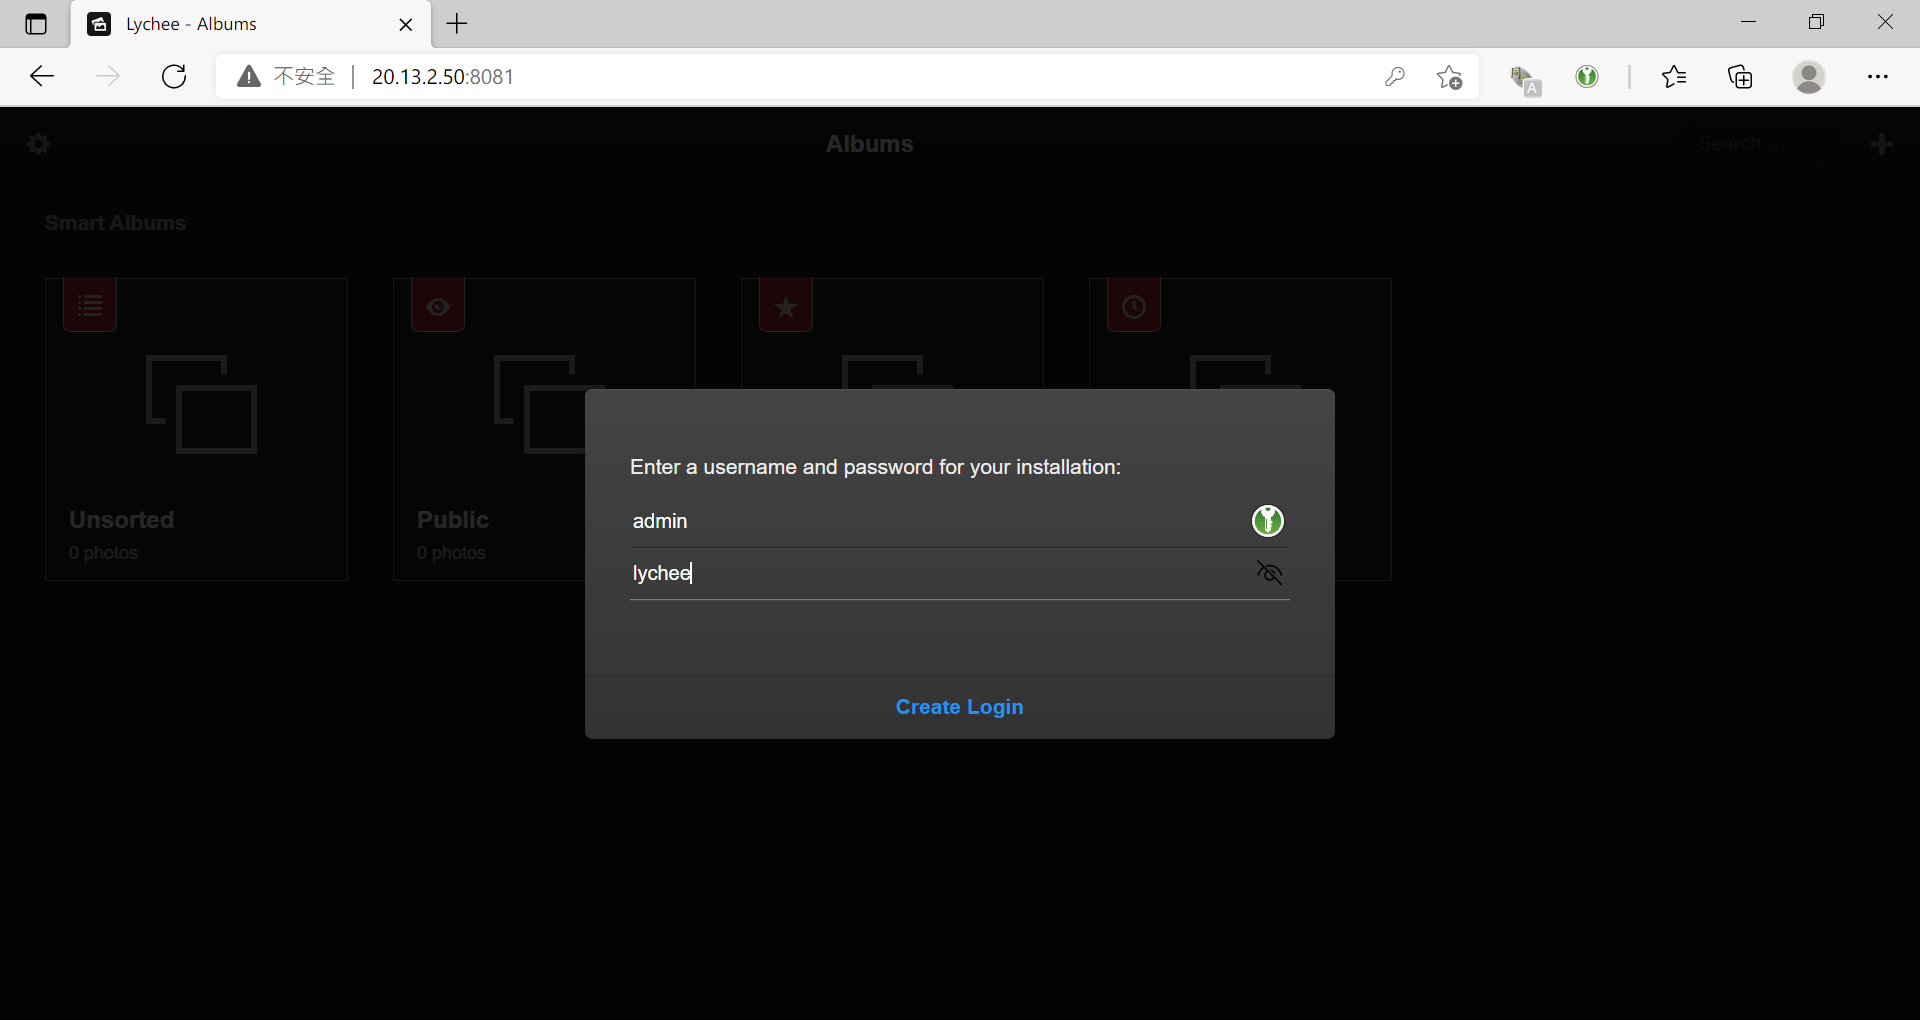
QUIT在瀏覽器中打開http://IP:8081
[[返回目錄內容]]
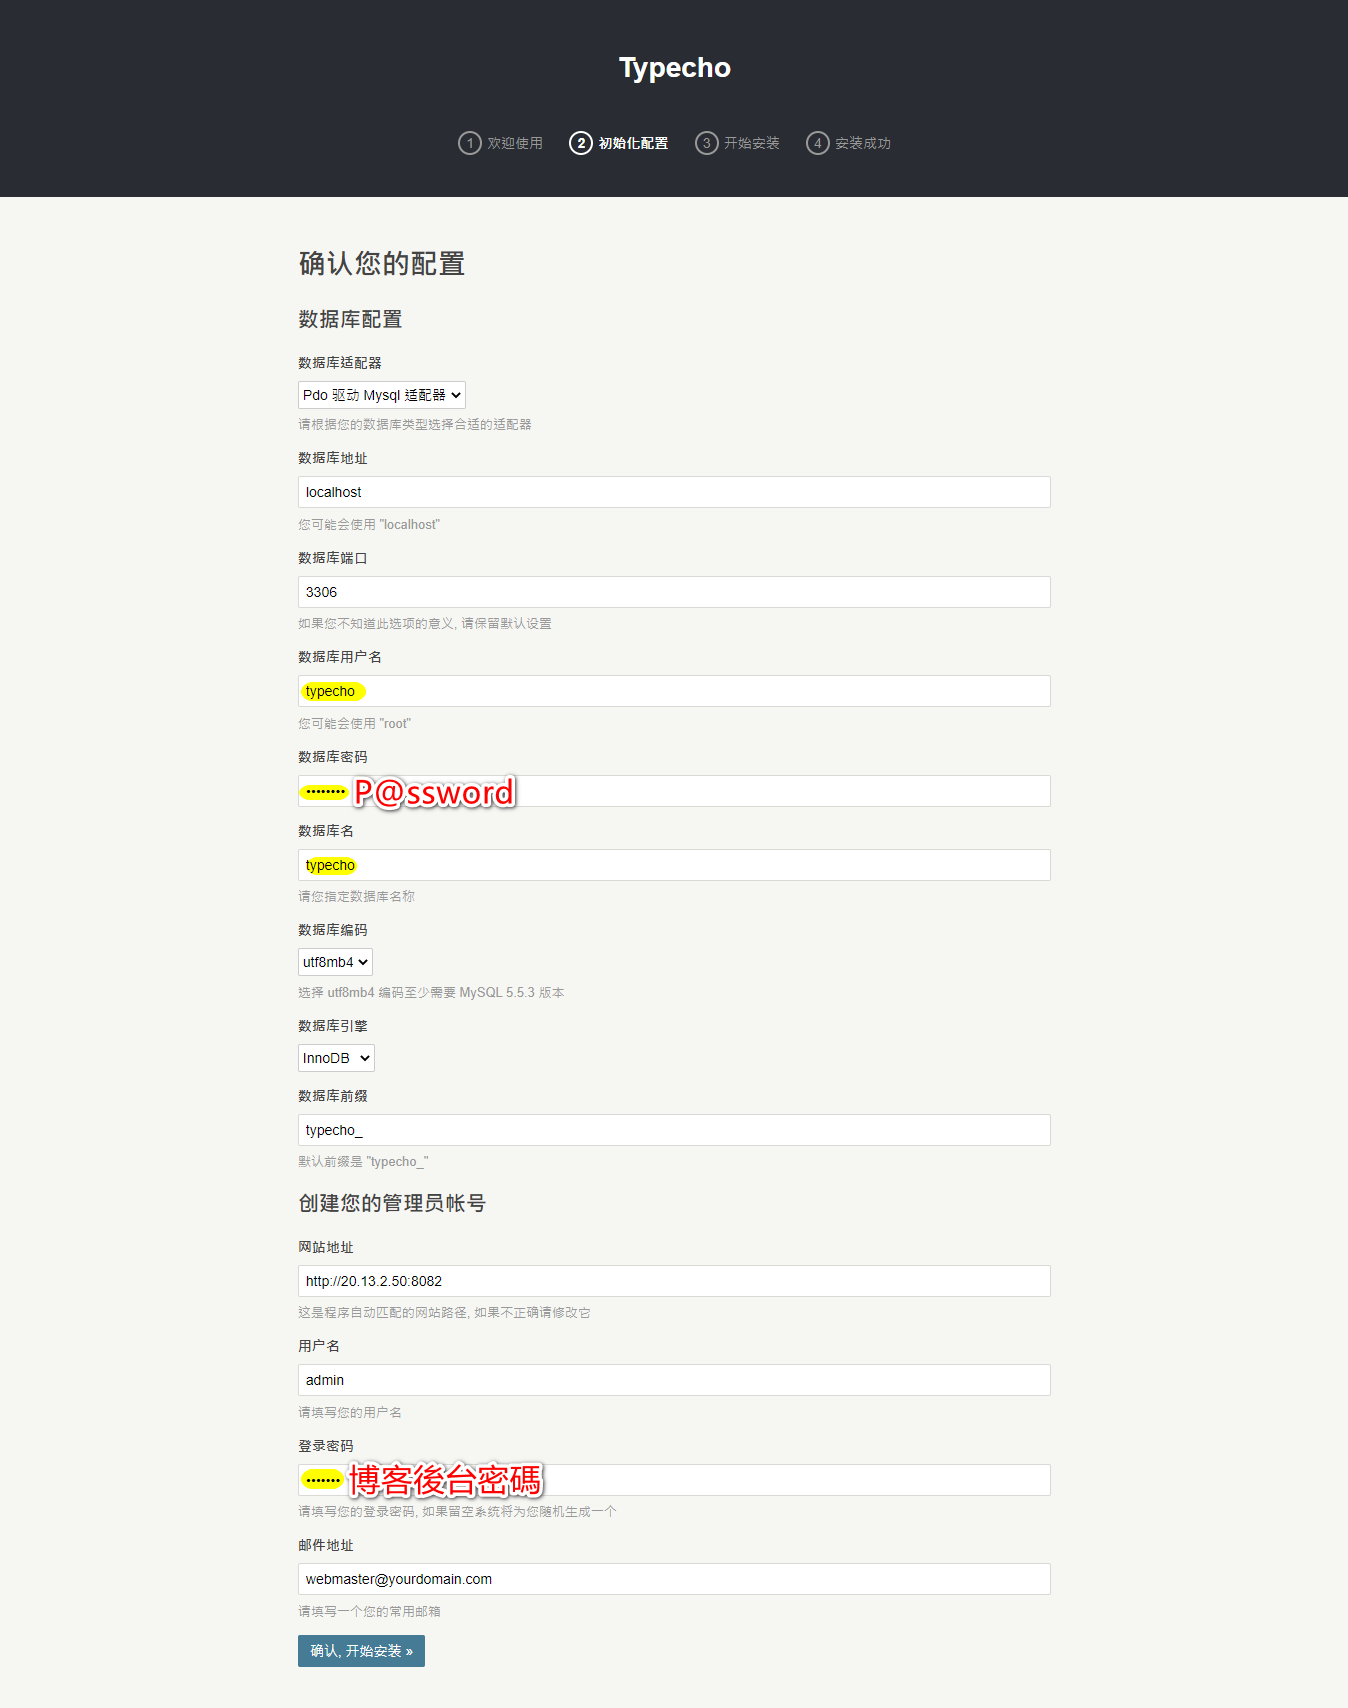
| Typecho - 個人博客 |
Typecho原生支持 Markdown 排版語法,易讀更易寫。支持 BAE/GAE/SAE 等各類雲主機,即使面對突如其來的高訪問量,也能輕松應對。輕量高效,僅僅 7 張數據表,加上不足 400KB 的代碼,就實現了完整的插件與模板機制。超低的 CPU 和內存使用率,足以發揮主機的最高性能。
實現條件:
Nginx(或者其他網頁伺服器)PHPMySql(這裡是MariaDB)
下載typecho博客文件:
wget https://nightly.link/typecho/typecho/workflows/Typecho-dev-Ci/master/typecho_build.zip && unzip typecho_build.zip -d typecho && chown www-data:www-data -R ./typecho/ && rm typecho_build.zip**Nginx 配置:**
cat >> "/etc/nginx/conf.d/typecho.conf" << EOF
server {
    listen 8082 default_server;
    root /mnt/sda/www/typecho;
    index index.html index.htm index.php;

    server_name _;

    if (!-e $request_filename) {
        rewrite ^(.*)$ /index.php$1 last;
    }

    location ~ .*\.php(\/.*)*$ {
            include snippets/fastcgi-php.conf;
            set $path_info "";
            set $real_script_name $fastcgi_script_name;
            if ($fastcgi_script_name ~ "^(.+?\.php)(/.+)$") {
                    set $real_script_name $1;
                    set $path_info $2;
            }
            fastcgi_param SCRIPT_FILENAME $document_root$real_script_name;
            fastcgi_param SCRIPT_NAME $real_script_name;
            fastcgi_param PATH_INFO $path_info;

            # fastcgi_pass unix:/run/php/php7.0-fpm.sock;
            fastcgi_pass unix:/run/php/php7.3-fpm.sock;
            include fastcgi_params;
    }

}
EOF啟動Nginx服務
systemctl restart nginxMariaDB(Mysql)配置:
登入到數據庫
mysql -u root -p創建typecho數據庫
CREATE DATABASE typecho DEFAULT CHARACTER SET utf8mb4 COLLATE utf8mb4_unicode_ci;設定typecho數據庫用戶名和密碼
GRANT ALL ON typecho.* TO 'typecho'@'localhost' IDENTIFIED BY 'P@ssword';引號裡的typecho是用戶名
P@ssword是要設置的密碼
刷新系統權限
FLUSH PRIVILEGES;退出
QUIT在瀏覽器中打開http://IP:8082
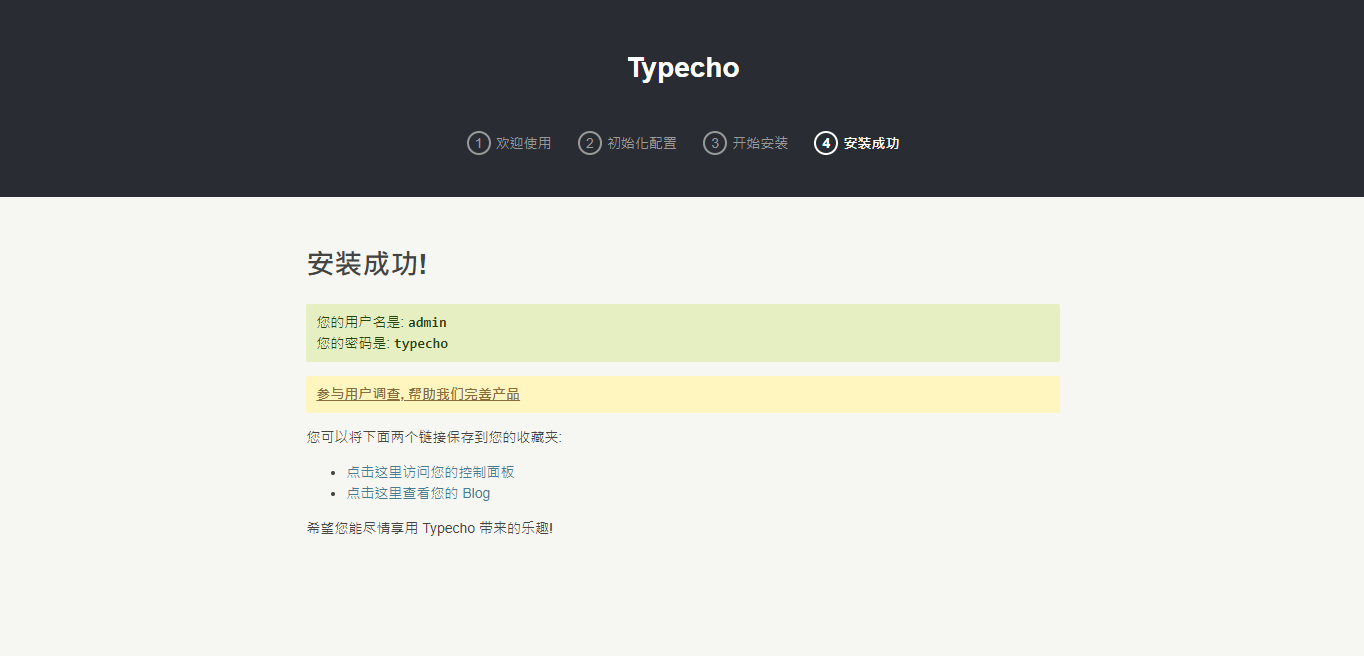
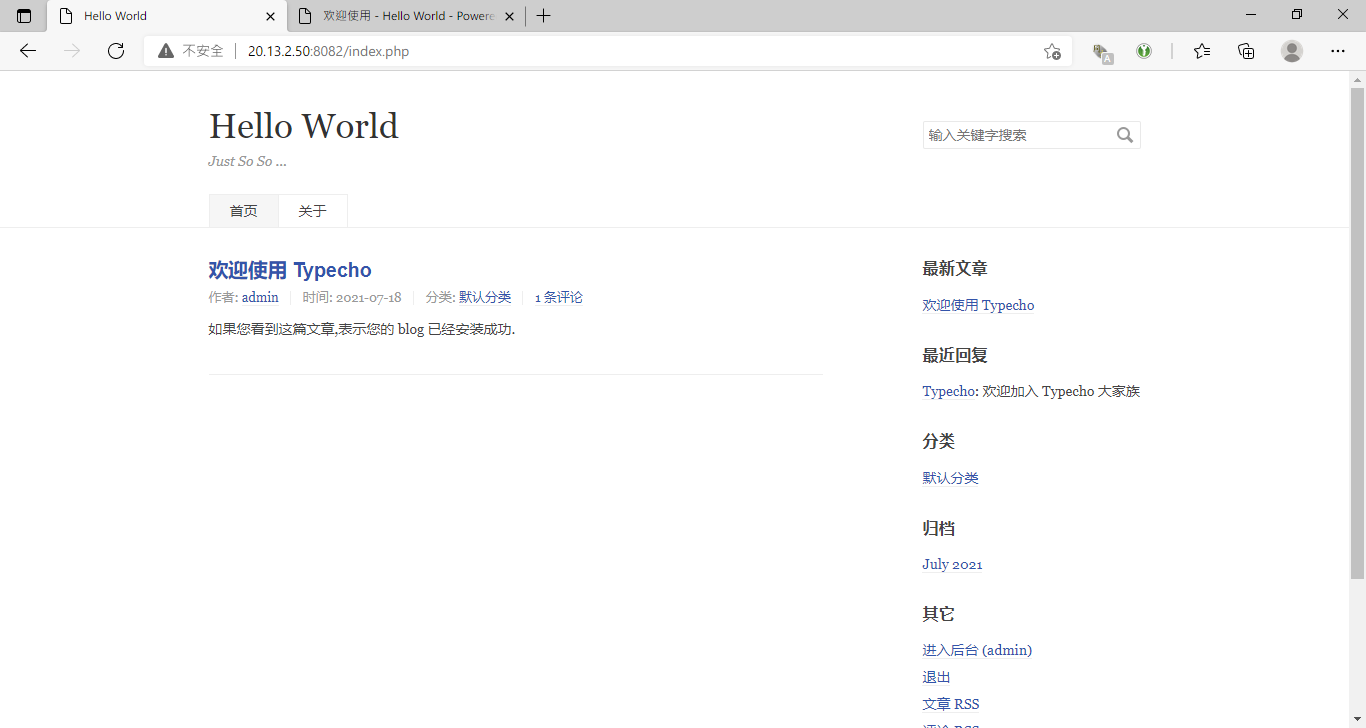
[[返回目錄內容]]
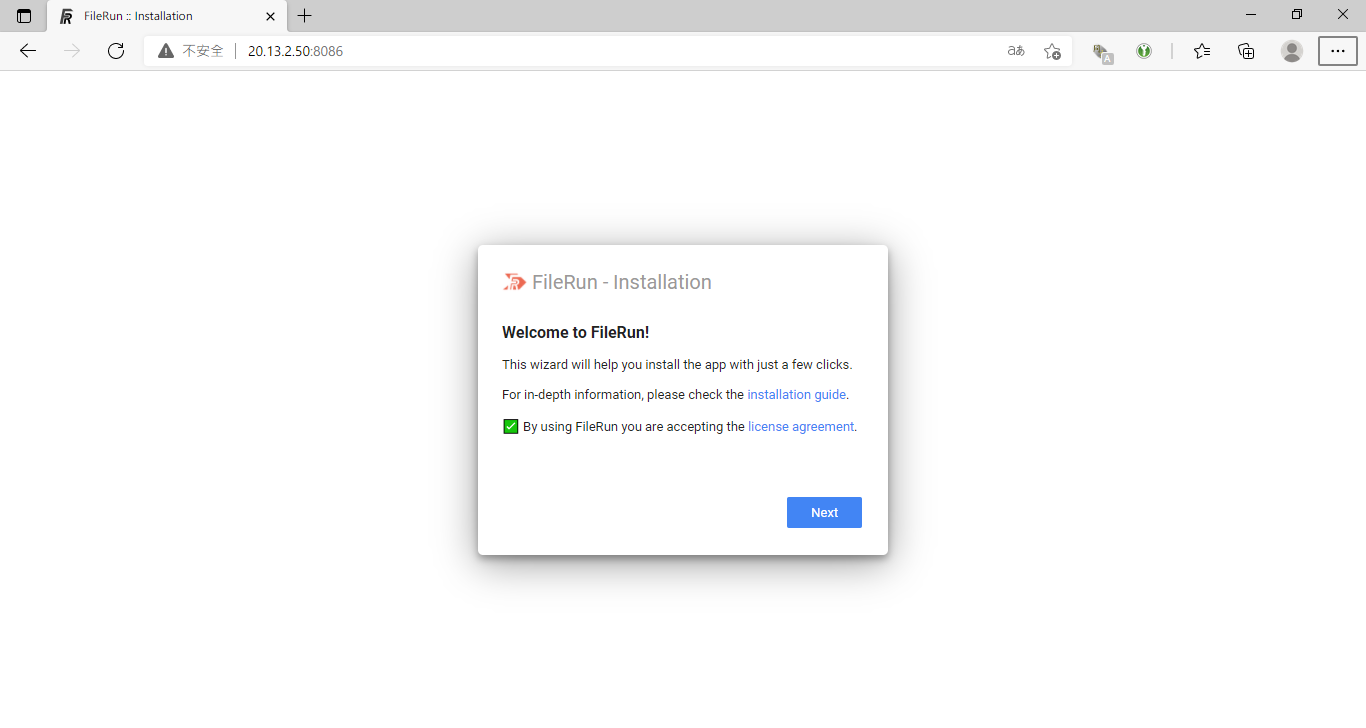
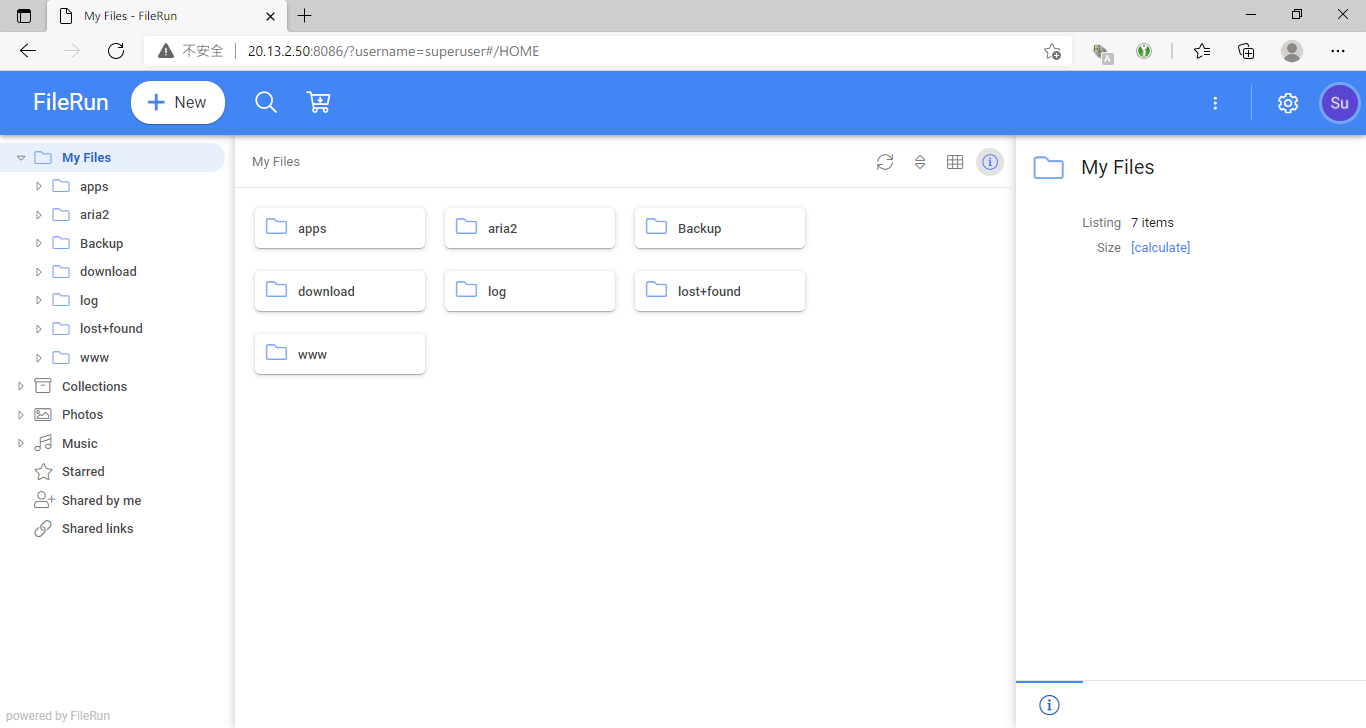
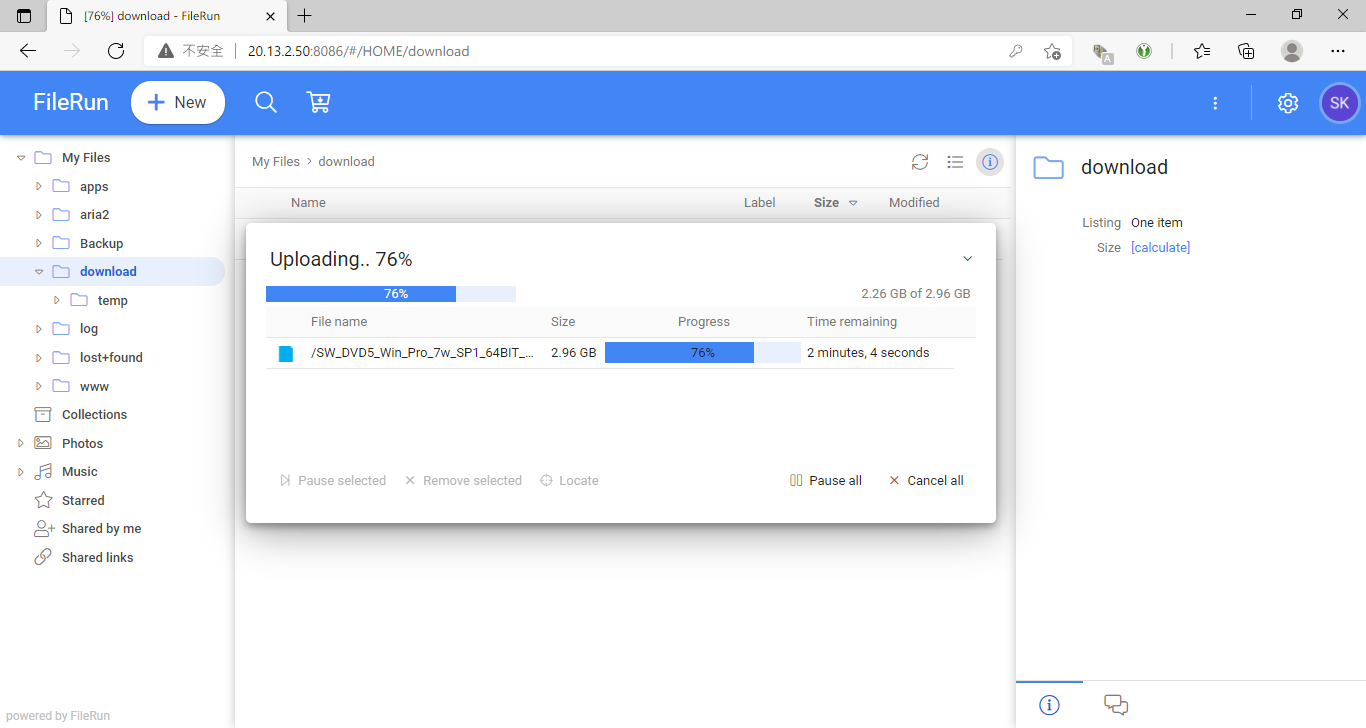
| FileRun - 個人網盤 |
FileRun是一款簡潔、漂亮且功能強大的個人網盤。可直接訪問本地目錄,傳輸文件速度快。免費版本,最多允許建立三個用戶。
實現條件:
ioncube加密組件Nginx(或者其他網頁伺服器)PHPMySql(這裡是MariaDB)
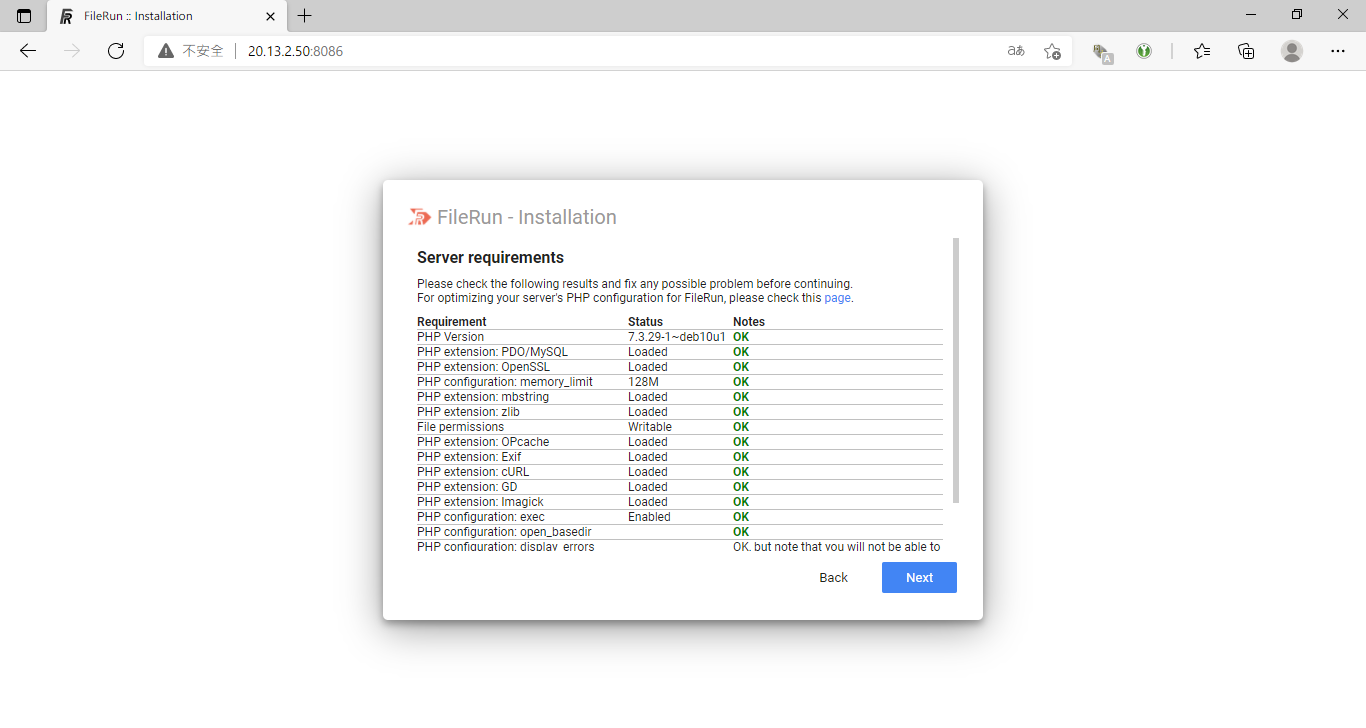
ioncube 加密組件安裝:
cd /var/www/html && wget https://www.ioncube.com/loader-wizard/loader-wizard.zip && unzip loader-wizard.zip && rm loader-wizard.zip在瀏覽器中打開http://IP/ioncube/loader-wizard.php
ioncube提供了一個安裝向導,可以幫助檢測php的運行環境,自動給出提示及安裝。
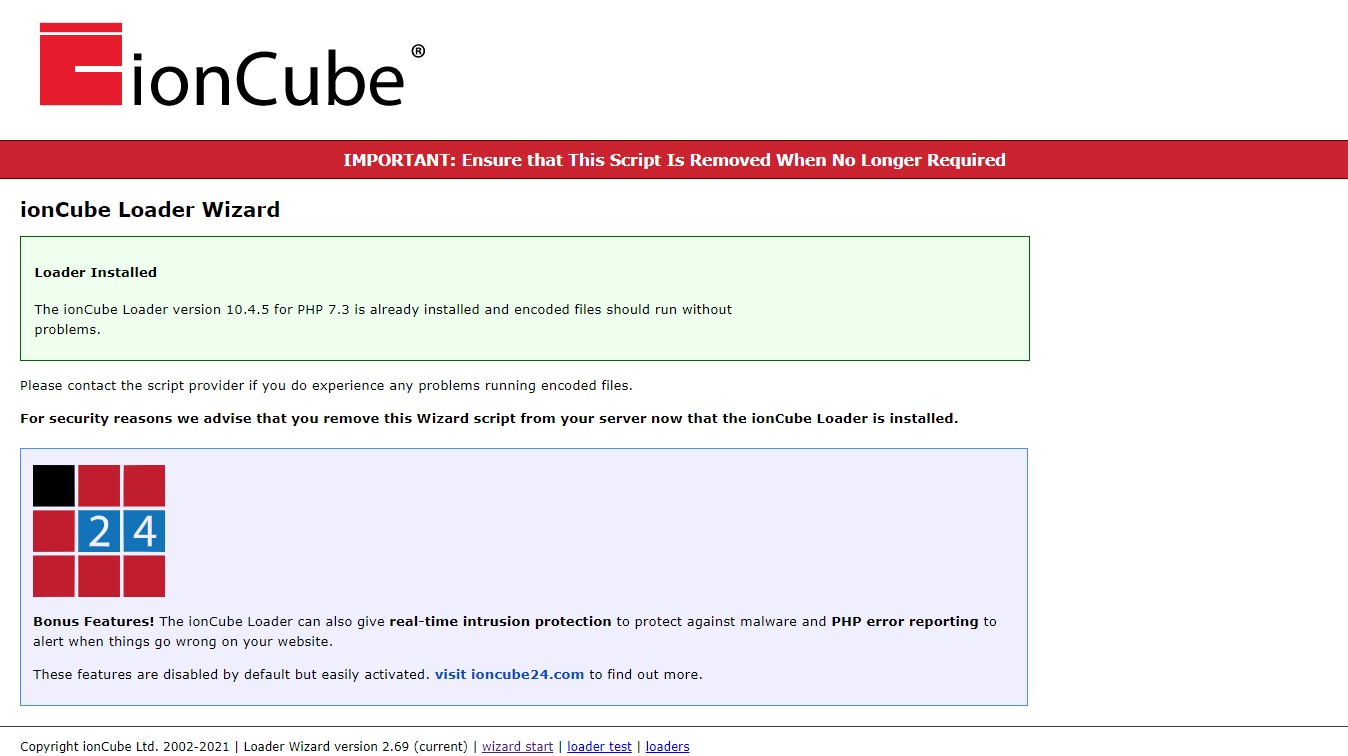
Loader Installed代表已安裝安裝php擴展模組:
apt-get install -y php-mbstring php-zip php-curl php-gd php-ldap php-xml php-imagick重啟php-fpm
systemctl restart php7.3-fpm建立FileRun目錄:
mkdir -p /mnt/sda/www/filerun && cd /mnt/sda/www/filerun/下載FileRun文件:
wget http://www.filerun.com/download-latest && unzip download-latest && chown www-data:www-data -R ../filerun/ && rm download-latestNginx 配置:
cat >> "/etc/nginx/conf.d/filerun.conf" << EOF
server {
    listen 8086;
    index index.php;
    server_name  localhost; # change to your own domain

    root /mnt/sda/www/filerun;

    # individual nginx logs for this vhost
    access_log  /var/log/nginx/filefun_access.log; # change to your own domain
    error_log   /var/log/nginx/filefun_error.log;  # change to your own domain

    location ~ [^/]\.php(/|$) {
    fastcgi_split_path_info ^(.+?\.php)(/.*)$;
    if (!-f $document_root$fastcgi_script_name) {
        return 404;
    }

    fastcgi_param HTTP_PROXY "";

    fastcgi_pass unix:/run/php/php7.3-fpm.sock;
    fastcgi_index index.php;

    include fastcgi_params;

    fastcgi_param  SCRIPT_FILENAME   $document_root$fastcgi_script_name;
    fastcgi_param  PATH_INFO         $fastcgi_path_info;
    }
}
EOF避免413 Request Entity Too Large錯誤
sed -i '/types_hash_max_size 2048;/a\ client_max_body_size 20m;' /etc/nginx/nginx.conf重新啟動Nginx服務
systemctl restart nginxMariaDB(Mysql)配置:
登入到數據庫
mysql -u root -p創建filerun數據庫
CREATE DATABASE filerun;設定filerun數據庫用戶名和密碼
GRANT ALL ON filerun.* TO 'filerun'@'localhost' IDENTIFIED BY 'P@ssword';引號裡的filerun是用戶名
P@ssword是要設置的密碼
刷新系統權限
FLUSH PRIVILEGES;退出
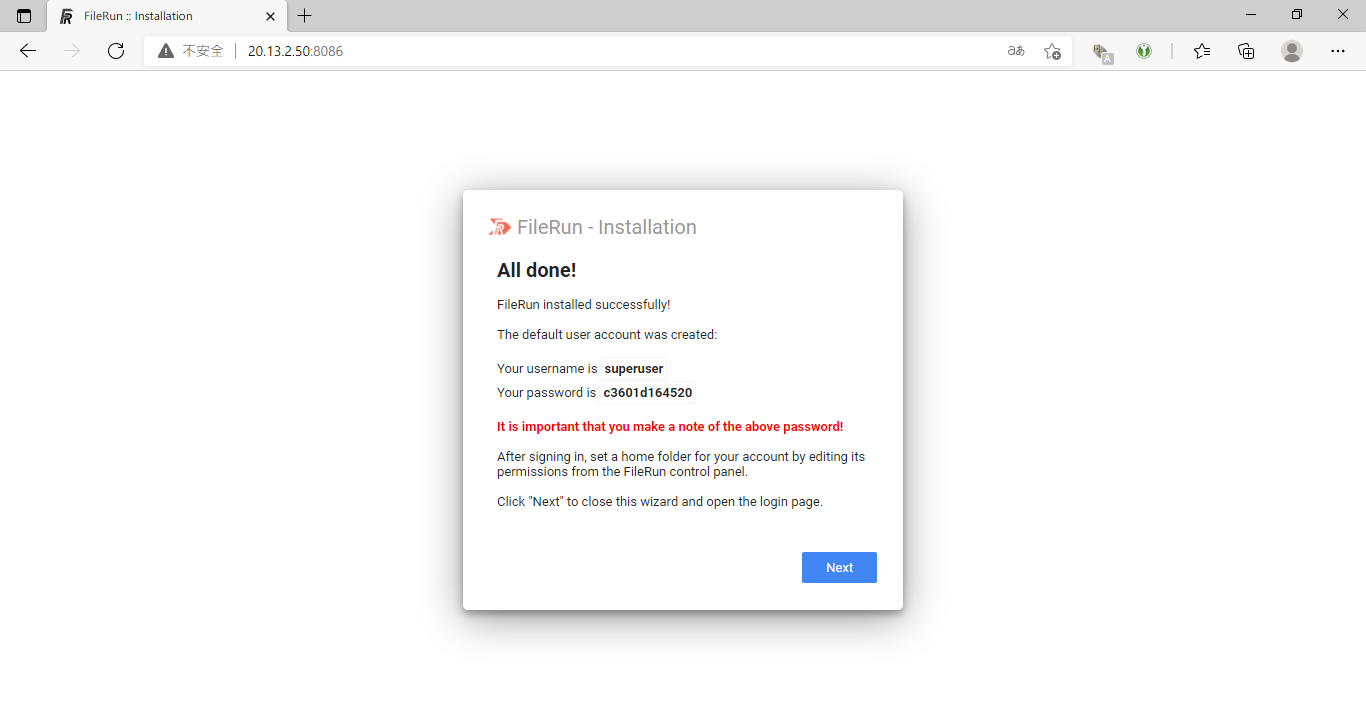
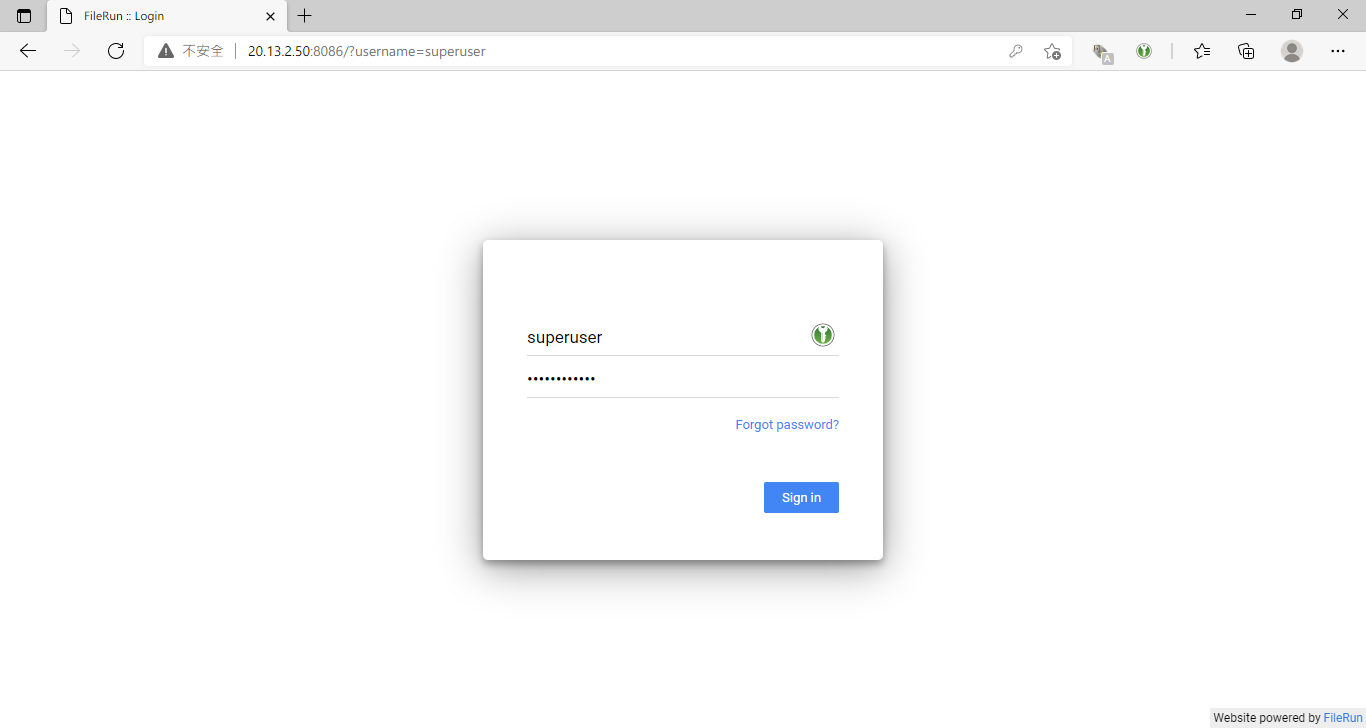
QUIT在瀏覽器中打開http://IP:8086


參考3mile大佬的LNMP環境下手動安裝Filerun
[[返回目錄內容]]
| frp - 高性能的內網穿透程式 |
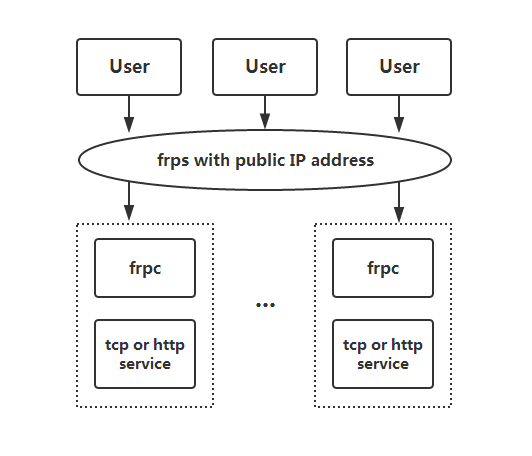
frp 是一個專注於內網穿透的高性能的反向代理應用,支持 TCP、UDP、HTTP、HTTPS 等多種協議。可以將內網服務以安全、便捷的方式通過具有公網 IP 節點的中轉暴露到公網。
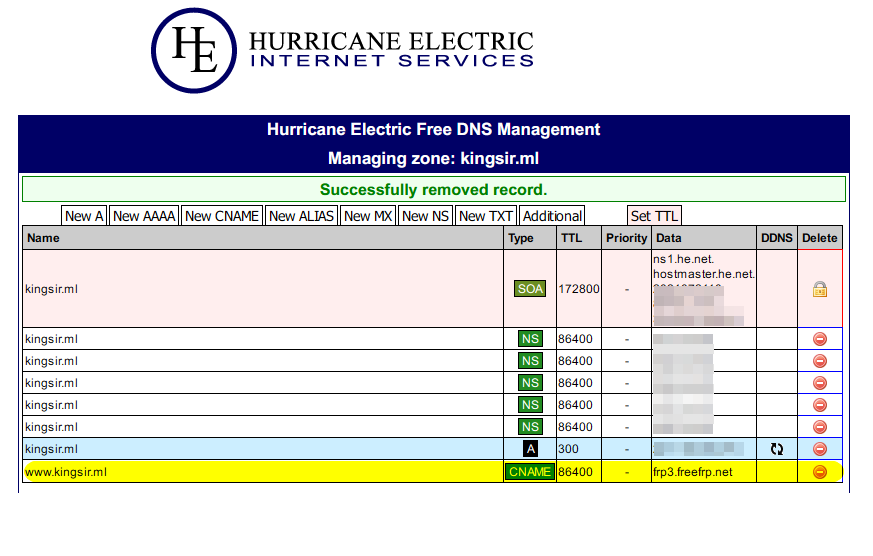
- 域名 1 個,無論是付費還是免費的
- FRPS伺服器 - 由
IOIOX大佬提供的免費 FRP 內網穿透服務

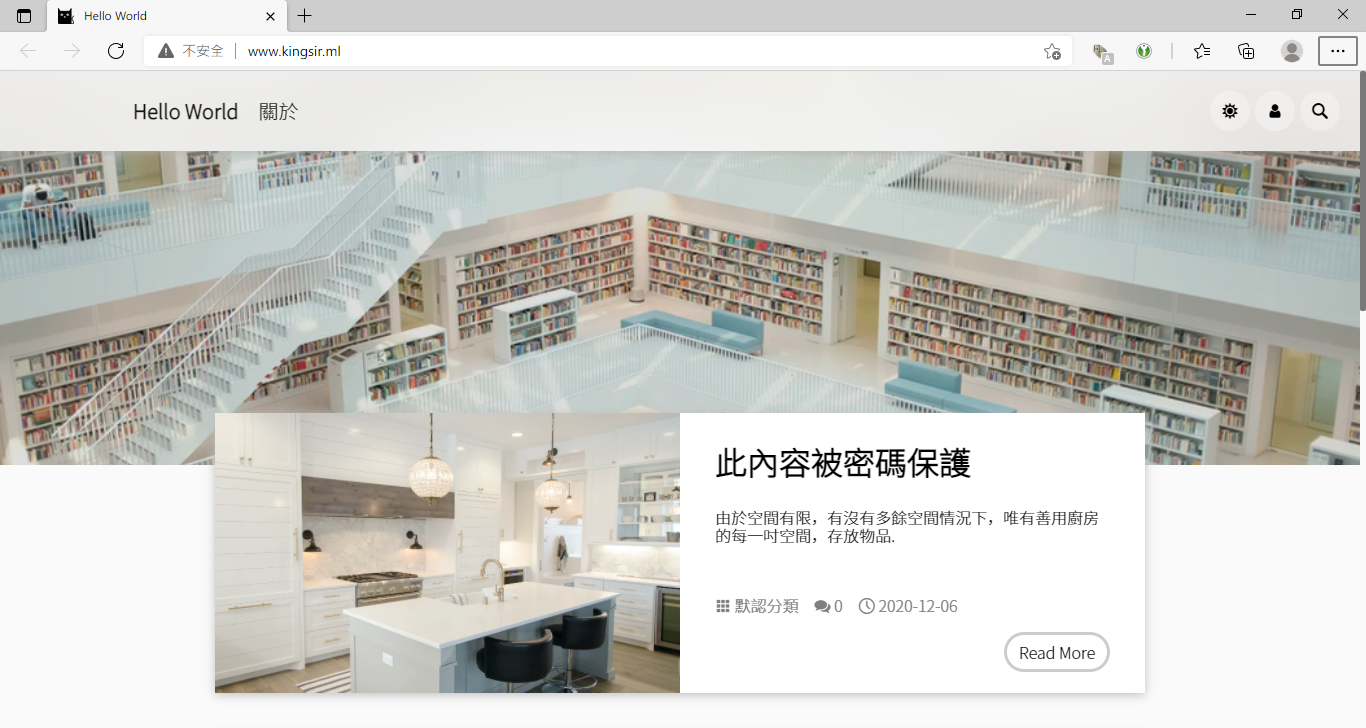
實例中的域名是:kingsir.ml新增一個別名
CNAME名稱為www.kingsir.ml對應的目標為frp3.freefrp.net
下載及安裝frpc客戶端(以最新的0.37.0版)
FRP_VERSION="0.37.0" && wget https://github.com/fatedier/frp/releases/download/v${FRP_VERSION}/frp_${FRP_VERSION}_linux_arm.tar.gz && tar -zxvf frp_${FRP_VERSION}_linux_arm.tar.gz && mv frp_${FRP_VERSION}_linux_arm/frpc /usr/bin && mv frp_${FRP_VERSION}_linux_arm/systemd/frpc.service /etc/systemd/system && rm -rf frp_${FRP_VERSION}_linux_arm.tar.gz frp_${FRP_VERSION}_linux_arm建立frpc配置目錄和文件
mkdir -p /etc/frpcat >> /etc/frp/frpc.ini << EOF
[common]
server_addr = frp3.freefrp.net
server_port = 7000
token = freefrp.net
admin_addr = 20.13.2.50
admin_port = 7400
admin_user = admin
admin_pwd = admin
pool_count = 5
tcp_mux = true
user = OneCloud2
login_fail_exit = true
protocol = tcp
tls_enable = true
# 反向OneCloud的8082端口
[typecho]
type = http
local_ip = 127.0.0.1
local_port = 8082
#use_encryption = false
use_compression = true
custom_domains = www.kingsir.ml
EOF| 服務名稱 | 類別 | 本機地址 | 端口 | 遠端網址(剛新增的CNAME) |
|---|---|---|---|---|
| typecho | http | 127.0.0.1 | 8082 | www.kingsir.ml |
啟動及查看服務
systemctl start frpc
systemctl enable frpc
systemctl status frpcstart#表示啟動服務
enabled#表示開機自啟動
active (running)#表示執行中

在瀏覽器中打開http://www.kingsir.ml
[[返回目錄內容]]
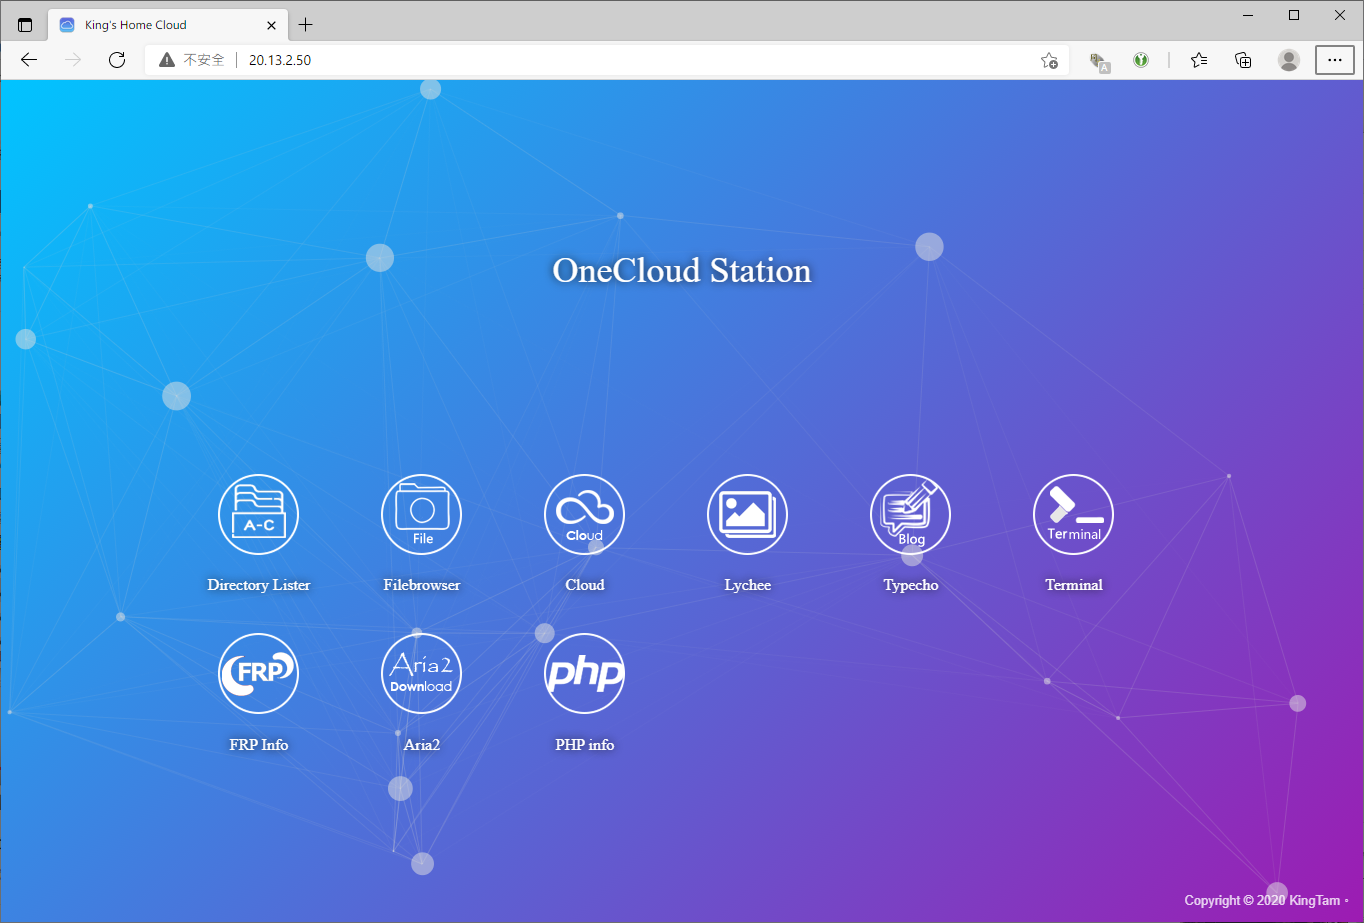
| 導航頁 |
導航頁面收錄每個應用相關連結,可以方便的找到想要的頁面和內容。
| Name | IP address |
|---|---|
| Directory Lister | http://IP:8084 |
| Filebrowser | http://IP:8080 |
| Filerun | http://IP:8086 |
| Lychee | http://IP:8081 |
| Typecho | http://IP:8082 |
| Terminal | http://IP:7681 |
| Frp Info | http://IP:7400 |
| Aria2 | http://IP/ariang/ |
| Php Info | http://IP/info.php |
下載及安裝導航頁面
wget http://down.kingsir.ml/OneCloud/AppData/dash.tgz && tar xzv -f dash.tgz && rm -rf /var/www/html/* && cp -r dash/* /var/www/html/ && rm -rf dash.tgz dash/在瀏覽器中打開http://IP
[[返回目錄內容]]
| RCLONE - 網盤掛載器 |
Rclone 是一個命令行程式,用於管理雲存儲中的檔案。支持在不同雲存儲間同步、上傳、下載數據。
Rclone安裝:
使用官方的軟件倉安裝後不能掛載,需要手動下載指定版本才成功。
wget https://downloads.rclone.org/v1.55.1/rclone-v1.55.1-linux-arm-v7.zip && sudo apt install unzip && unzip rclone-v1.55.1-linux-arm-v7.zip && cp rclone-v1.55.1-linux-arm-v7/rclone /usr/local/bin/ && rm -rf rclone-v1.55.1-linux-arm-v7/ rclone-v1.55.1-linux-arm-v7.zip配置:
配置過程可參考: 在Debian/Ubuntu上使用rclone掛載OneDrive網盤](https://www.moerats.com/archives/491/))
rclone config2021/07/16 10:33:38 NOTICE: Config file "/home/user/.config/rclone/rclone.conf" not found - using defaults
No remotes found - make a new one
n) New remote
s) Set configuration password
q) Quit config
n/s/q>
建立掛載目錄
mkdir -p /mnt/cloud/GDRIVE掛載網盤到本地
rclone mount GDRIVE:/ /mnt/cloud/GDRIVE/ --copy-links --allow-other --allow-non-empty --umask 000 --daemon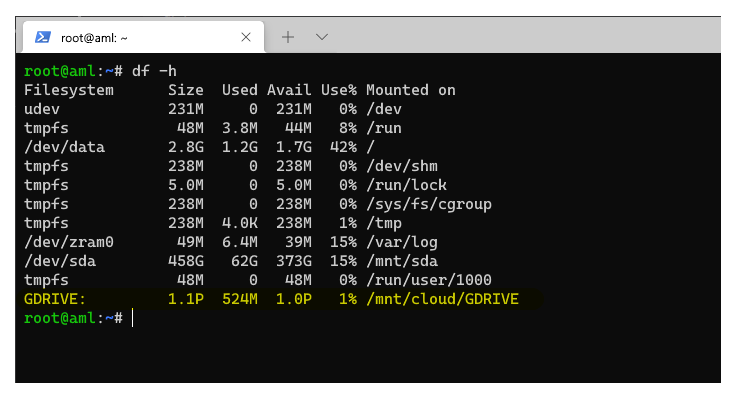
開機自動掛載
cat >> /etc/init.d/cloud.sh <<EOF
#!/bin/bash

## Mount the Cloud Drive

rclone mount  GDRIVE: /mnt/cloud/GDRIVE --copy-links --allow-other --allow-non-empty --umask 000 --daemon
EOF
chmod +x /etc/init.d/cloud.shsed -i -e '/# By default this script does nothing./a\sh /etc/init.d/cloud.sh' /etc/rc.local將指命sh /etc/init.d/cloud.sh添加到尾二行段,即exit 0上一行。
配合crontab排程可以很方便地定時自動備分資料到網盤
指命:
rclone sync SOURCE remote:DESTINATION
rclone sync --progress /mnt/sda/ GDRIVE:/Backup--progress#查看實時傳輸備份本地的
/mnt/sda/內容到網盤的Backup目錄
[[返回目錄內容]]
| Rsync - 定時備份資料到NAS上 |
rsync是開源程式,提供快速的增量或同步備份,大部份的 Linux 發行版已經內建。
OneCloud的Armbian系統已經內置這程式。可以配合RCLONE - 網盤掛載器,排程自動備份資料到網盤。
實現條件:
- 在
DSM建立Rsync伺服器 (如果備份到rclone掛載的目錄,可以忽略建立Rsync伺服器) OneCloud建立備份腳本- 透過
Crontab建立排程
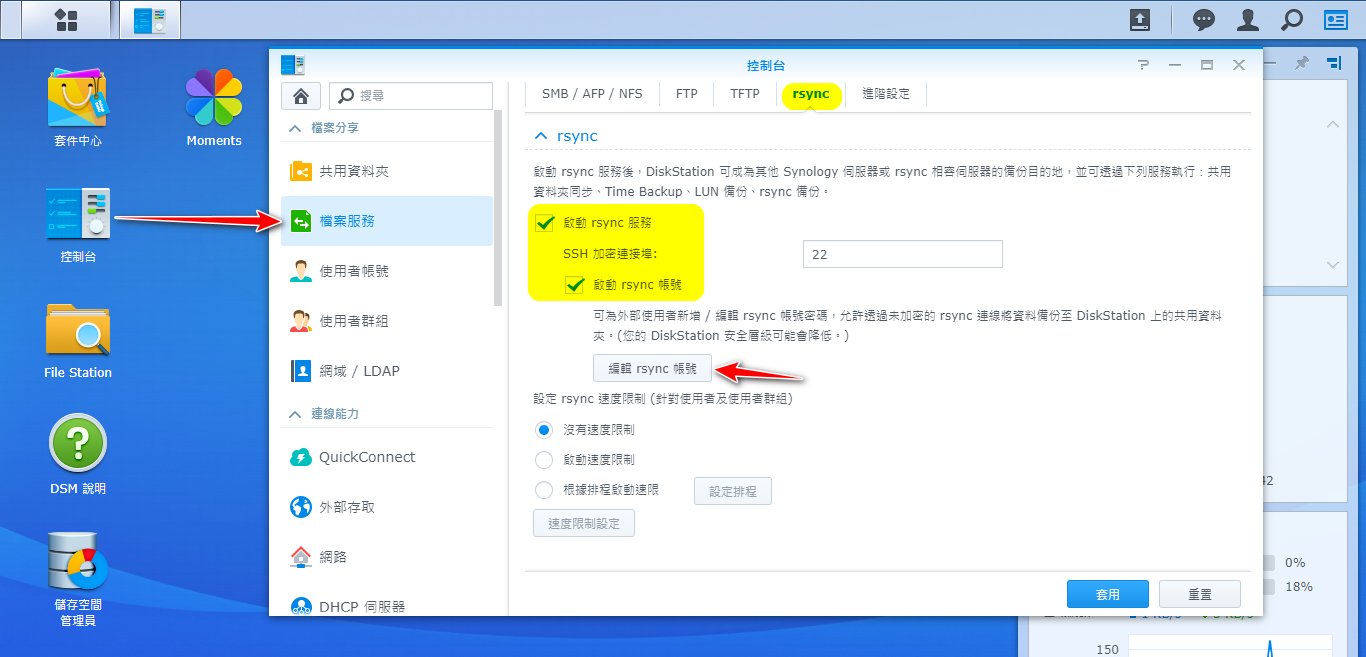
開啟 Rsync 服務
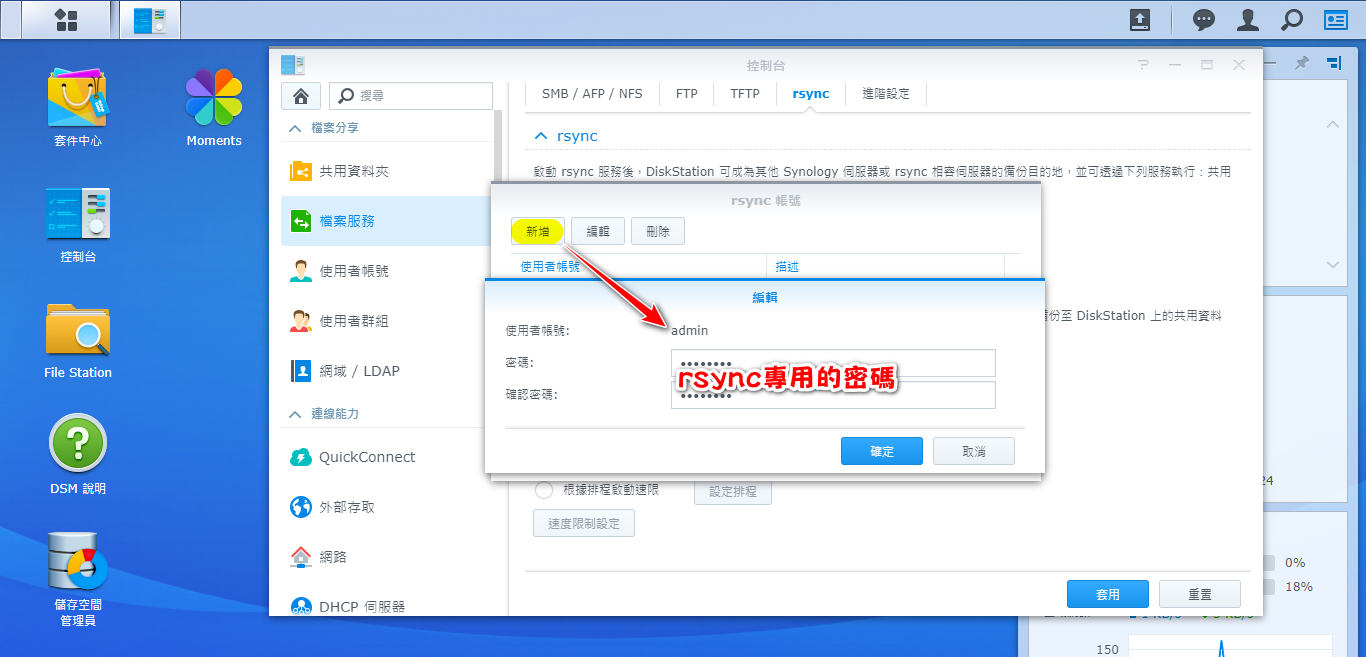
設定 Rsync 帳號
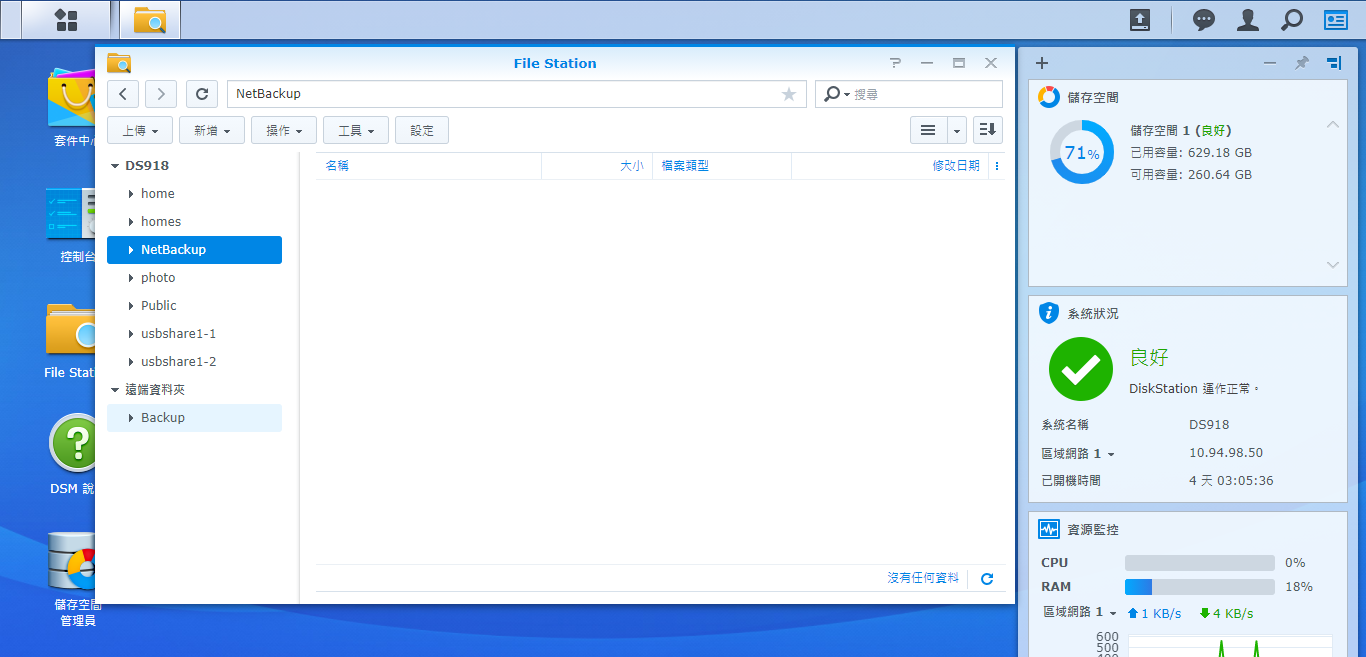
查看 Rsync 的分享目錄
建立備份腳本:
cat >> /root/rsync_bak.sh << EOF
#!/bin/bash

## Rsync Rsync_Server's local to folder
export RSYNC_PASSWORD="P@ssw0rd01"
rsync -avzuh --delete --progress /mnt/sda/ admin@Rsync_Server::NetBackup/ --log-file=/mnt/sda/log/rsync_$(date -I).txt

EOF以root身份登入
export RSYNC_PASSWORD=P@ssw0rd01# Rsync專用的密碼,添加到環境變量(用於免手動輸入密碼)
/mnt/sda/#是本地需要備份目錄
Rsync_Server#是遠端Rsync伺服器的IP (即DSM NAS的IP地址)::
NetBackup#是遠端伺服的分享目錄
--log-file=#日誌存放
可執行權限:
chmod +x /root/rsync_bak.sh加入到crontab排程
crontab -e新增指命到最底行
0 1 * * * sh /root/rsync_bak.sh 2>&1每天1時執行腳本
[[返回目錄內容]]
結語:
這次的折騰是基於迅雷賺錢寶PRO(二代)刷入Armbian系統,所以很多軟件或者安裝方法都可以應用於其他裝置 如: N1、粒子雲、或者是OneCloud3等等的Armbian系統。在軟件安裝的分享中,有多款軟件功能是重復,需要按需選擇。如:
qBittorrent和aria2都是下載器,Directory Lister和h5ai都是目錄分享,FileBrowser和FileRun類似個人網盤,另外因為typecho是我喜歡的個人博客程序之一,所以你也可以用同樣安裝方法設置WordPress。
| 相關連結: |
博主太猛了,装完这么多之后还有多少内存RAM剩余。。。