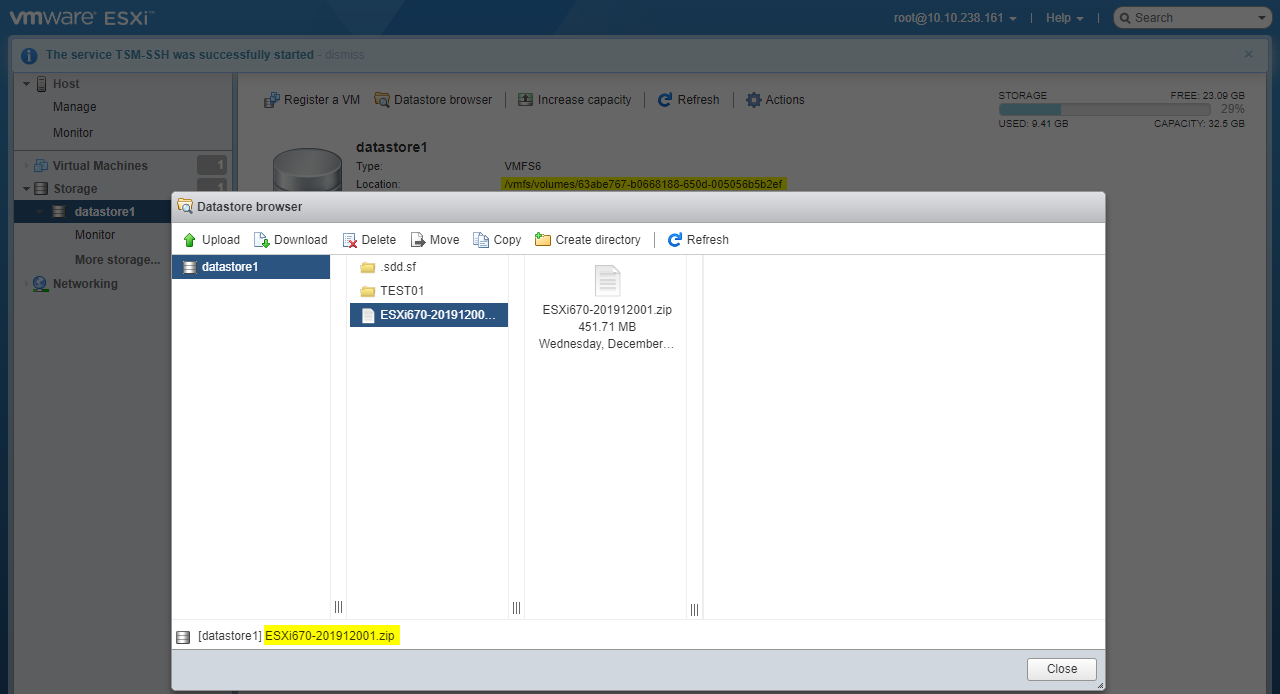
Upload the upgrade file(ESXi670-201912001.zip) to a datastore
The file location: /vmfs/volumes/63abe767-b0668188-650d-005056b5b2ef/ESXi670-201912001.zip
2022-12-28_151805.png
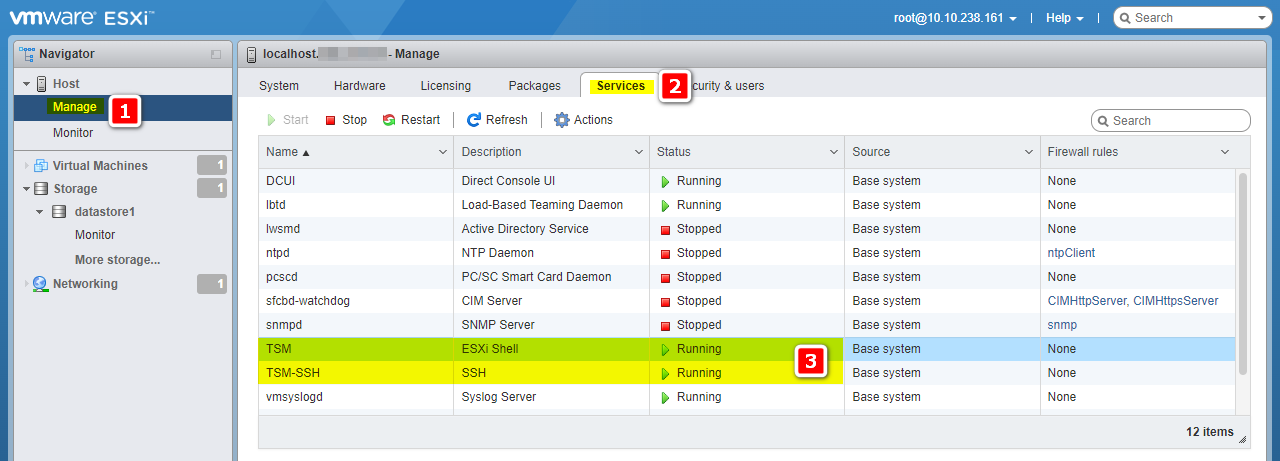
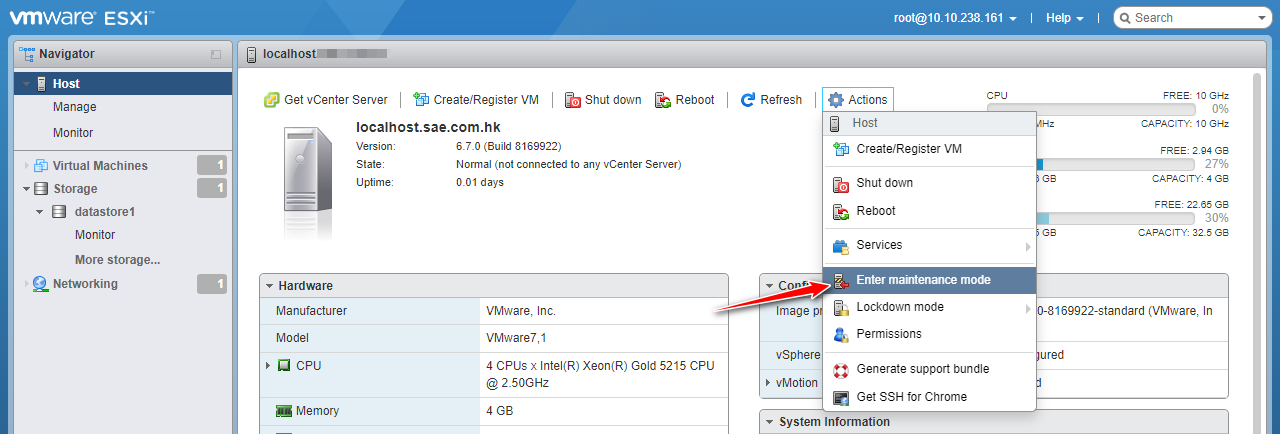
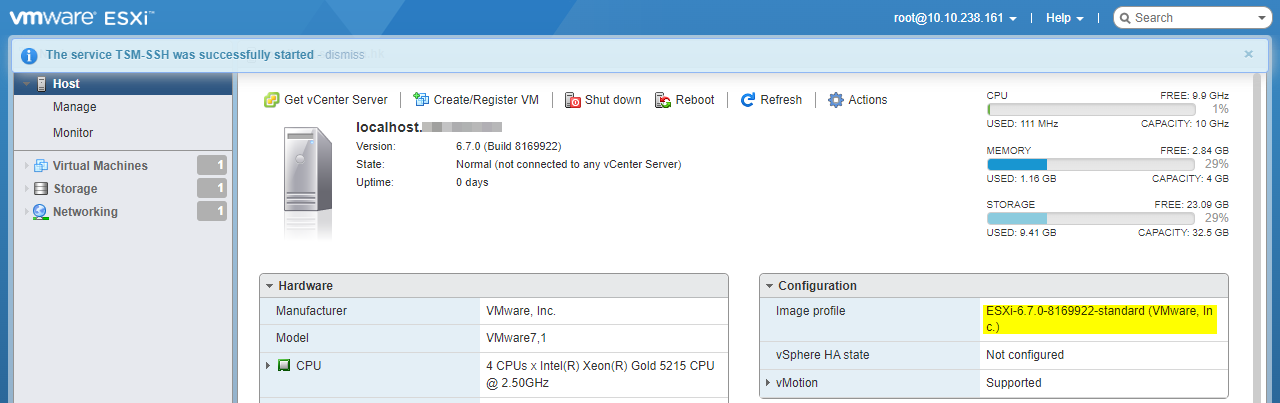
Enable SSH Service
Put the node into maintenance mode
connect to the console via SSH.
vim-cmd hostsvc/maintenance_mode_enter
2022-12-28_150716.png
View the image profiles
Connect to the console via SSH and run the following command to check the image profile.
esxcli software sources profile list -d /vmfs/volumes/63abe767-b0668188-650d-005056b5b2ef/ESXi670-201912001.zip
2022-12-28_150608.png
2022-12-28_150100.png
Compared to the existing image profile ESXi-6.7.0-8169922-standard (VMware, Inc.), the upgrade profile name ESXi-6.7.0-20191204001-standard should be selected.
Run the upgrade and append the profile name (ESXi-6.7.0-20191204001-standard) at the end of the command.
When seeing the message: The Update completed successfully
The upgrade is completed and a reboot is required for the changes to take effect.
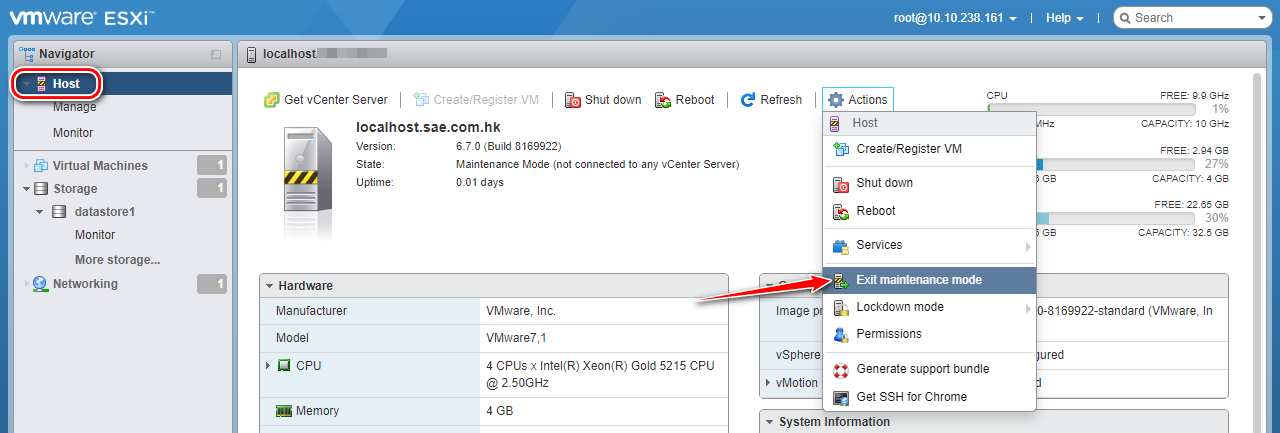
Finally, exit maintenance mode in the node after reboot.
vim-cmd hostsvc/maintenance_mode_exit
2022-12-28_150748.png
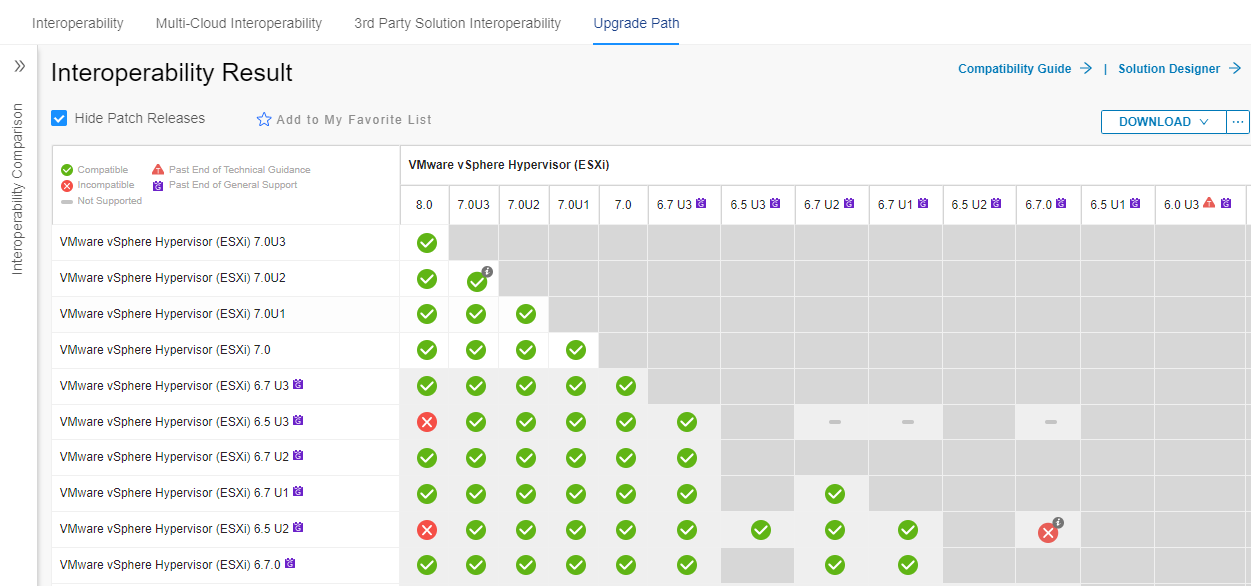
From ESXi 6.7U3 to ESXi 7.0 U3
Hypervisor
Before
After
ESXi
6.7.0 Update 3
7.0 Update 3
2022-12-28_151817.png
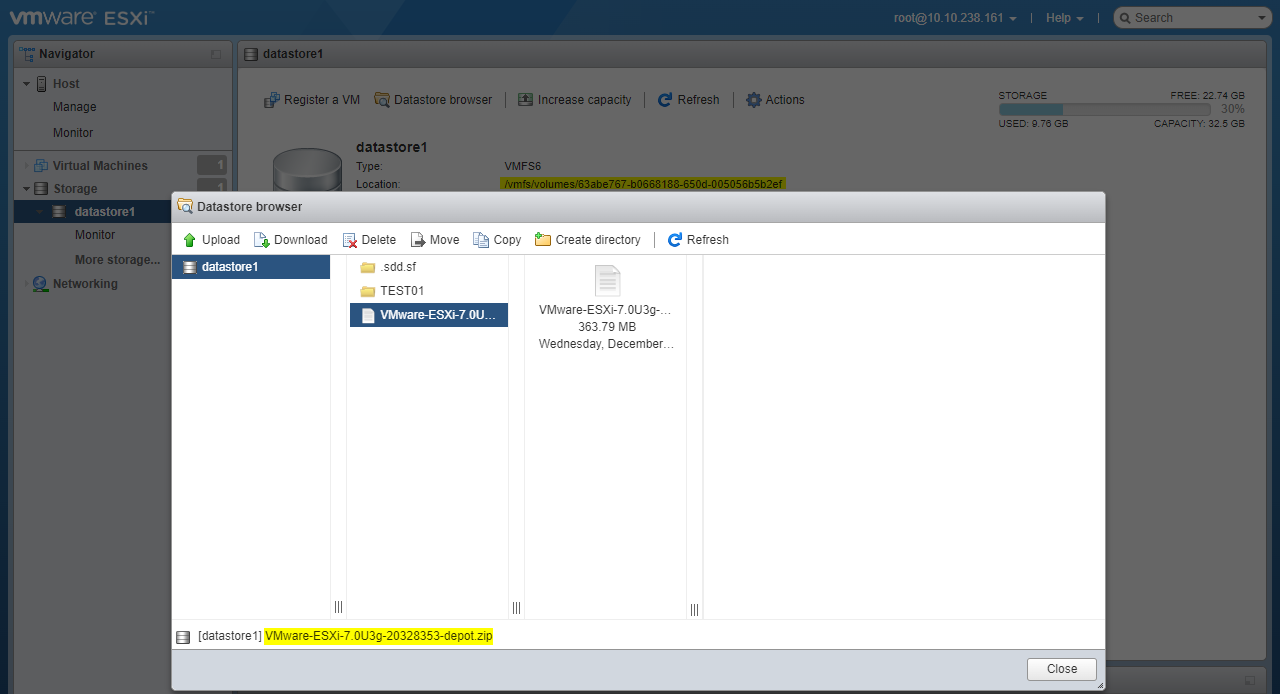
Upload the upgrade file(VMware-ESXi-7.0U3g-20328353-depot.zip) to a datastore
The file location: /vmfs/volumes/63abe767-b0668188-650d-005056b5b2ef/VMware-ESXi-7.0U3g-20328353-depot.zip
2022-12-28_151805.png
Enable SSH Service
Put the node into maintenance mode
connect to the console via SSH.
vim-cmd hostsvc/maintenance_mode_enter
View the image profiles
Connect to the console via SSH and run the following command to check the image profile.
esxcli software sources profile list -d /vmfs/volumes/63abe767-b0668188-650d-005056b5b2ef/VMware-ESXi-7.0U3g-20328353-depot.zip
2022-12-28_152115.png
2022-12-28_151948.png
Compared to the existing image profile (Updated) ESXi-6.7.0-20191204001-standard (VMware, Inc.), the upgrade profile name ESXi-7.0U3g-20328353-standard should be selected.
Run the upgrade and append the profile name (ESXi-7.0U3g-20328353-standard) at the end of the command.
When seeing the message: The Update completed successfully
The upgrade is completed and a reboot is required for the changes to take effect.
Finally, exit maintenance mode in the node after reboot.
vim-cmd hostsvc/maintenance_mode_exit
From ESXi 7.0 U3 to ESXi 8.0
Hypervisor
Before
After
ESXi
7.0 Update 3
8.0
2022-12-28_154037.png
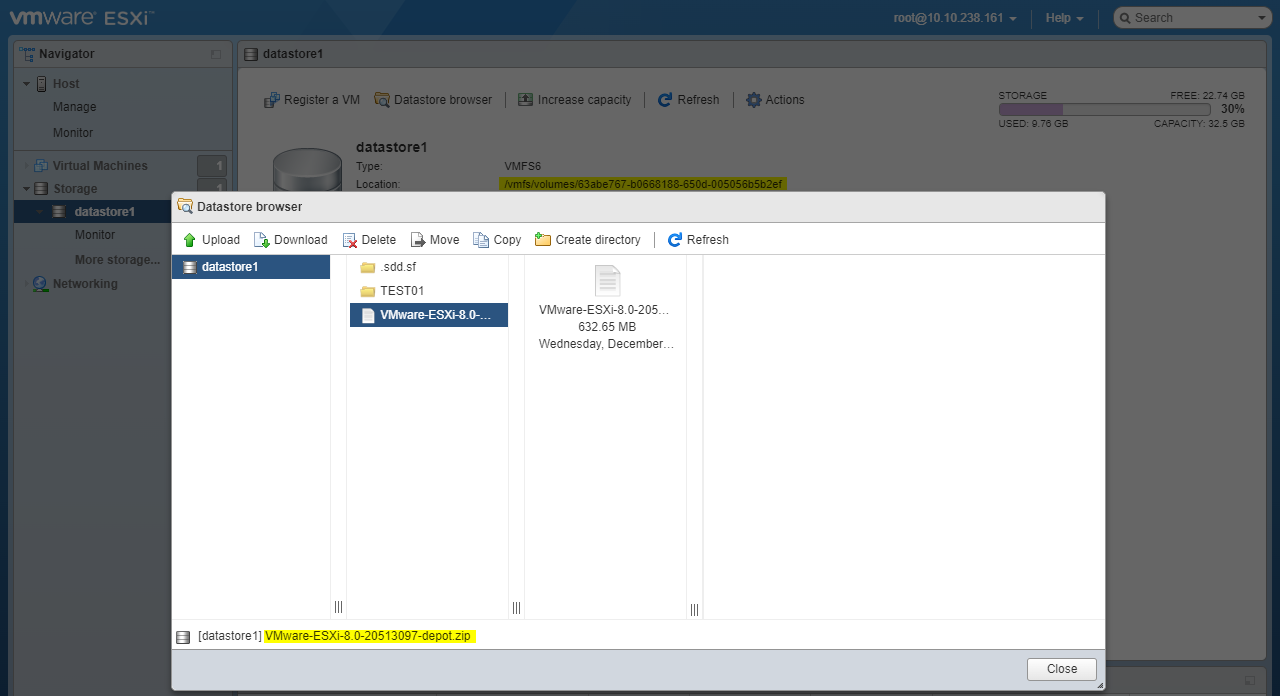
Upload the upgrade file(VMware-ESXi-8.0-20513097-depot.zip) to a datastore
The file location: /vmfs/volumes/63abe767-b0668188-650d-005056b5b2ef/VMware-ESXi-8.0-20513097-depot.zip
2022-12-28_151805.png
Enable SSH Service
Put the node into maintenance mode
connect to the console via SSH.
vim-cmd hostsvc/maintenance_mode_enter
View the image profiles
Connect to the console via SSH and run the following command to check the image profile.
esxcli software sources profile list -d /vmfs/volumes/63abe767-b0668188-650d-005056b5b2ef/VMware-ESXi-8.0-20513097-depot.zip
2022-12-28_155042.png
2022-12-28_154958.png
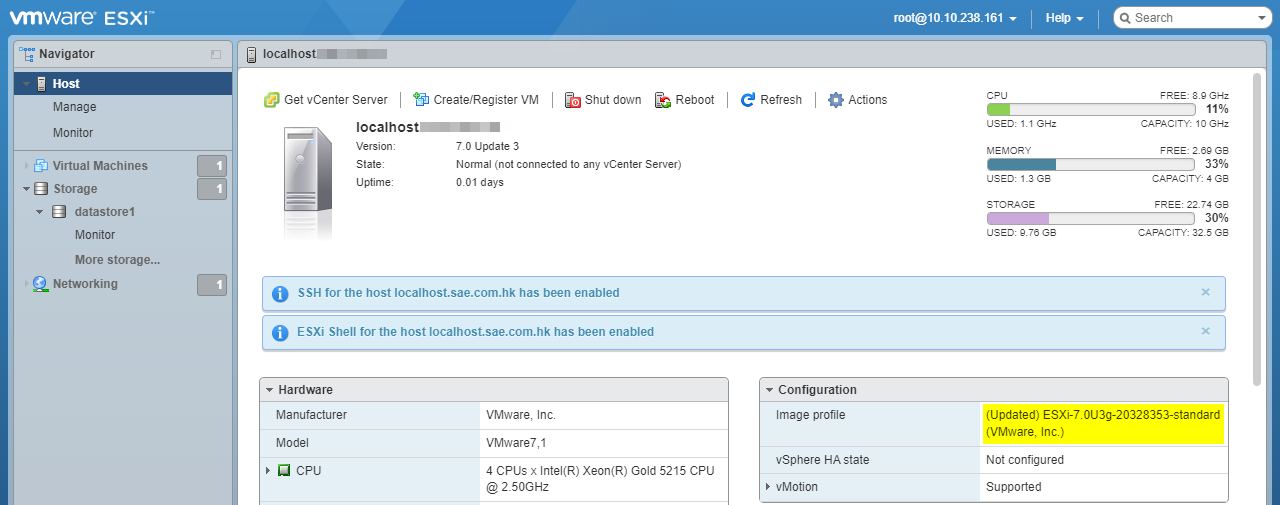
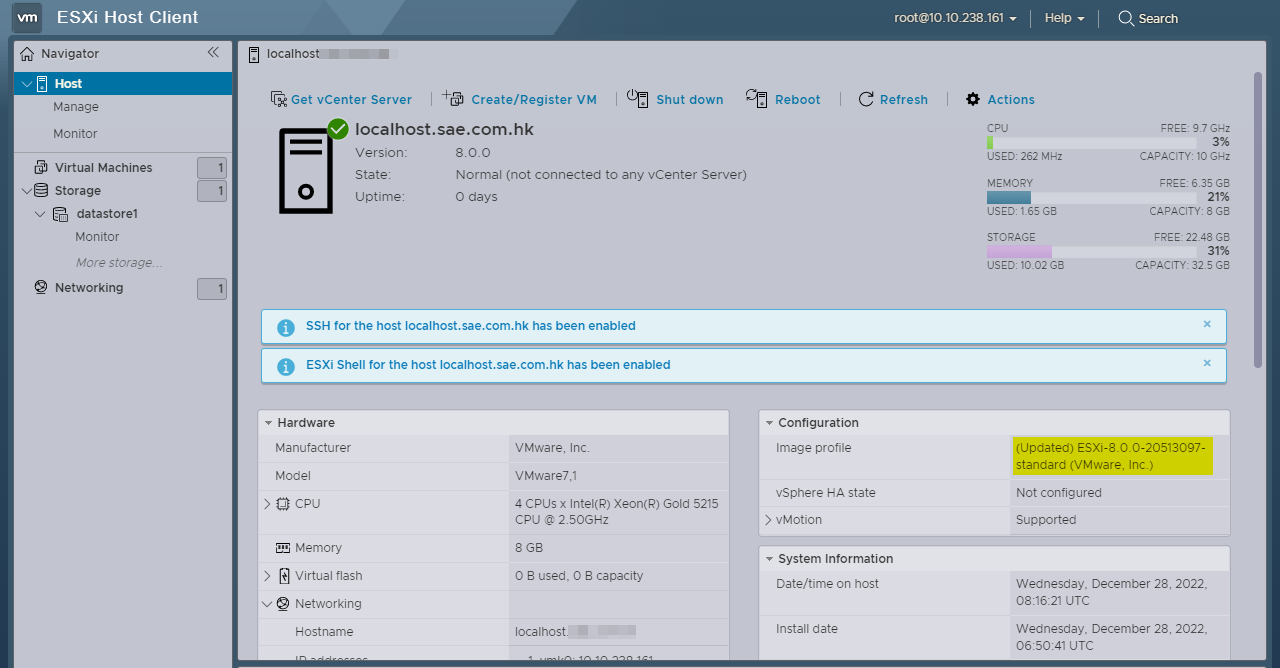
Compared to the existing image profile (Updated) ESXi-7.0U3g-20328353-standard (VMware, Inc.), the upgrade profile name ESXi-8.0.0-20513097-standard should be selected.
2022-12-30_152853.png
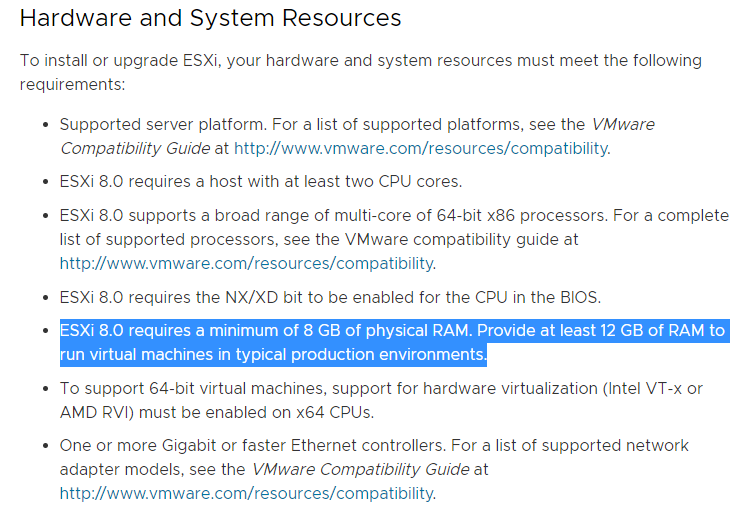
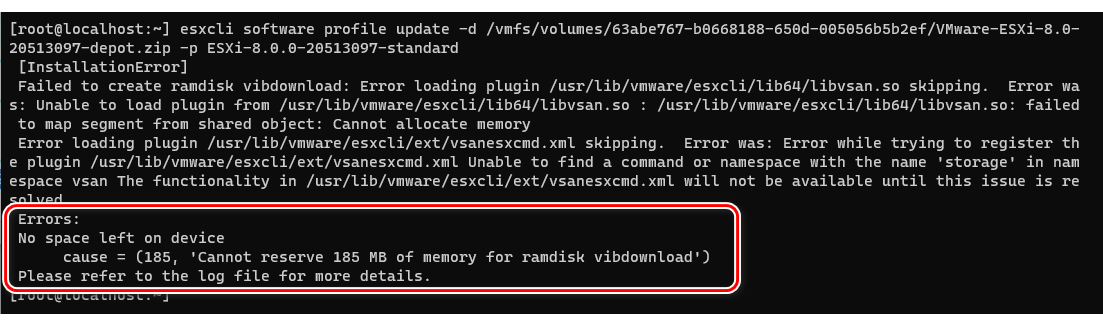
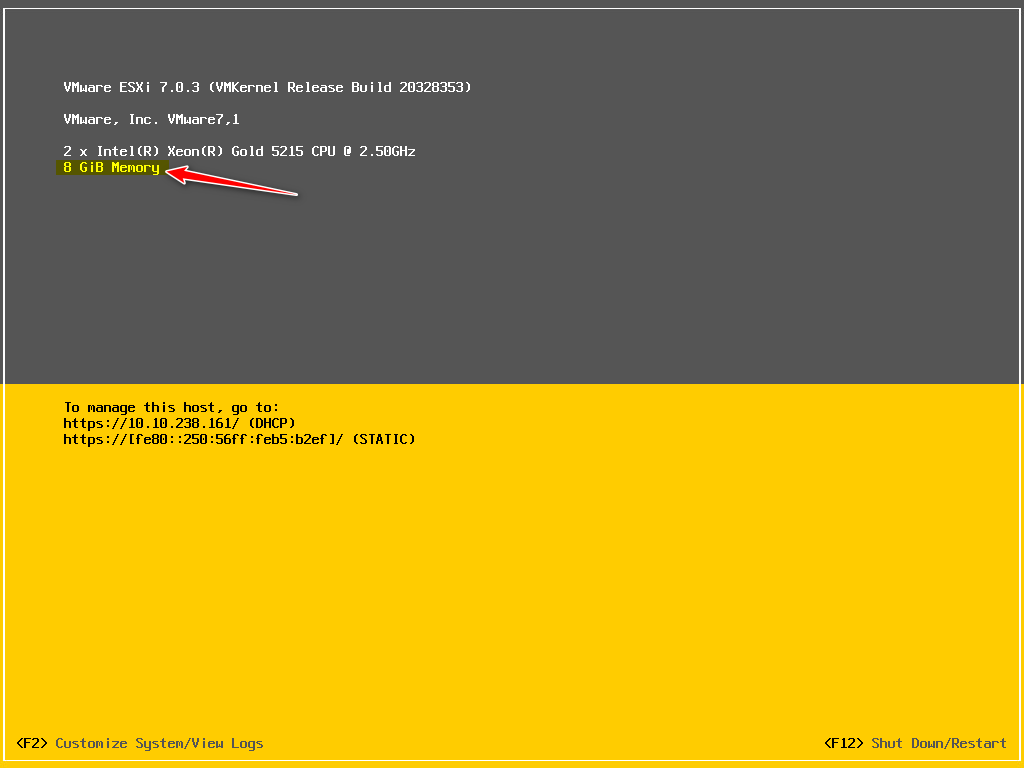
If the RAM capacity not match the minimum requires, the upgrade will be failed.
2022-12-28_155236.png
So, I Upgrade the RAM from 4 GB to 8 GB
2022-12-28_160738.png
Run the upgrade and append the profile name (ESXi-8.0.0-20513097-standard) at the end of the command.